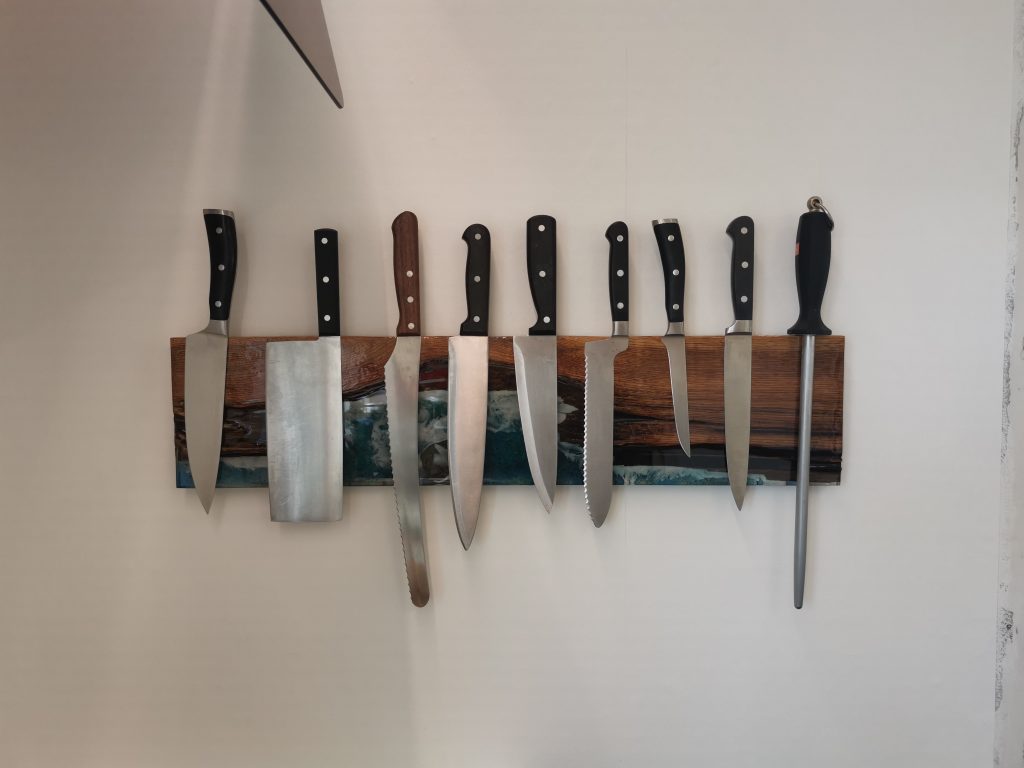
In this project, I show step by step how I made an epoxy knife block. I started with a rough piece of firewood and turned it into a finished epoxy knife block in our kitchen. You can follow the full process: preparation, pouring, sanding, coating, and the final result.
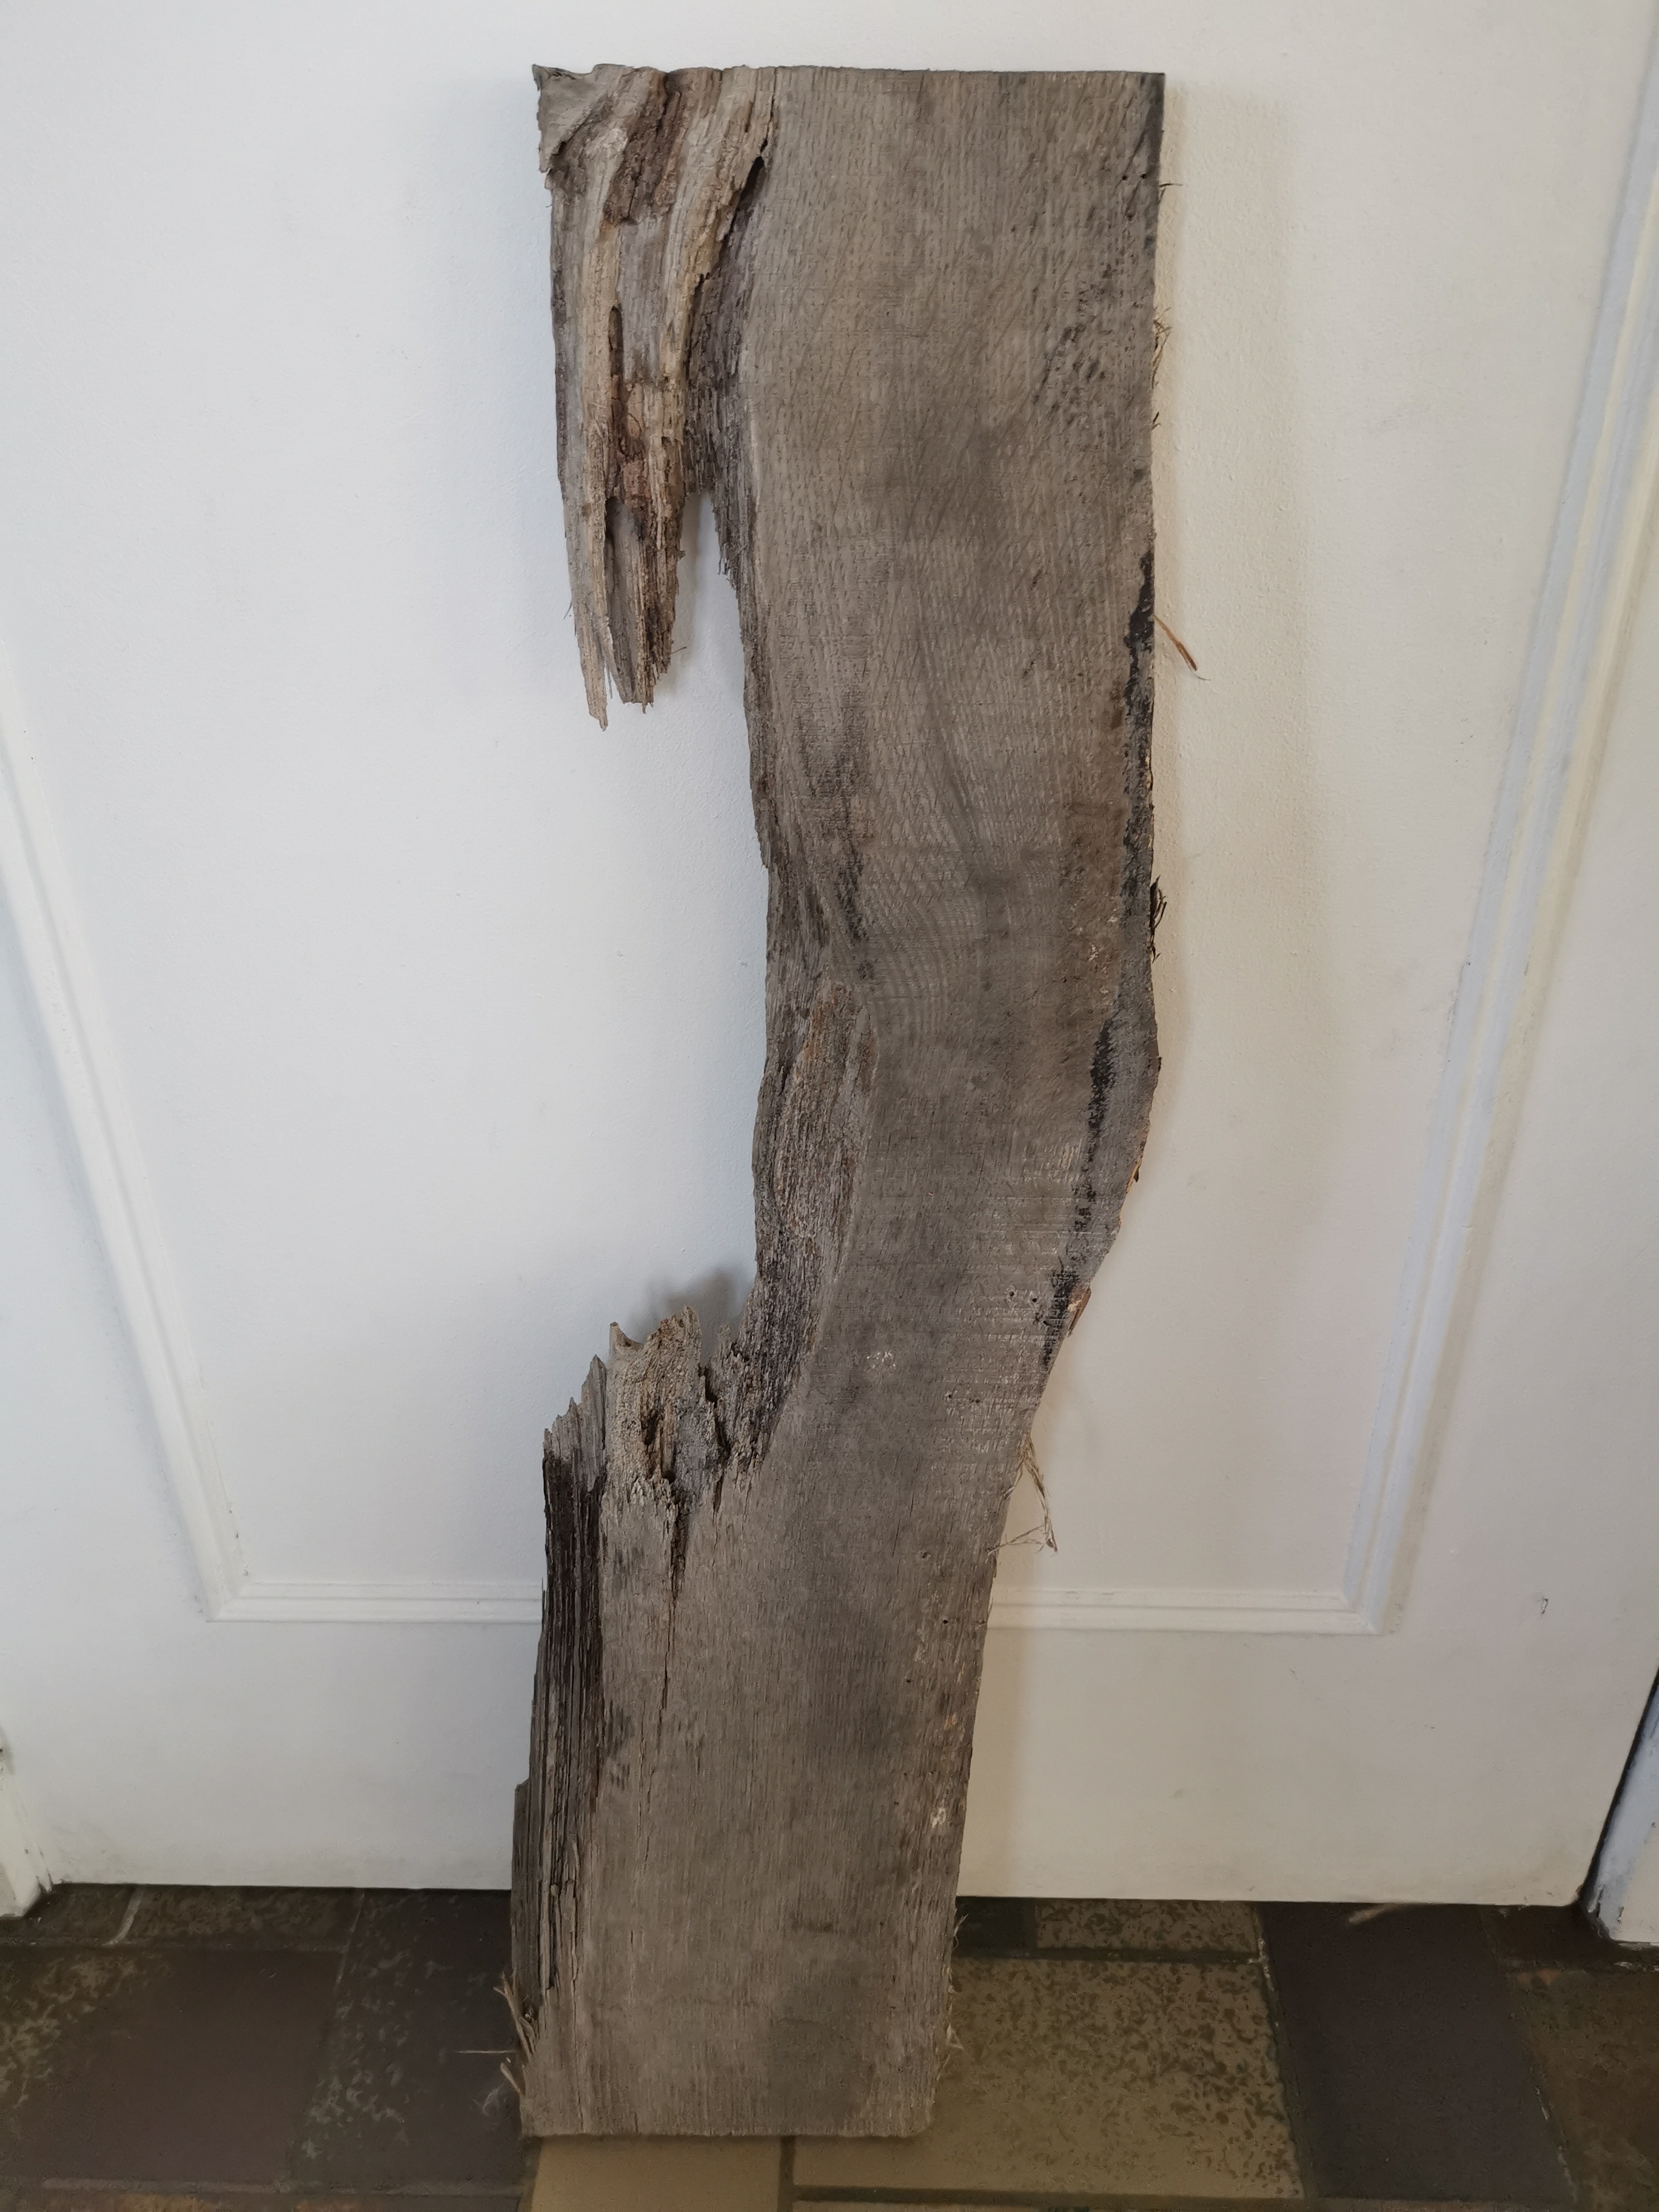
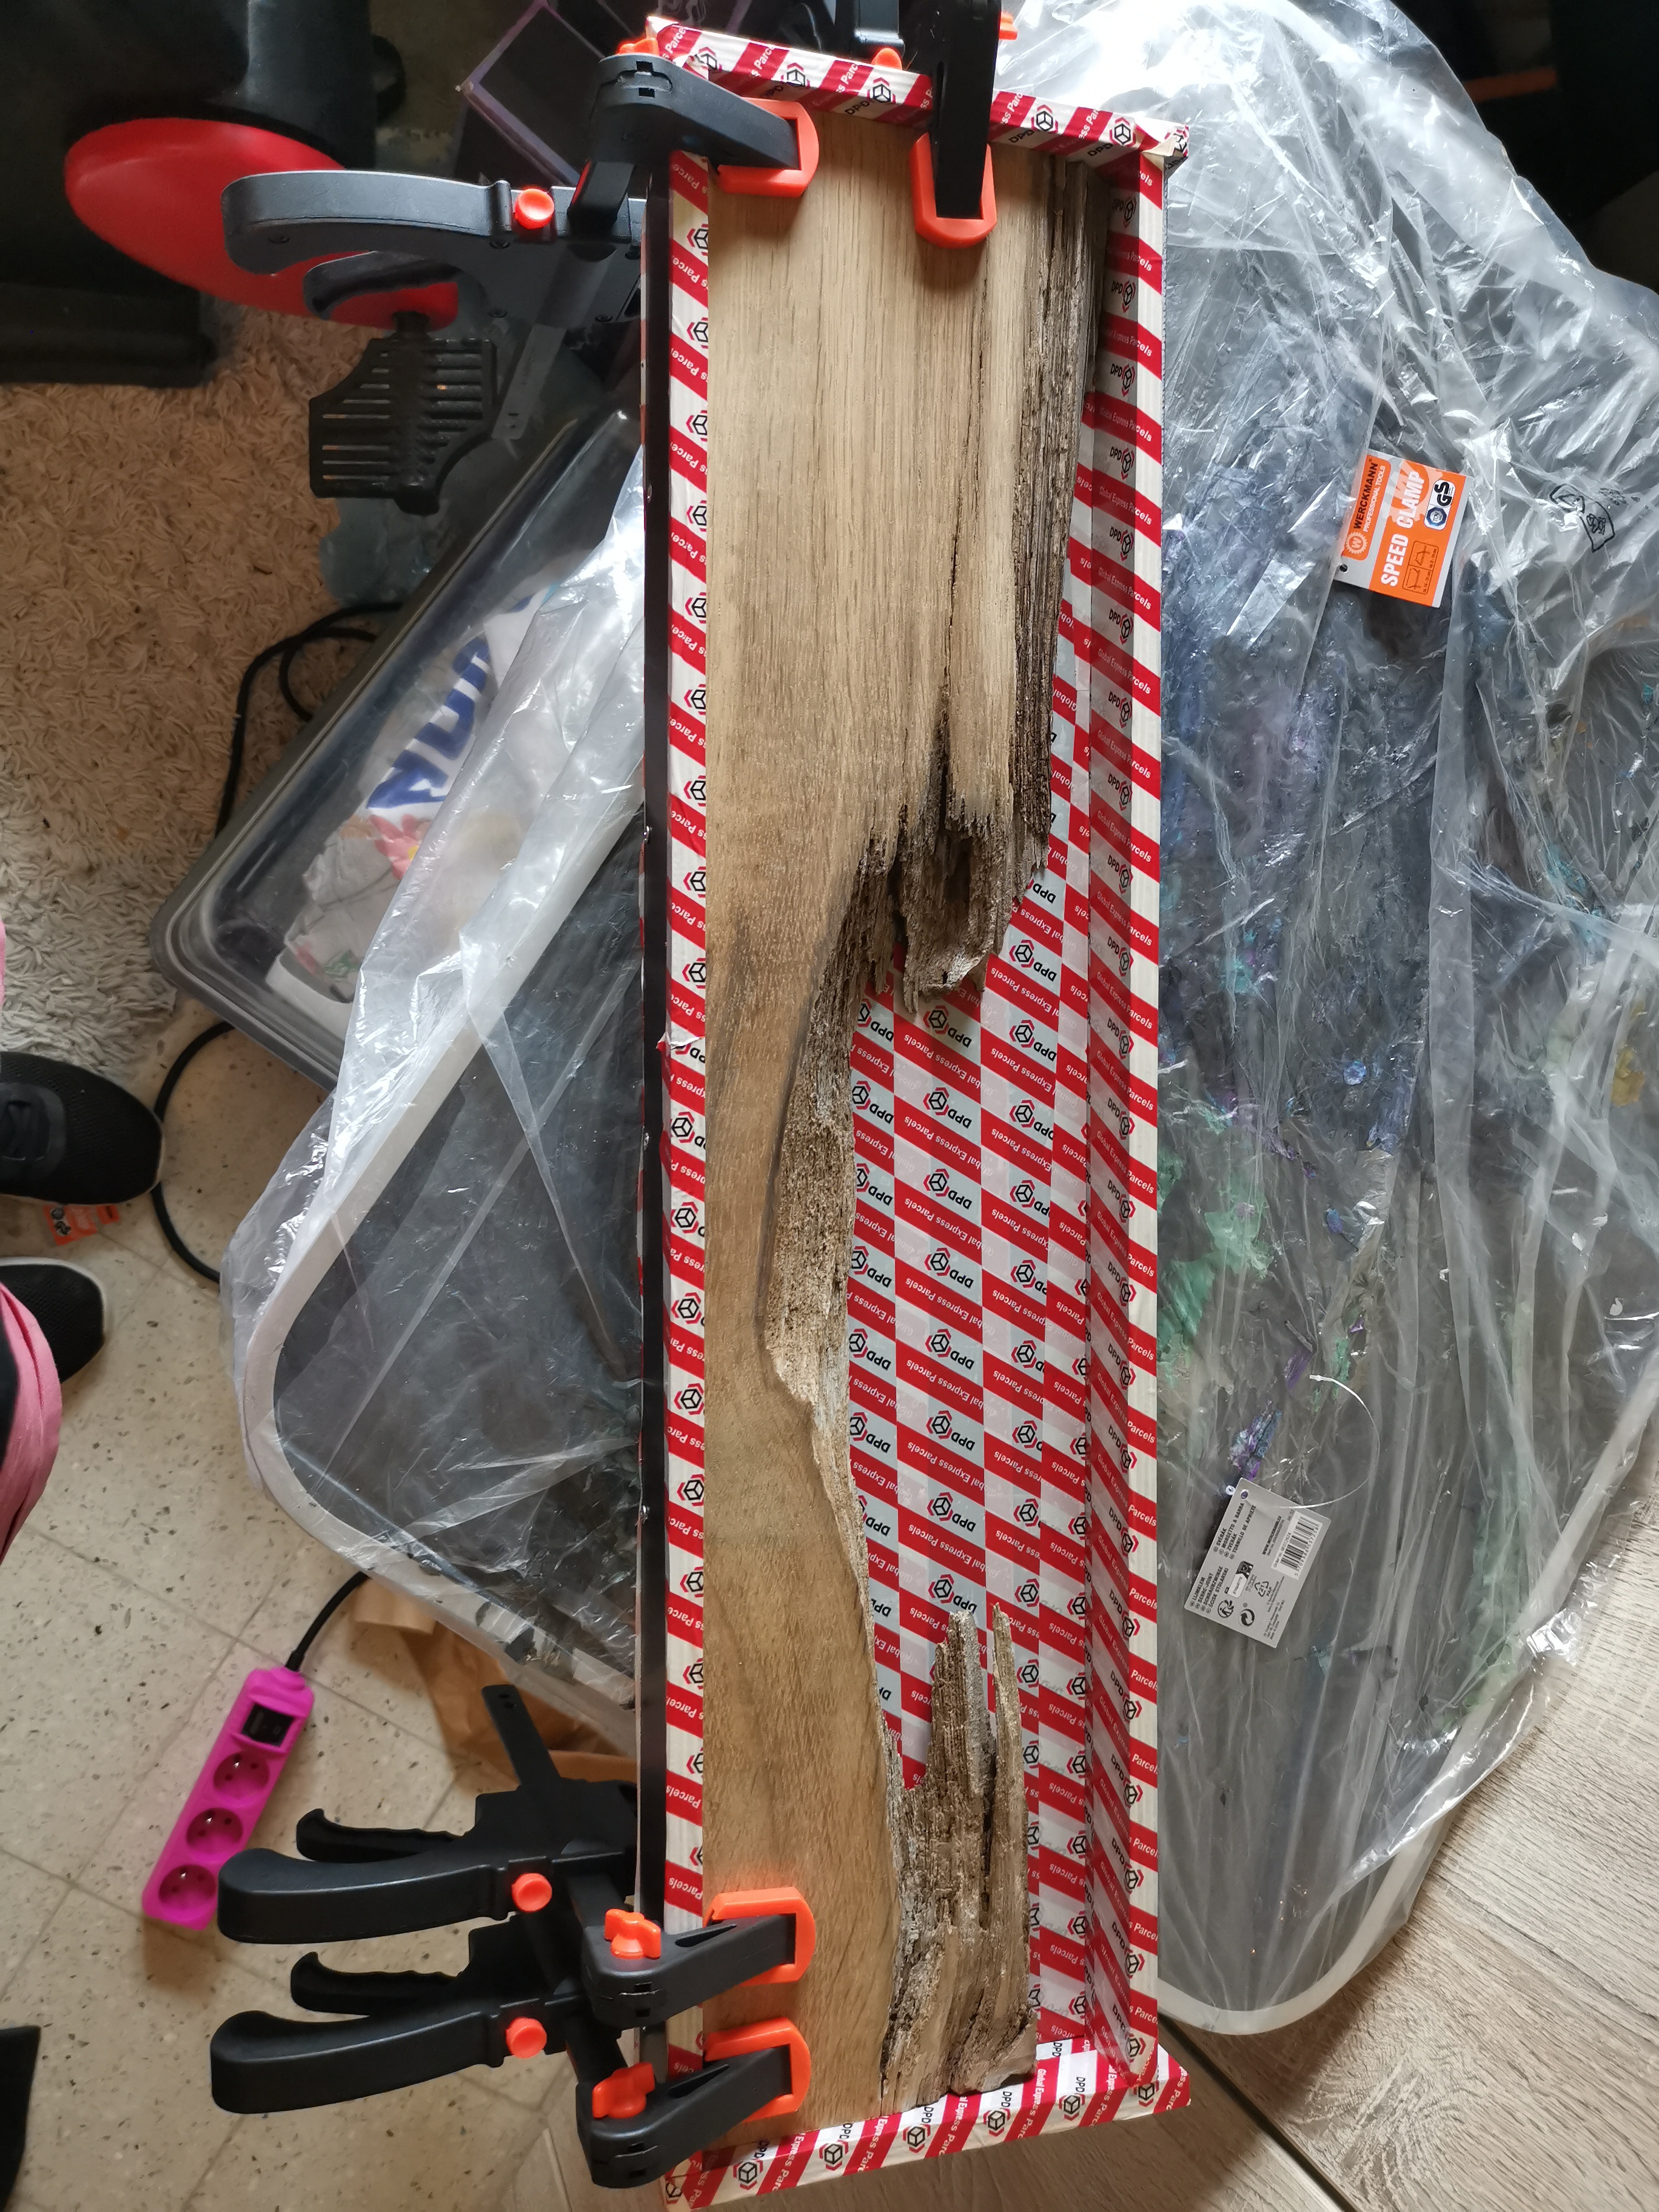
Making an epoxy knife block from reclaimed wood had been on my ideas list for a long time. I enjoy giving materials that look ready for the fireplace a second life. So this piece of wood did not become firewood. Instead, with epoxy, it became a unique knife block mounted on our kitchen wall.
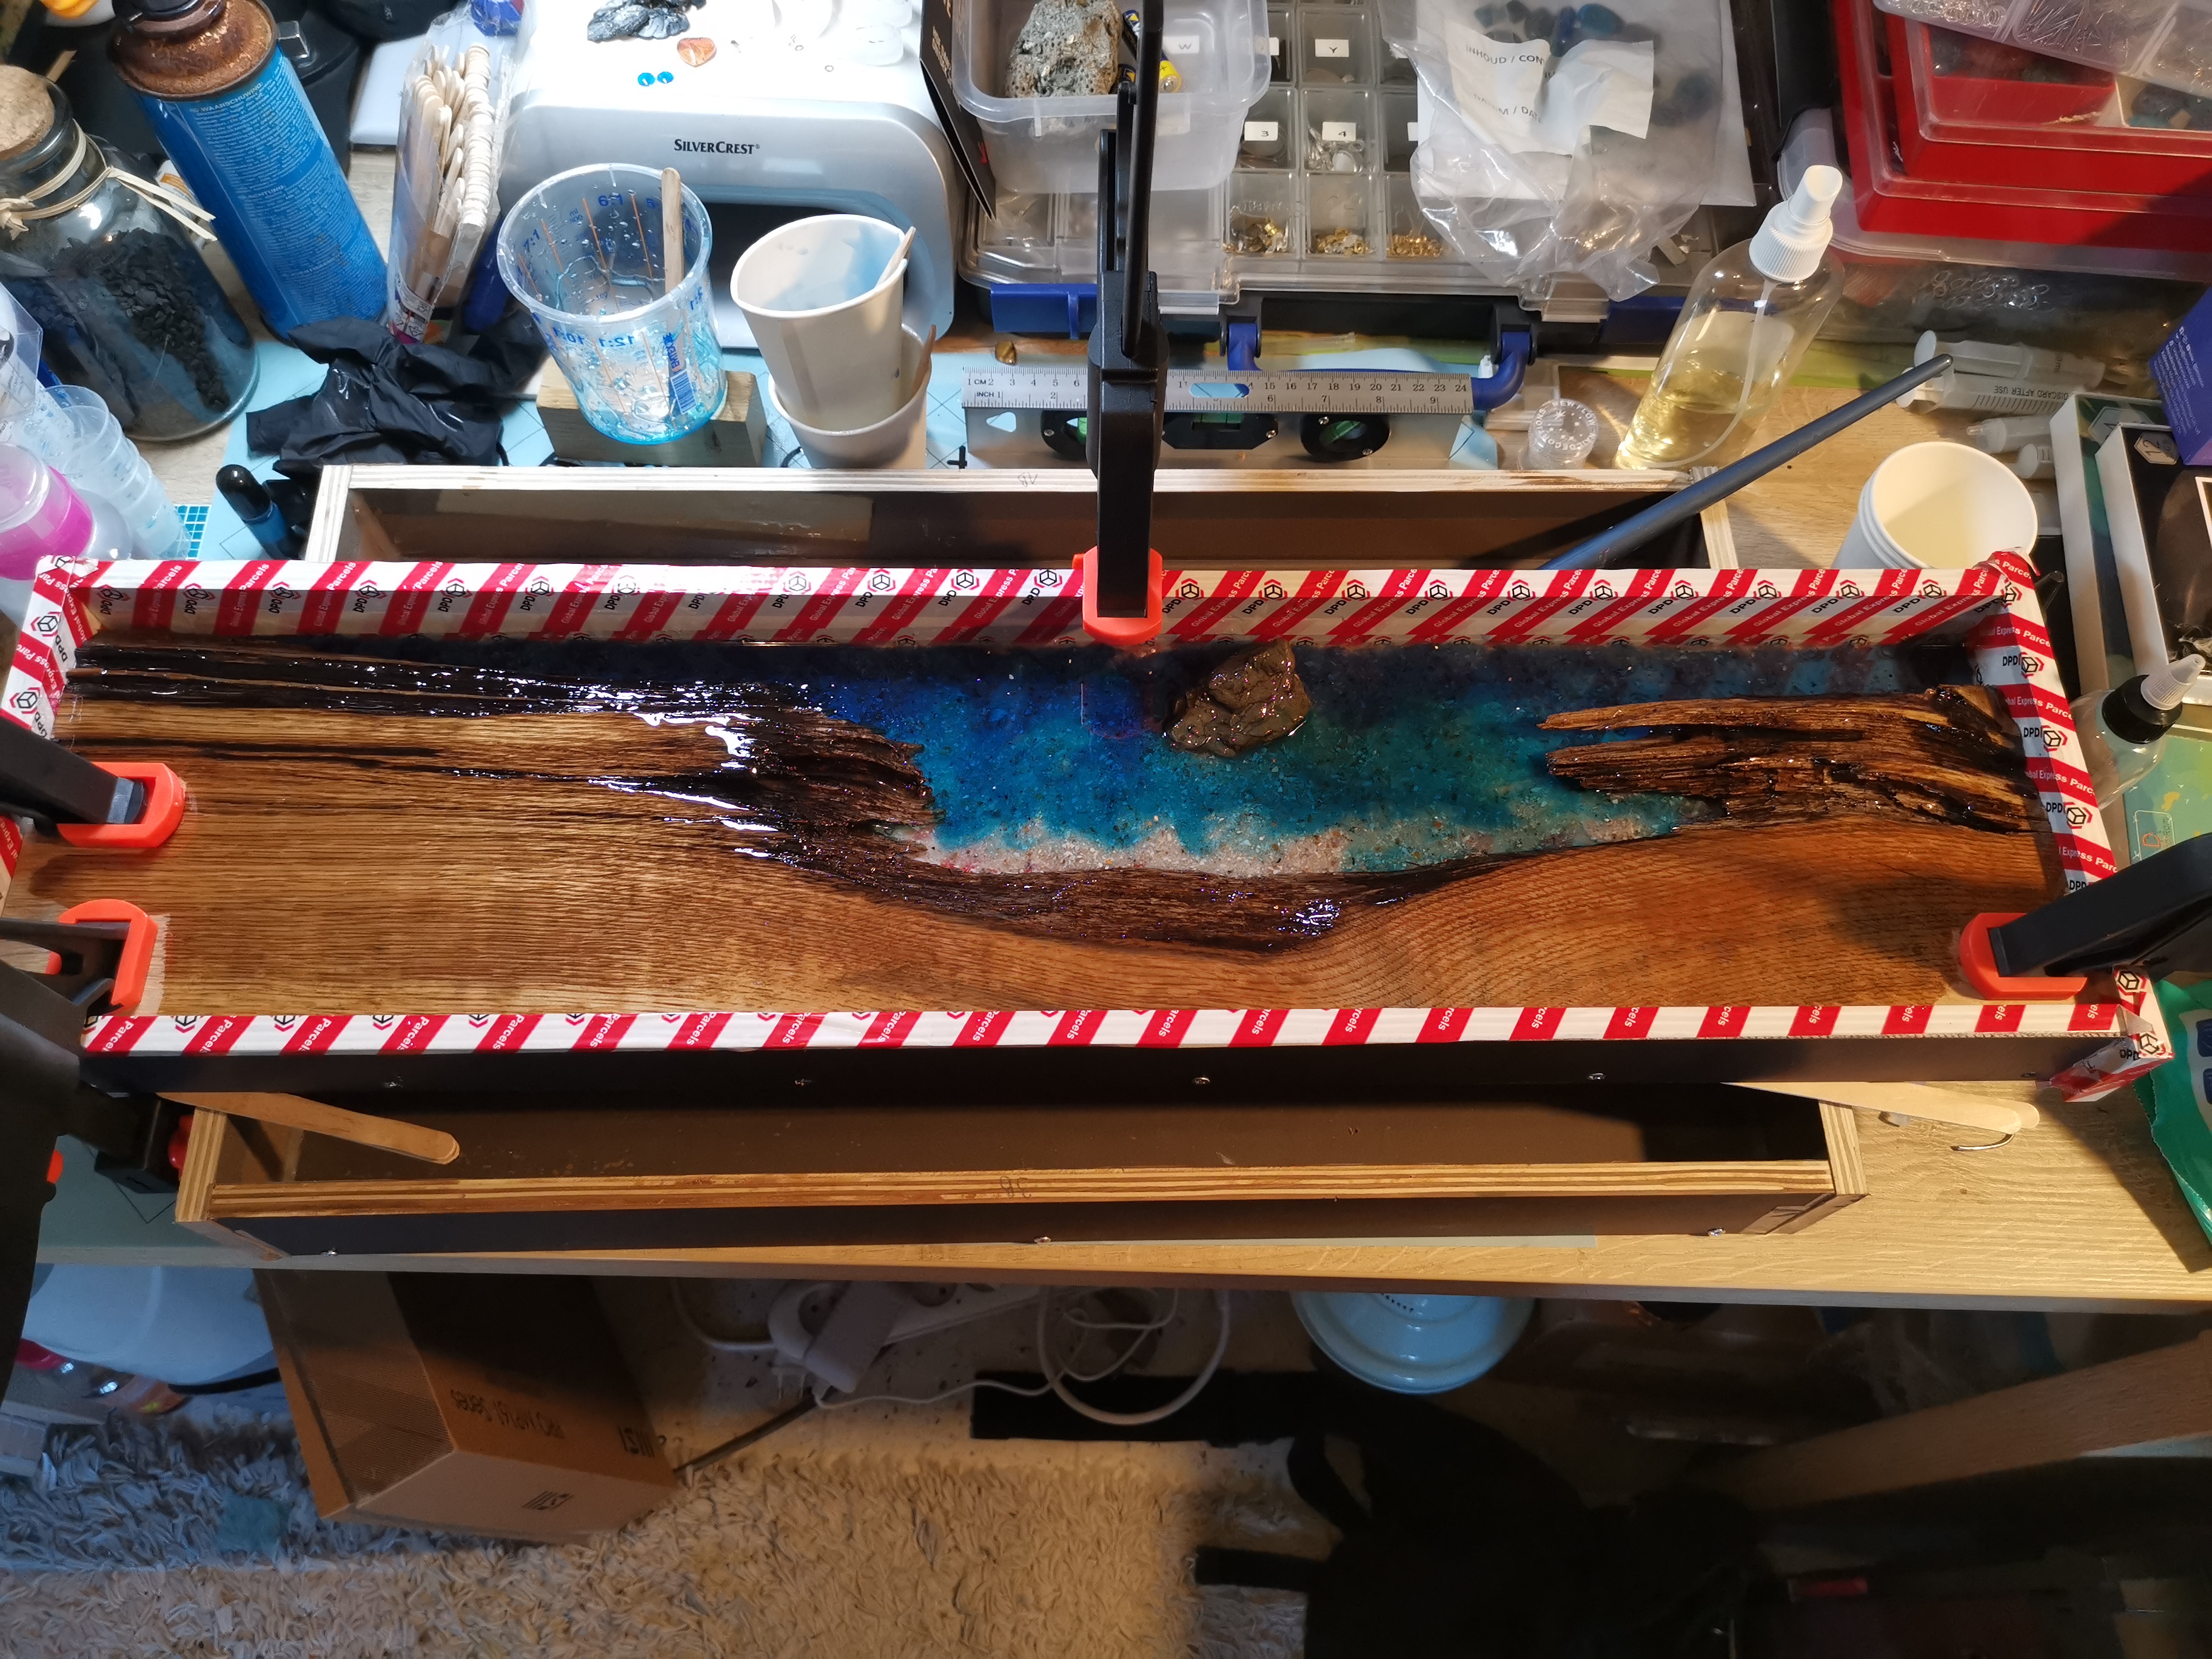
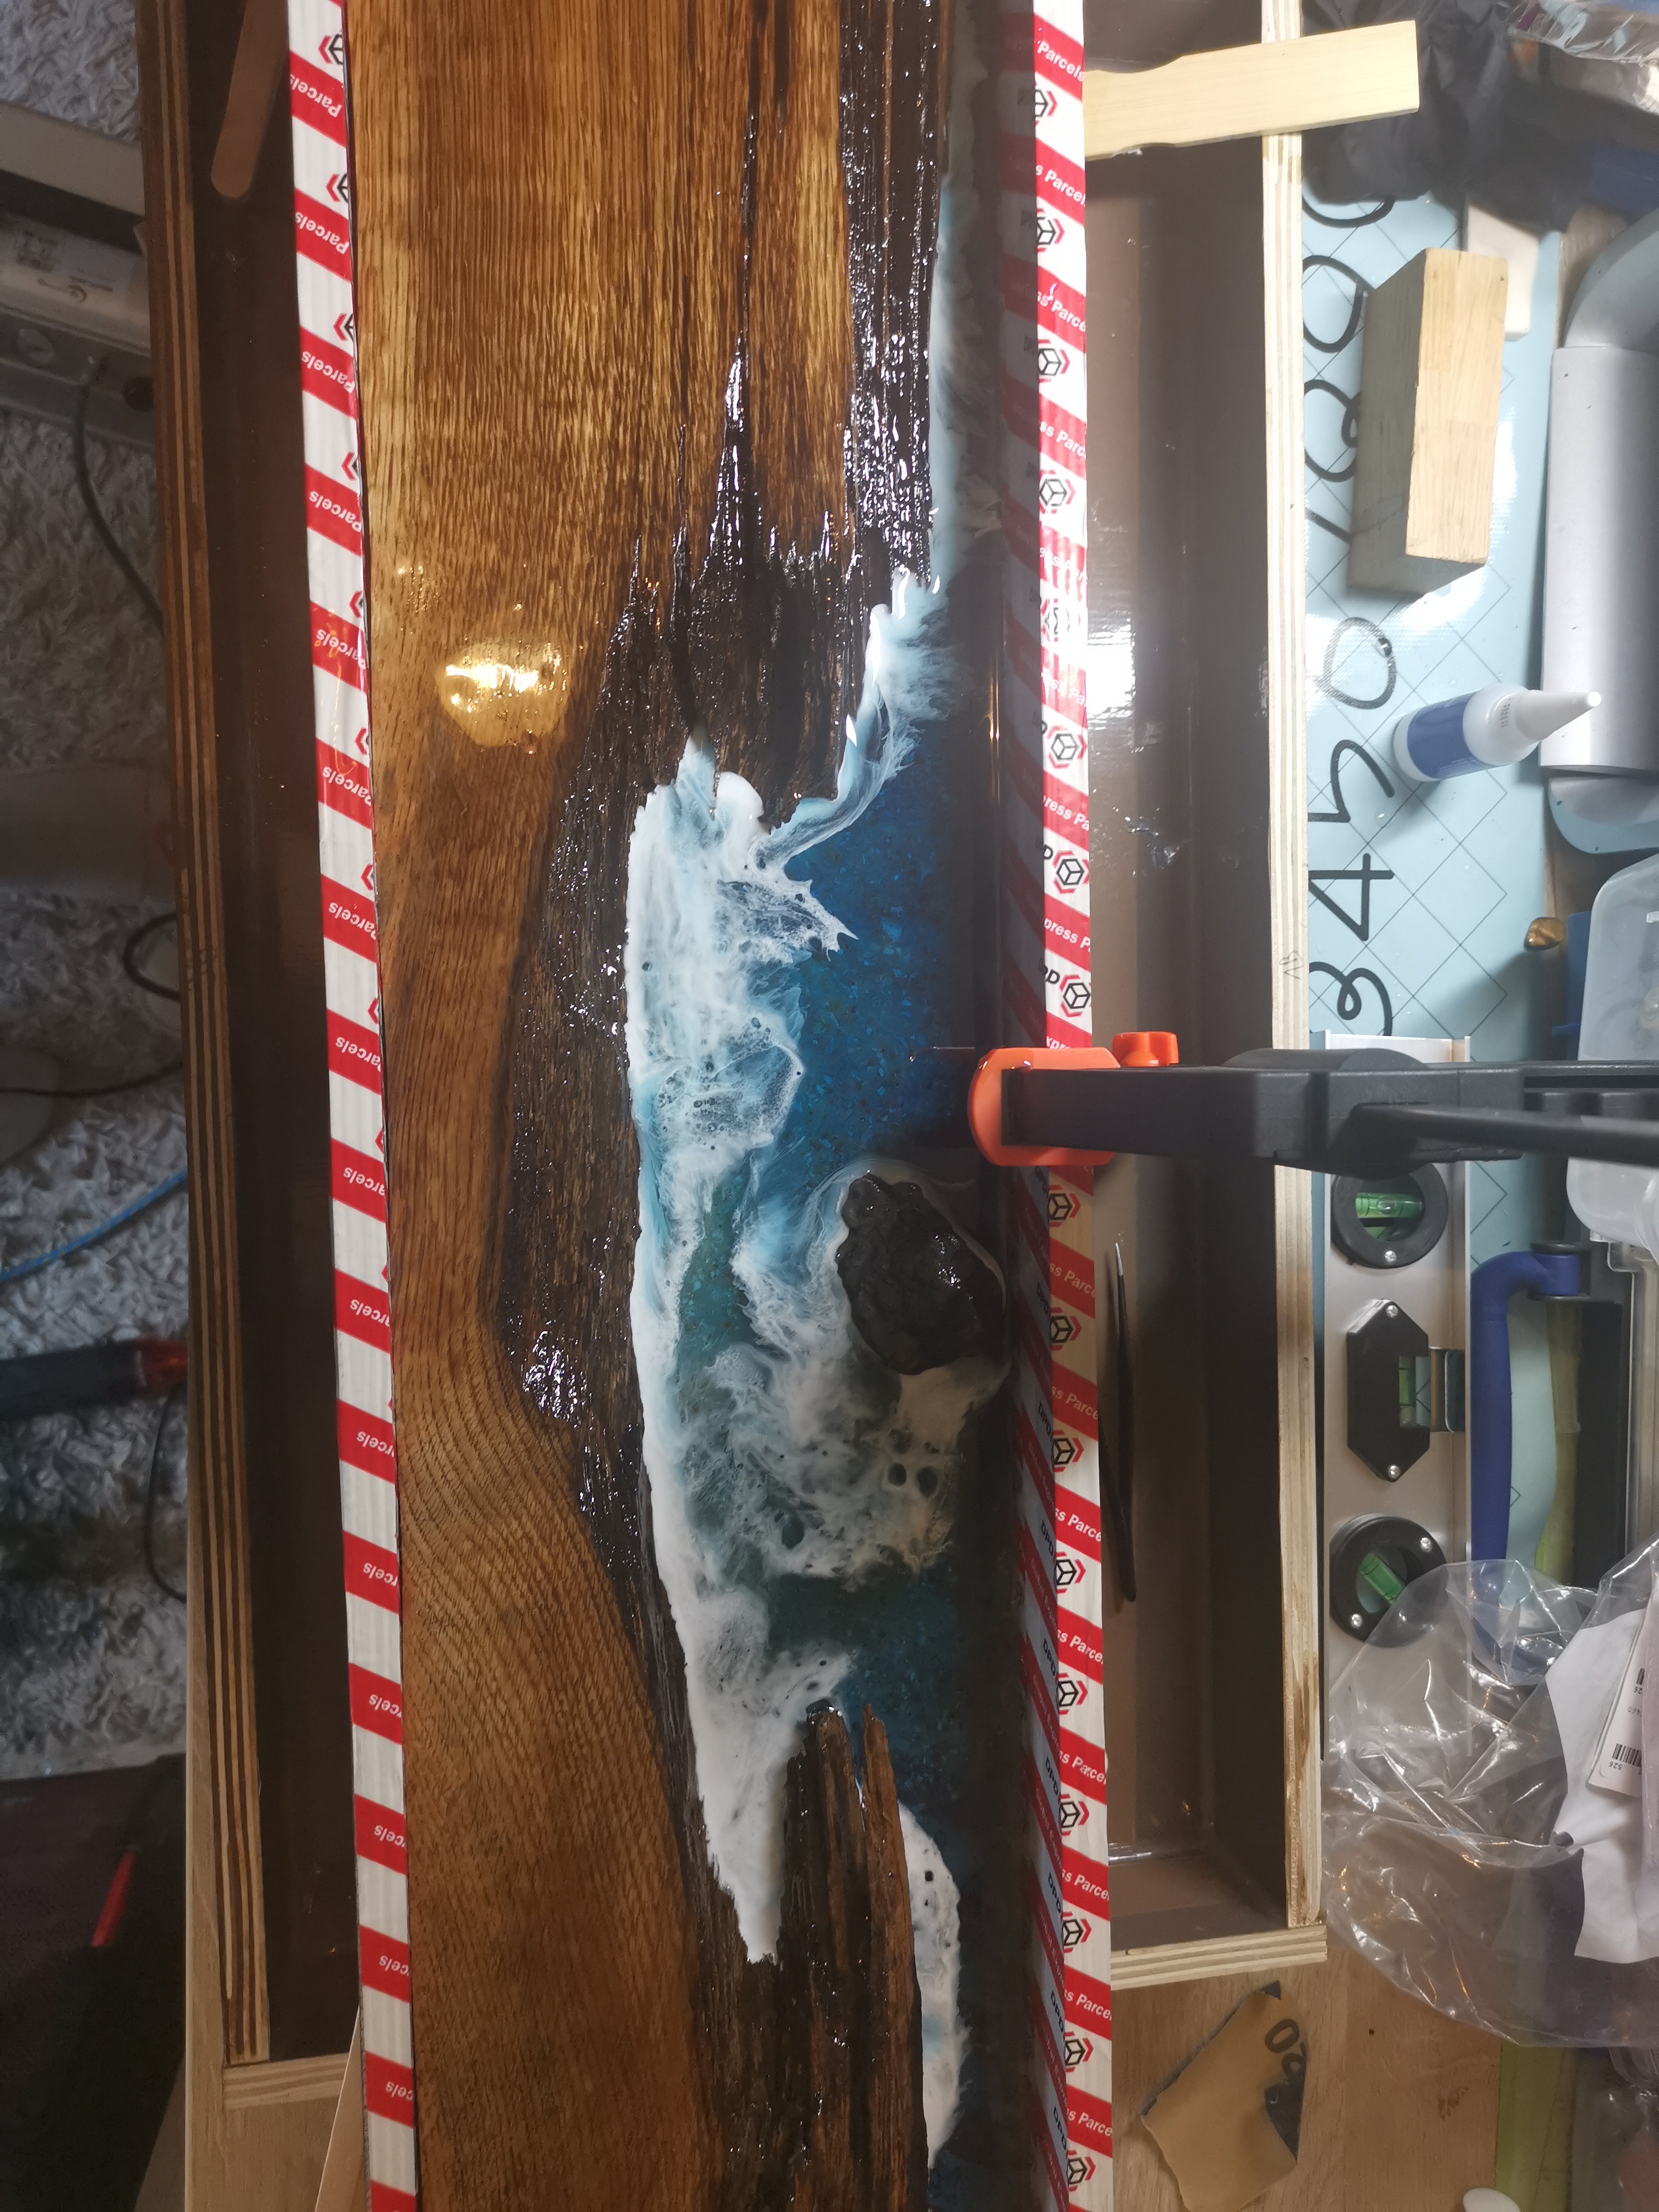
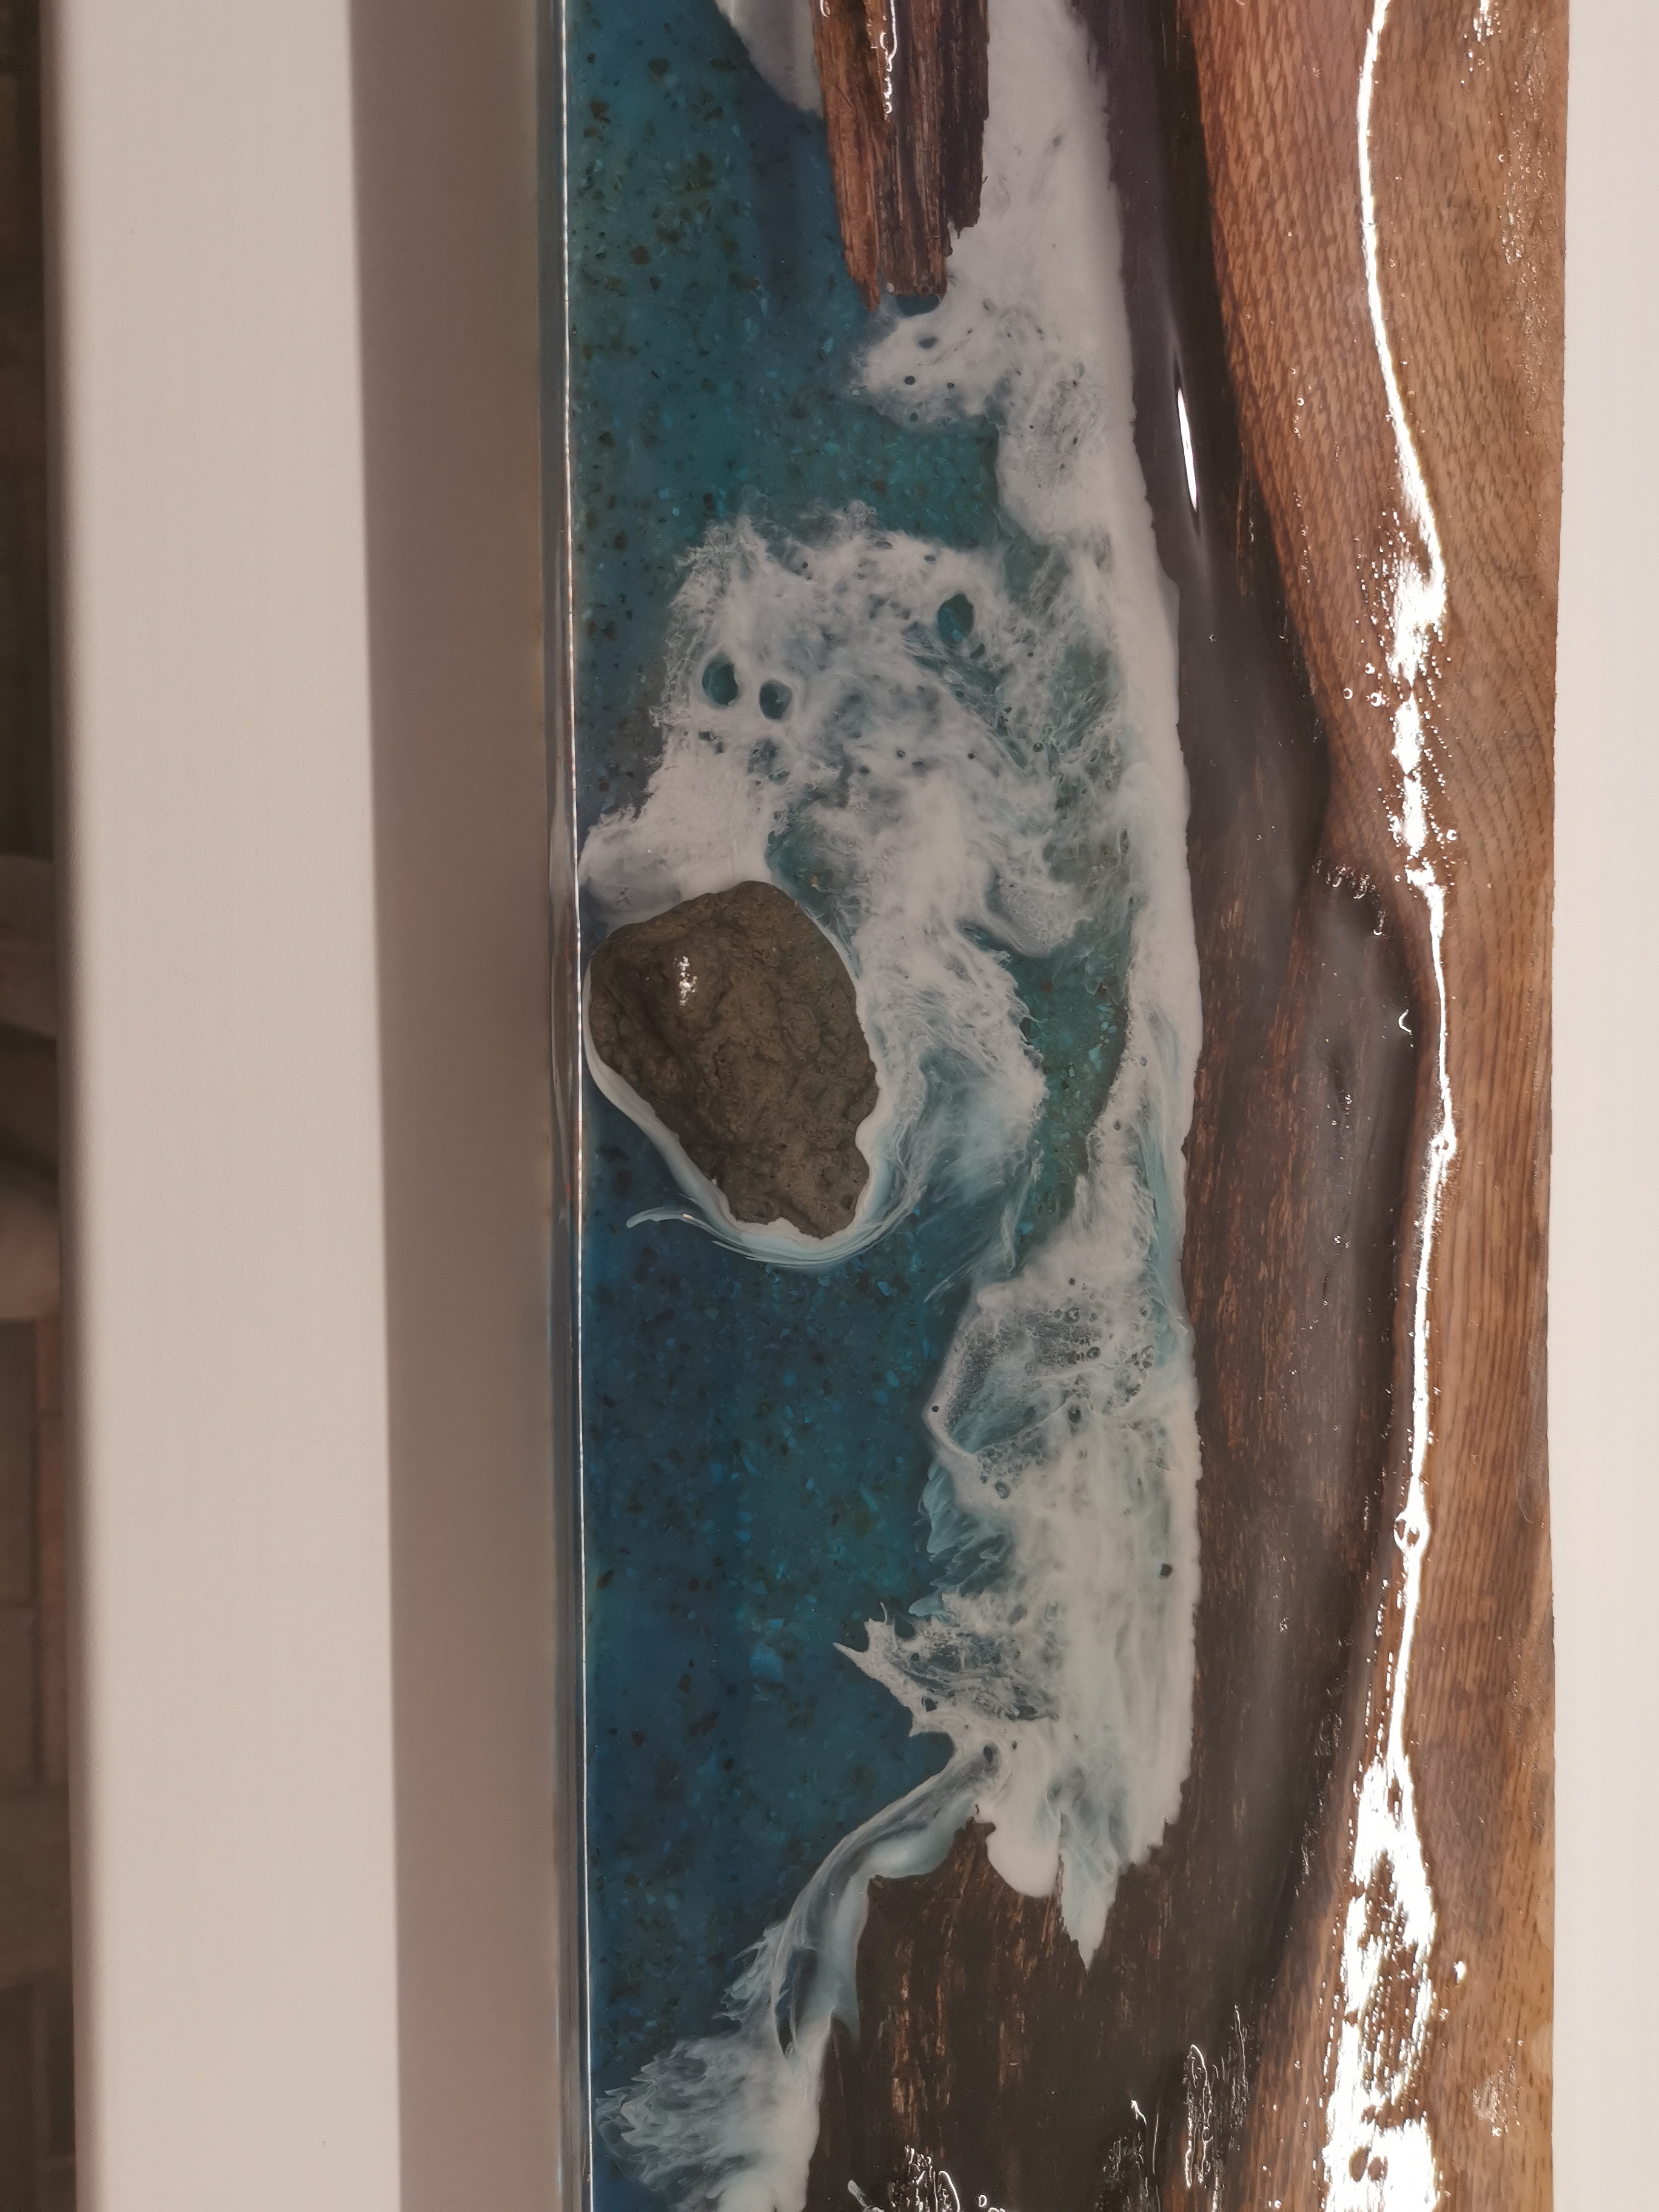
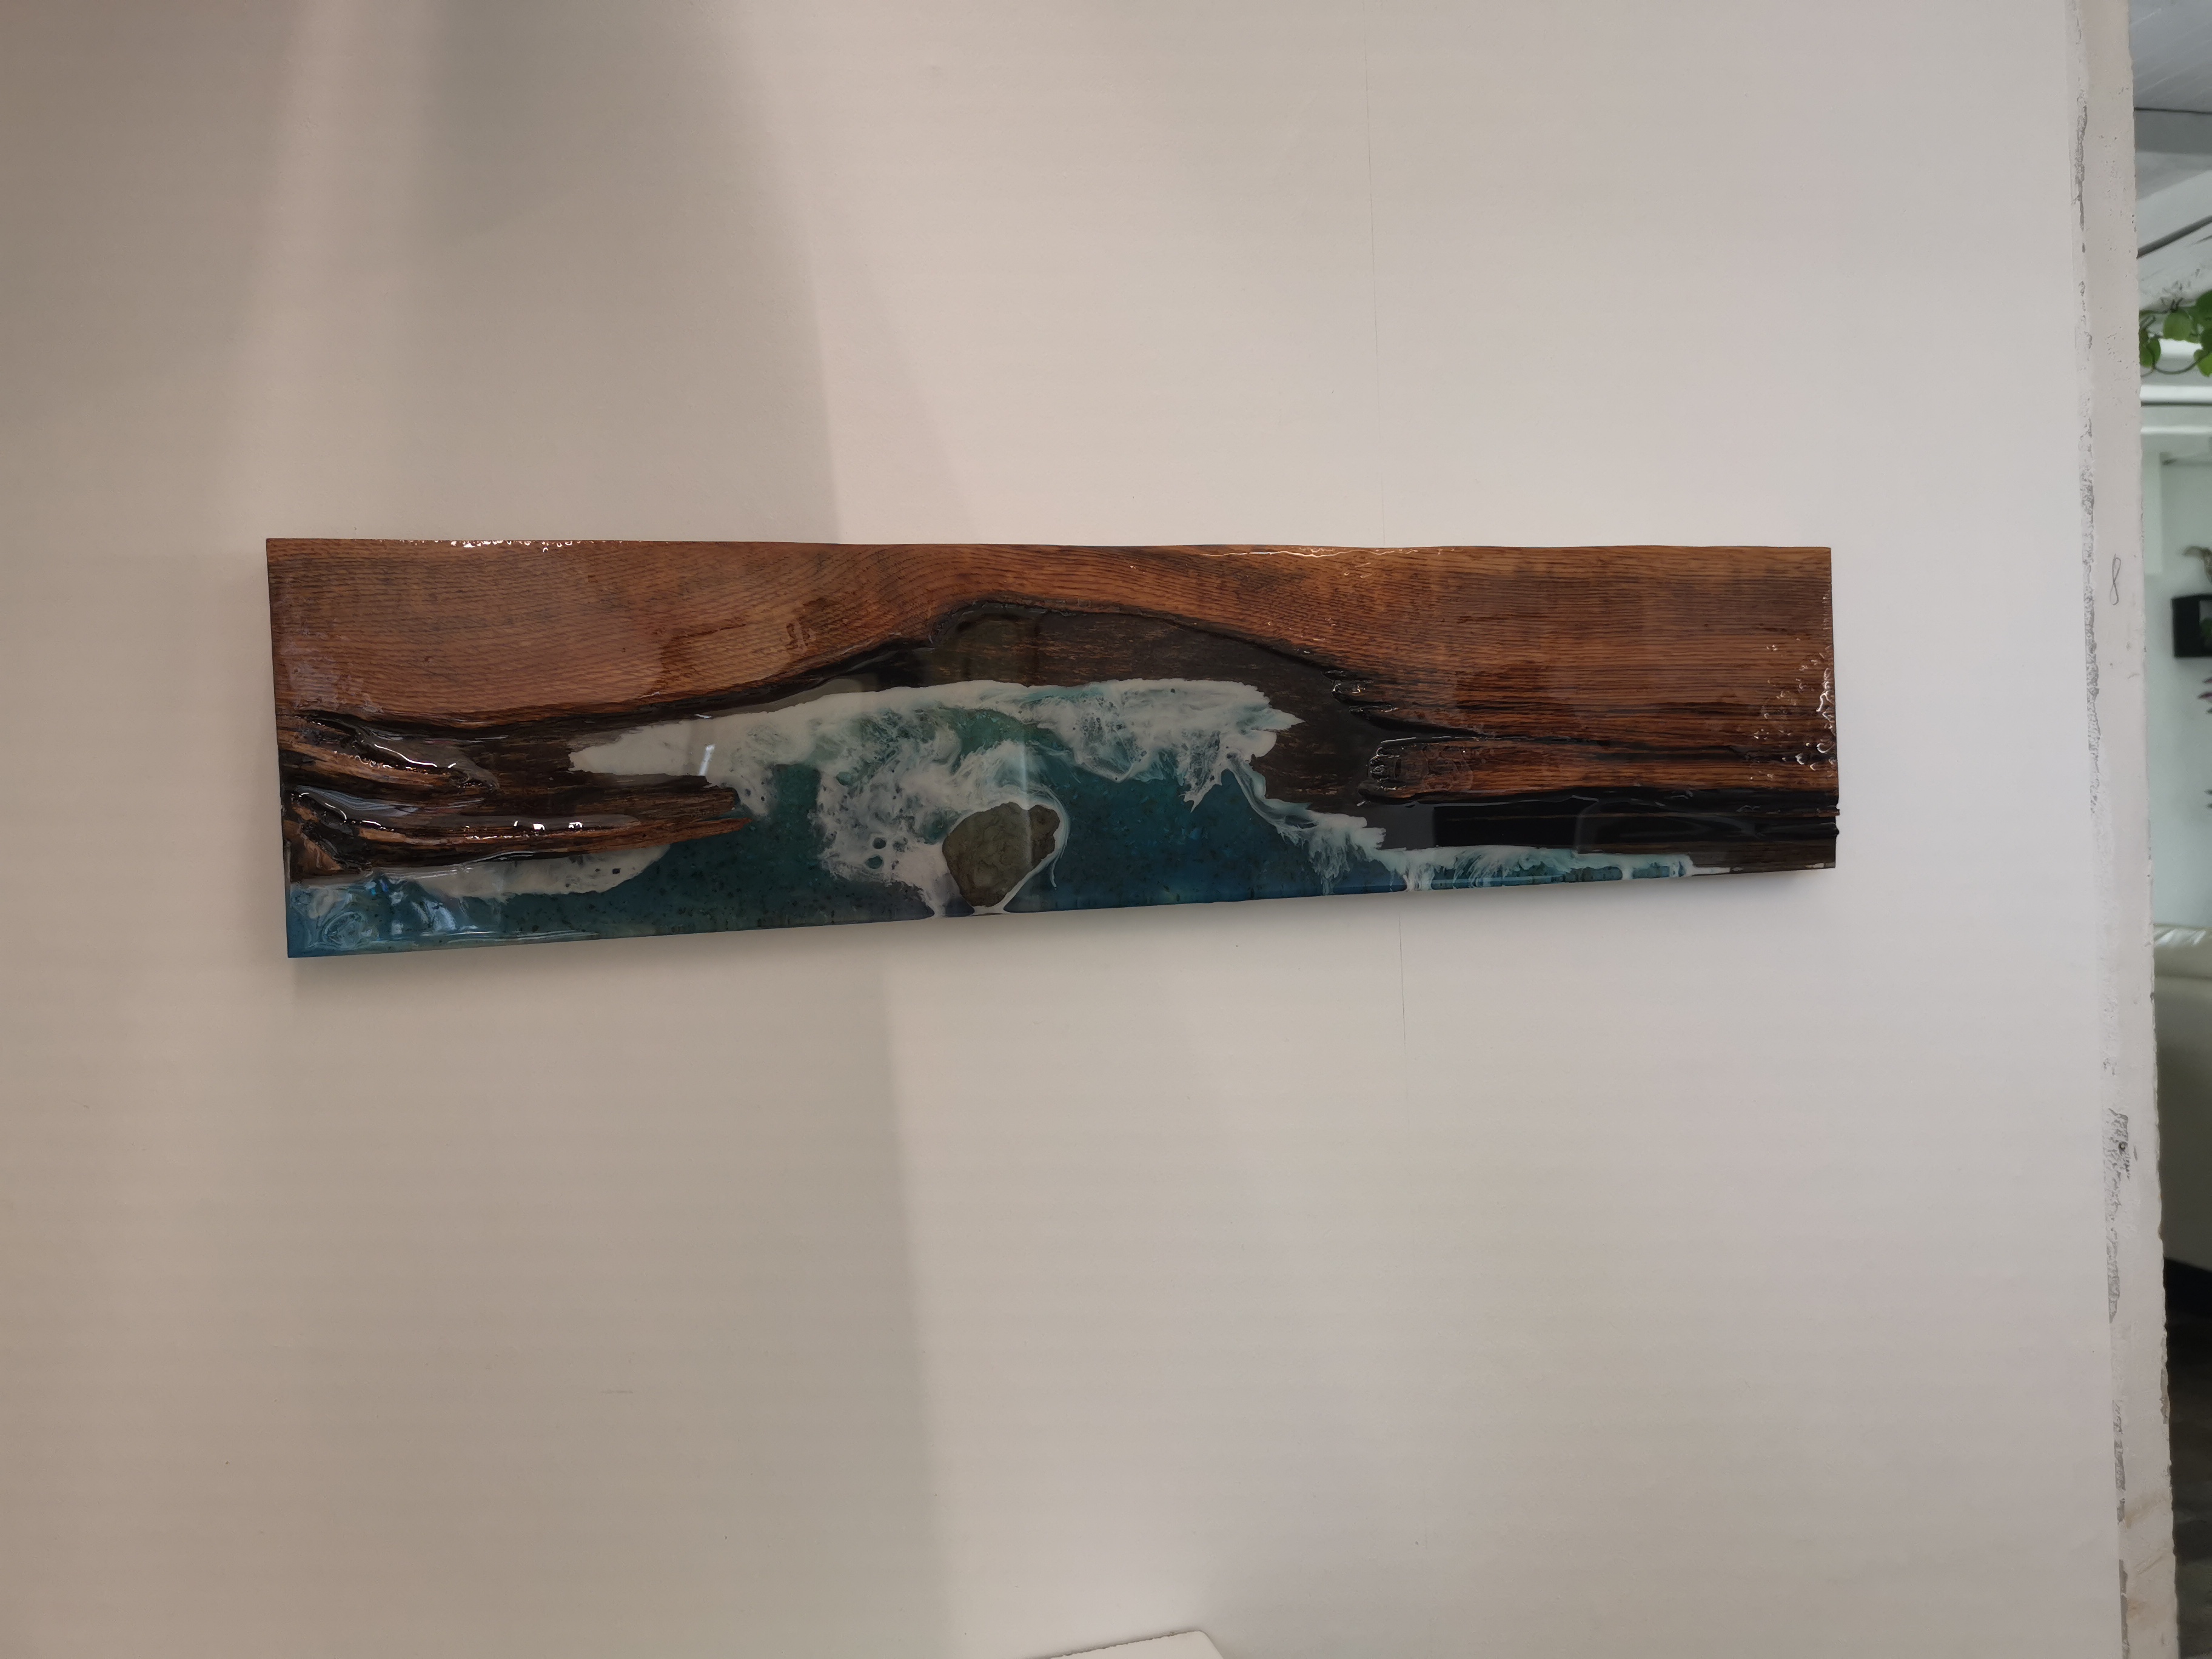
The inspiration came from our family holiday in Le Portel, Northern France. From the campsite and cliffs, we looked out at the old sea fort, visible and reachable only at low tide. The contrast between sand and water, and the waves hitting the rocks, stayed with me. I wanted to preserve that memory and make it tangible in this project.
Materials and choices for this epoxy knife block
- Dry hardwood (oak) as the base
- Clear casting epoxy (Let’s Resin)
- Sand for the beach and seabed base layer
- Blue alcohol ink shades
- Ocean White resin pigment (Dipon.de High Performance Liquids & Pigments)
- Neodymium magnets
- Two-component adhesive
- Concrete plywood and packing tape for the mold
- Hooks for wall mounting
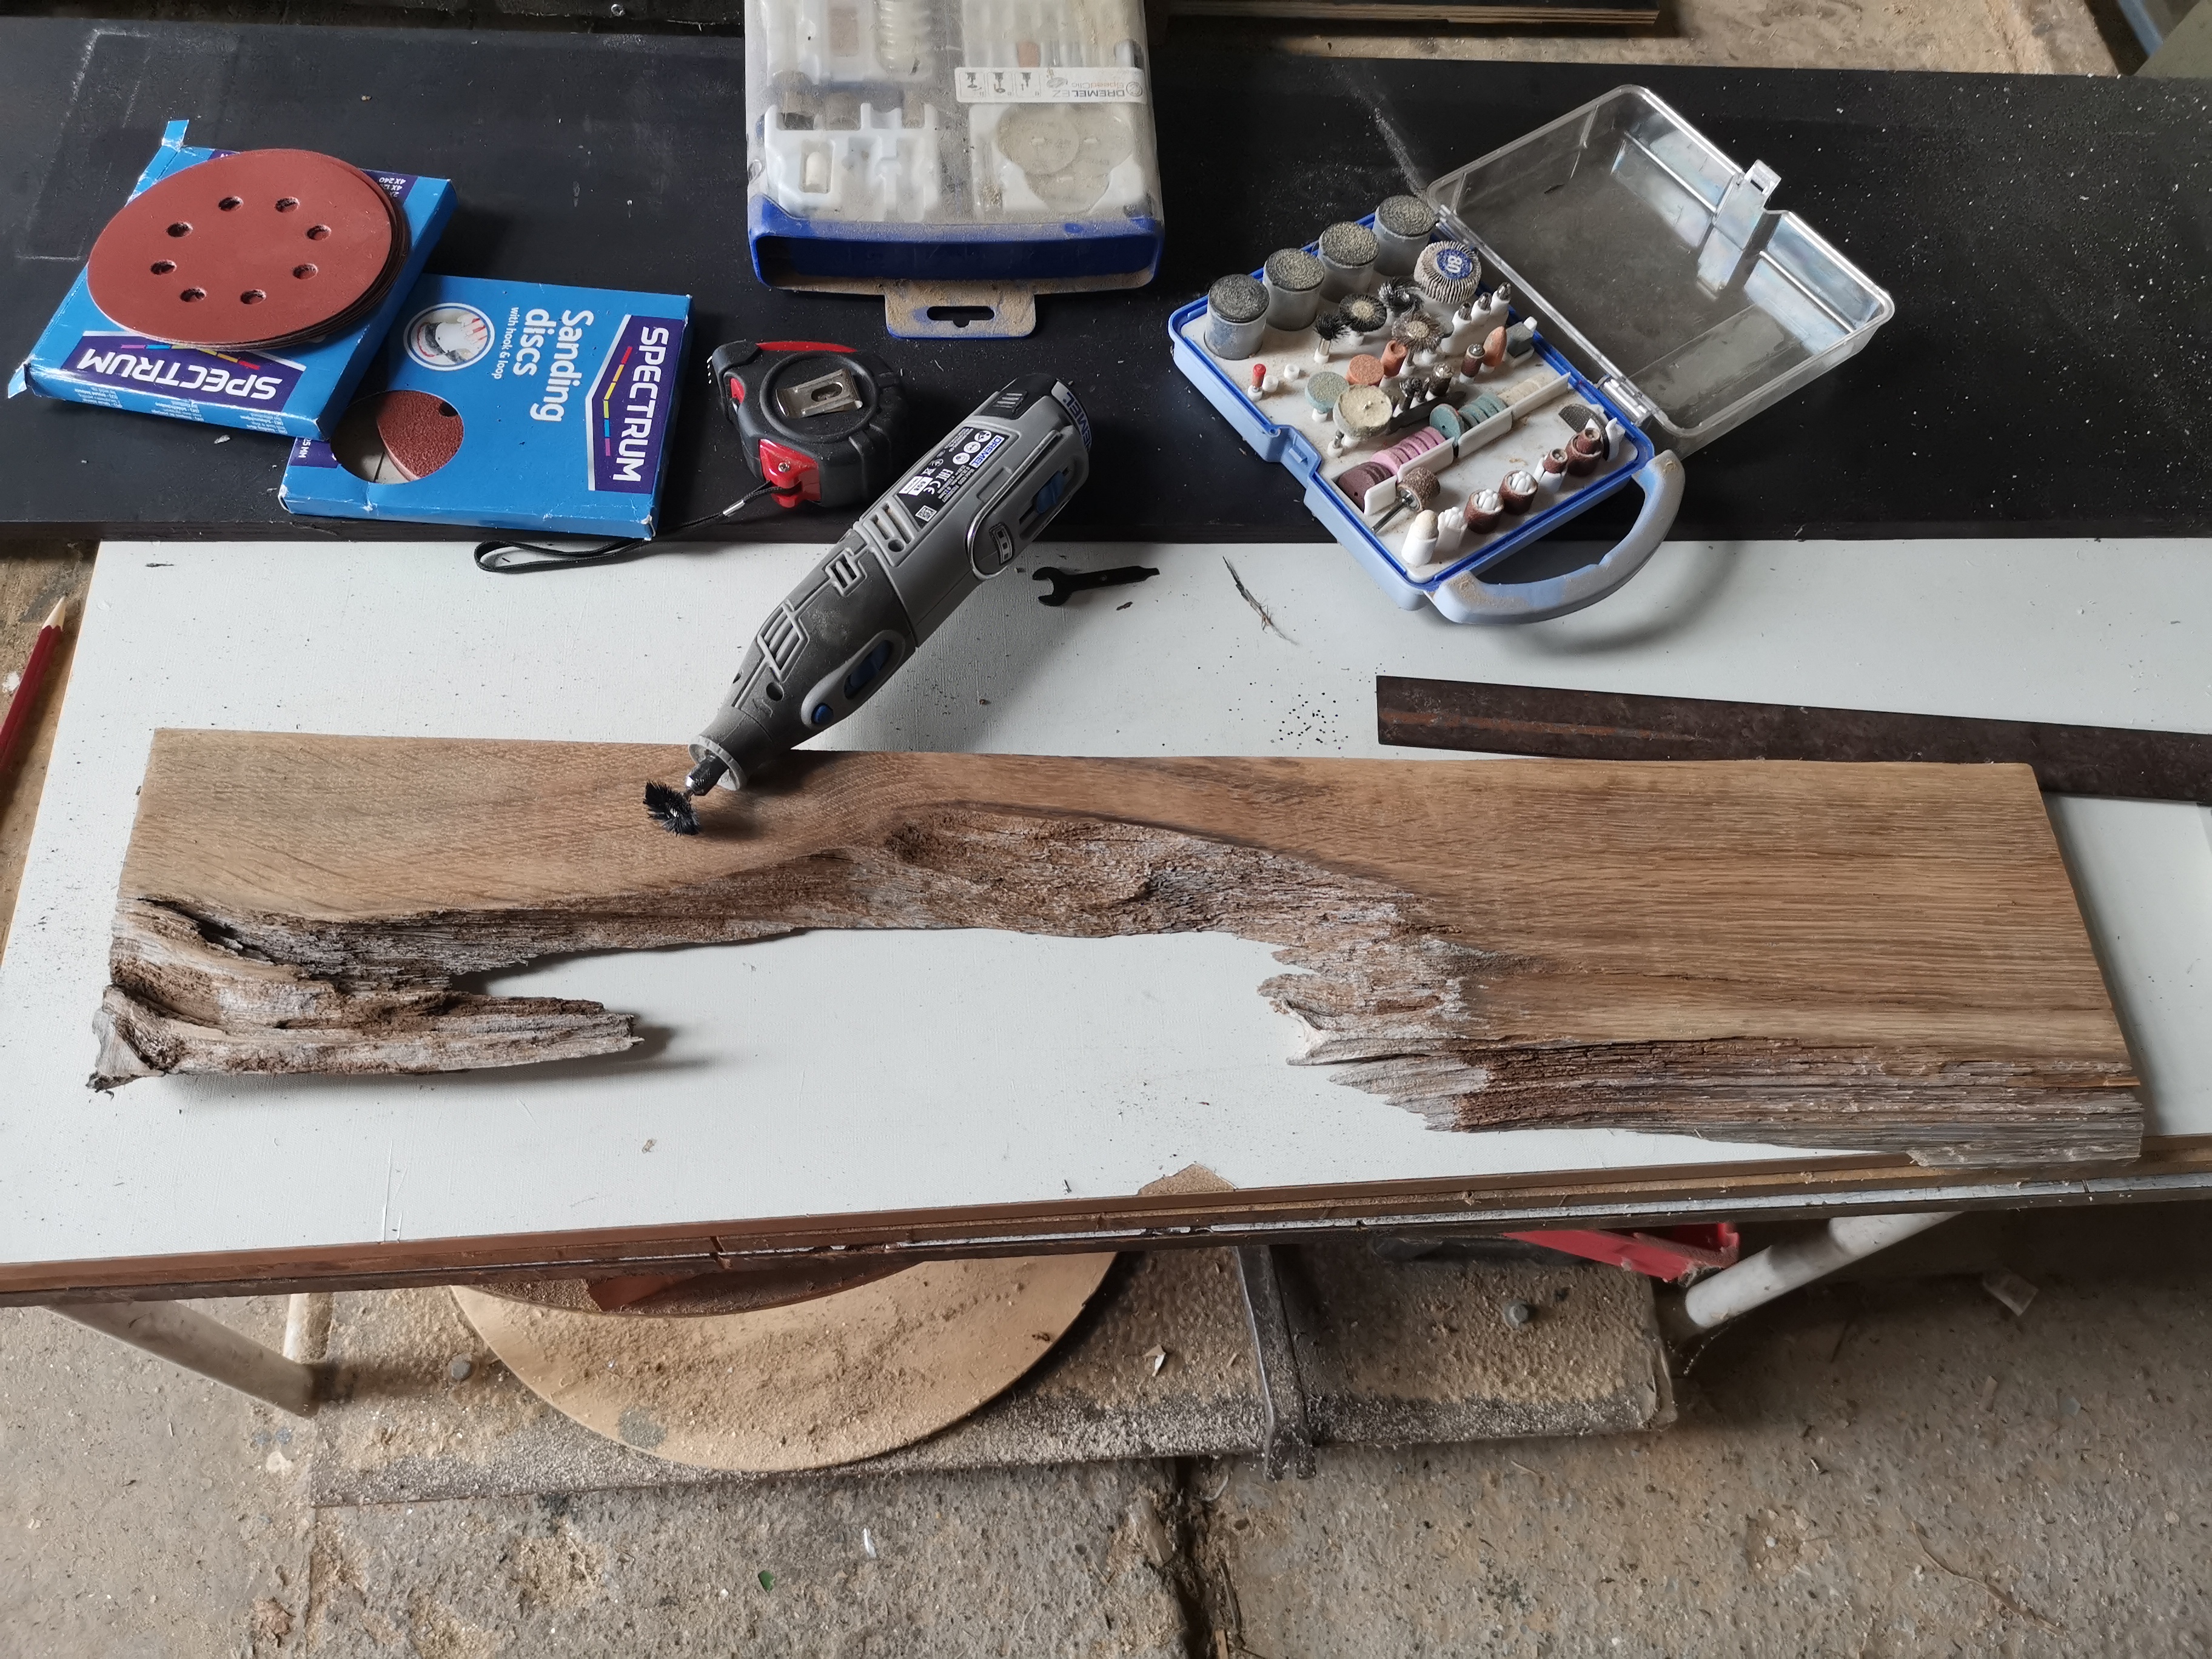
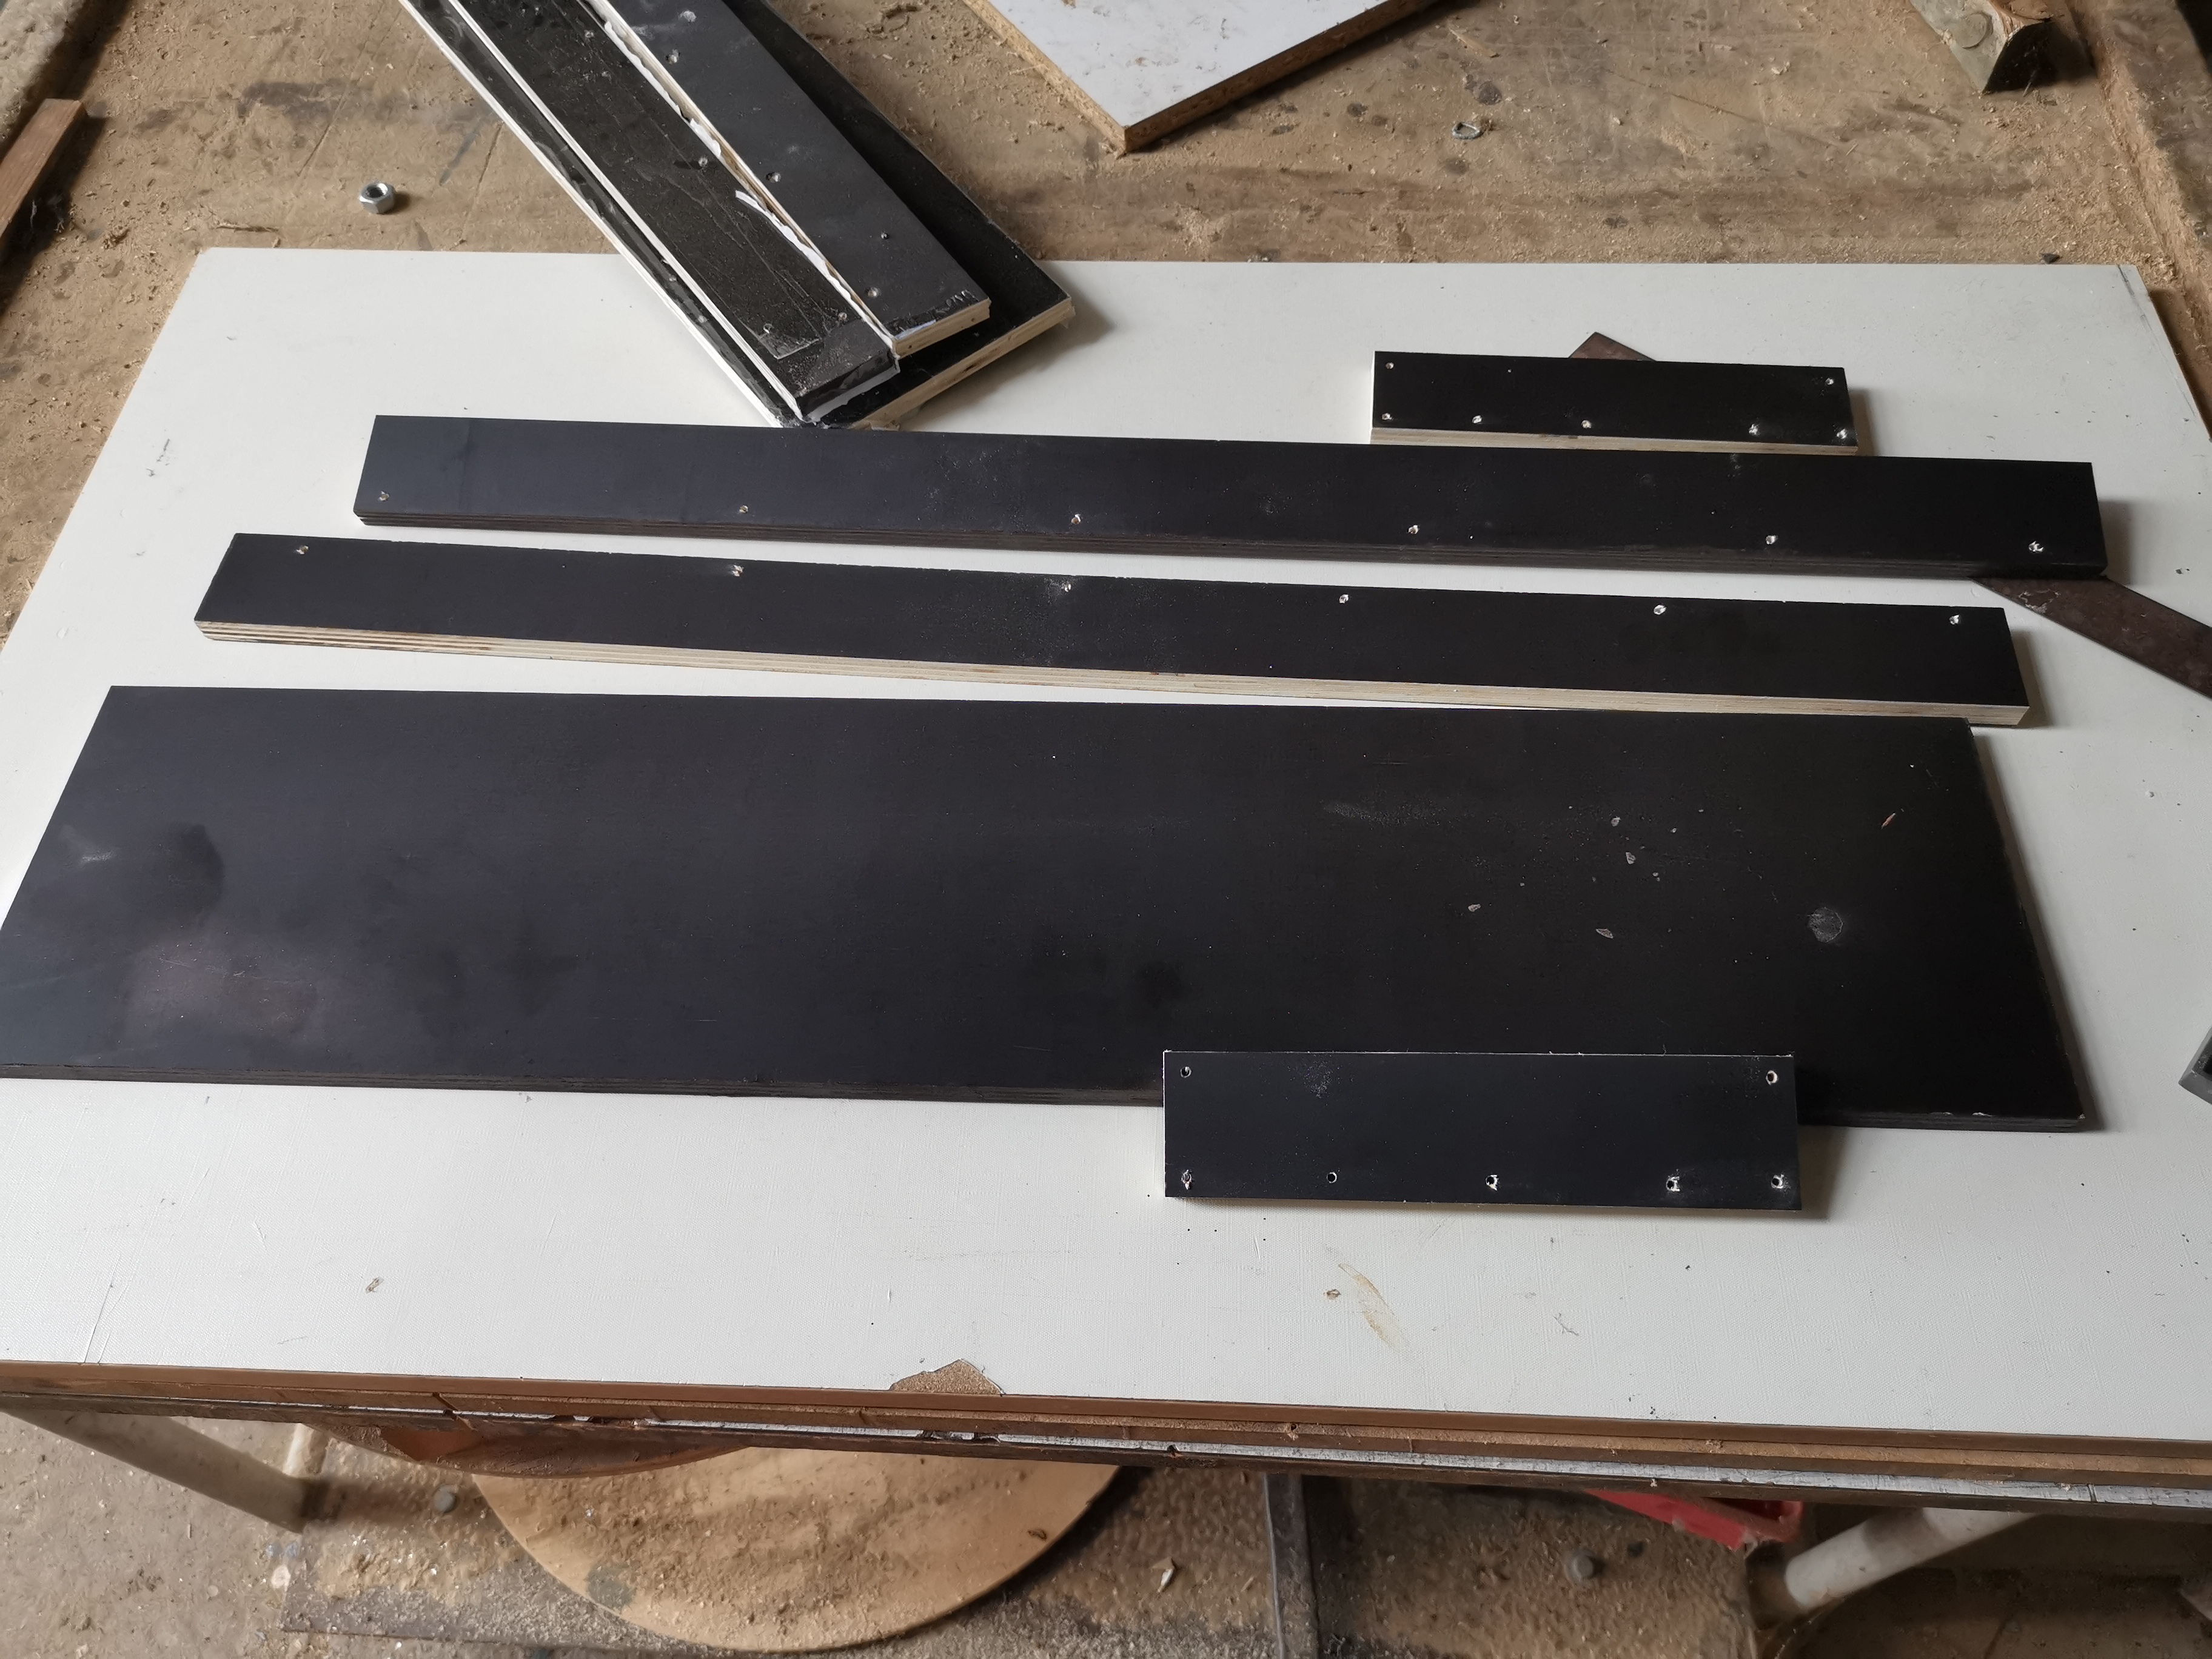
From reclaimed wood to an epoxy knife block
In the photos below, I walk you through the full build process of this epoxy knife block, from preparing the wood and building the mold to pouring, finishing, and wall mounting.
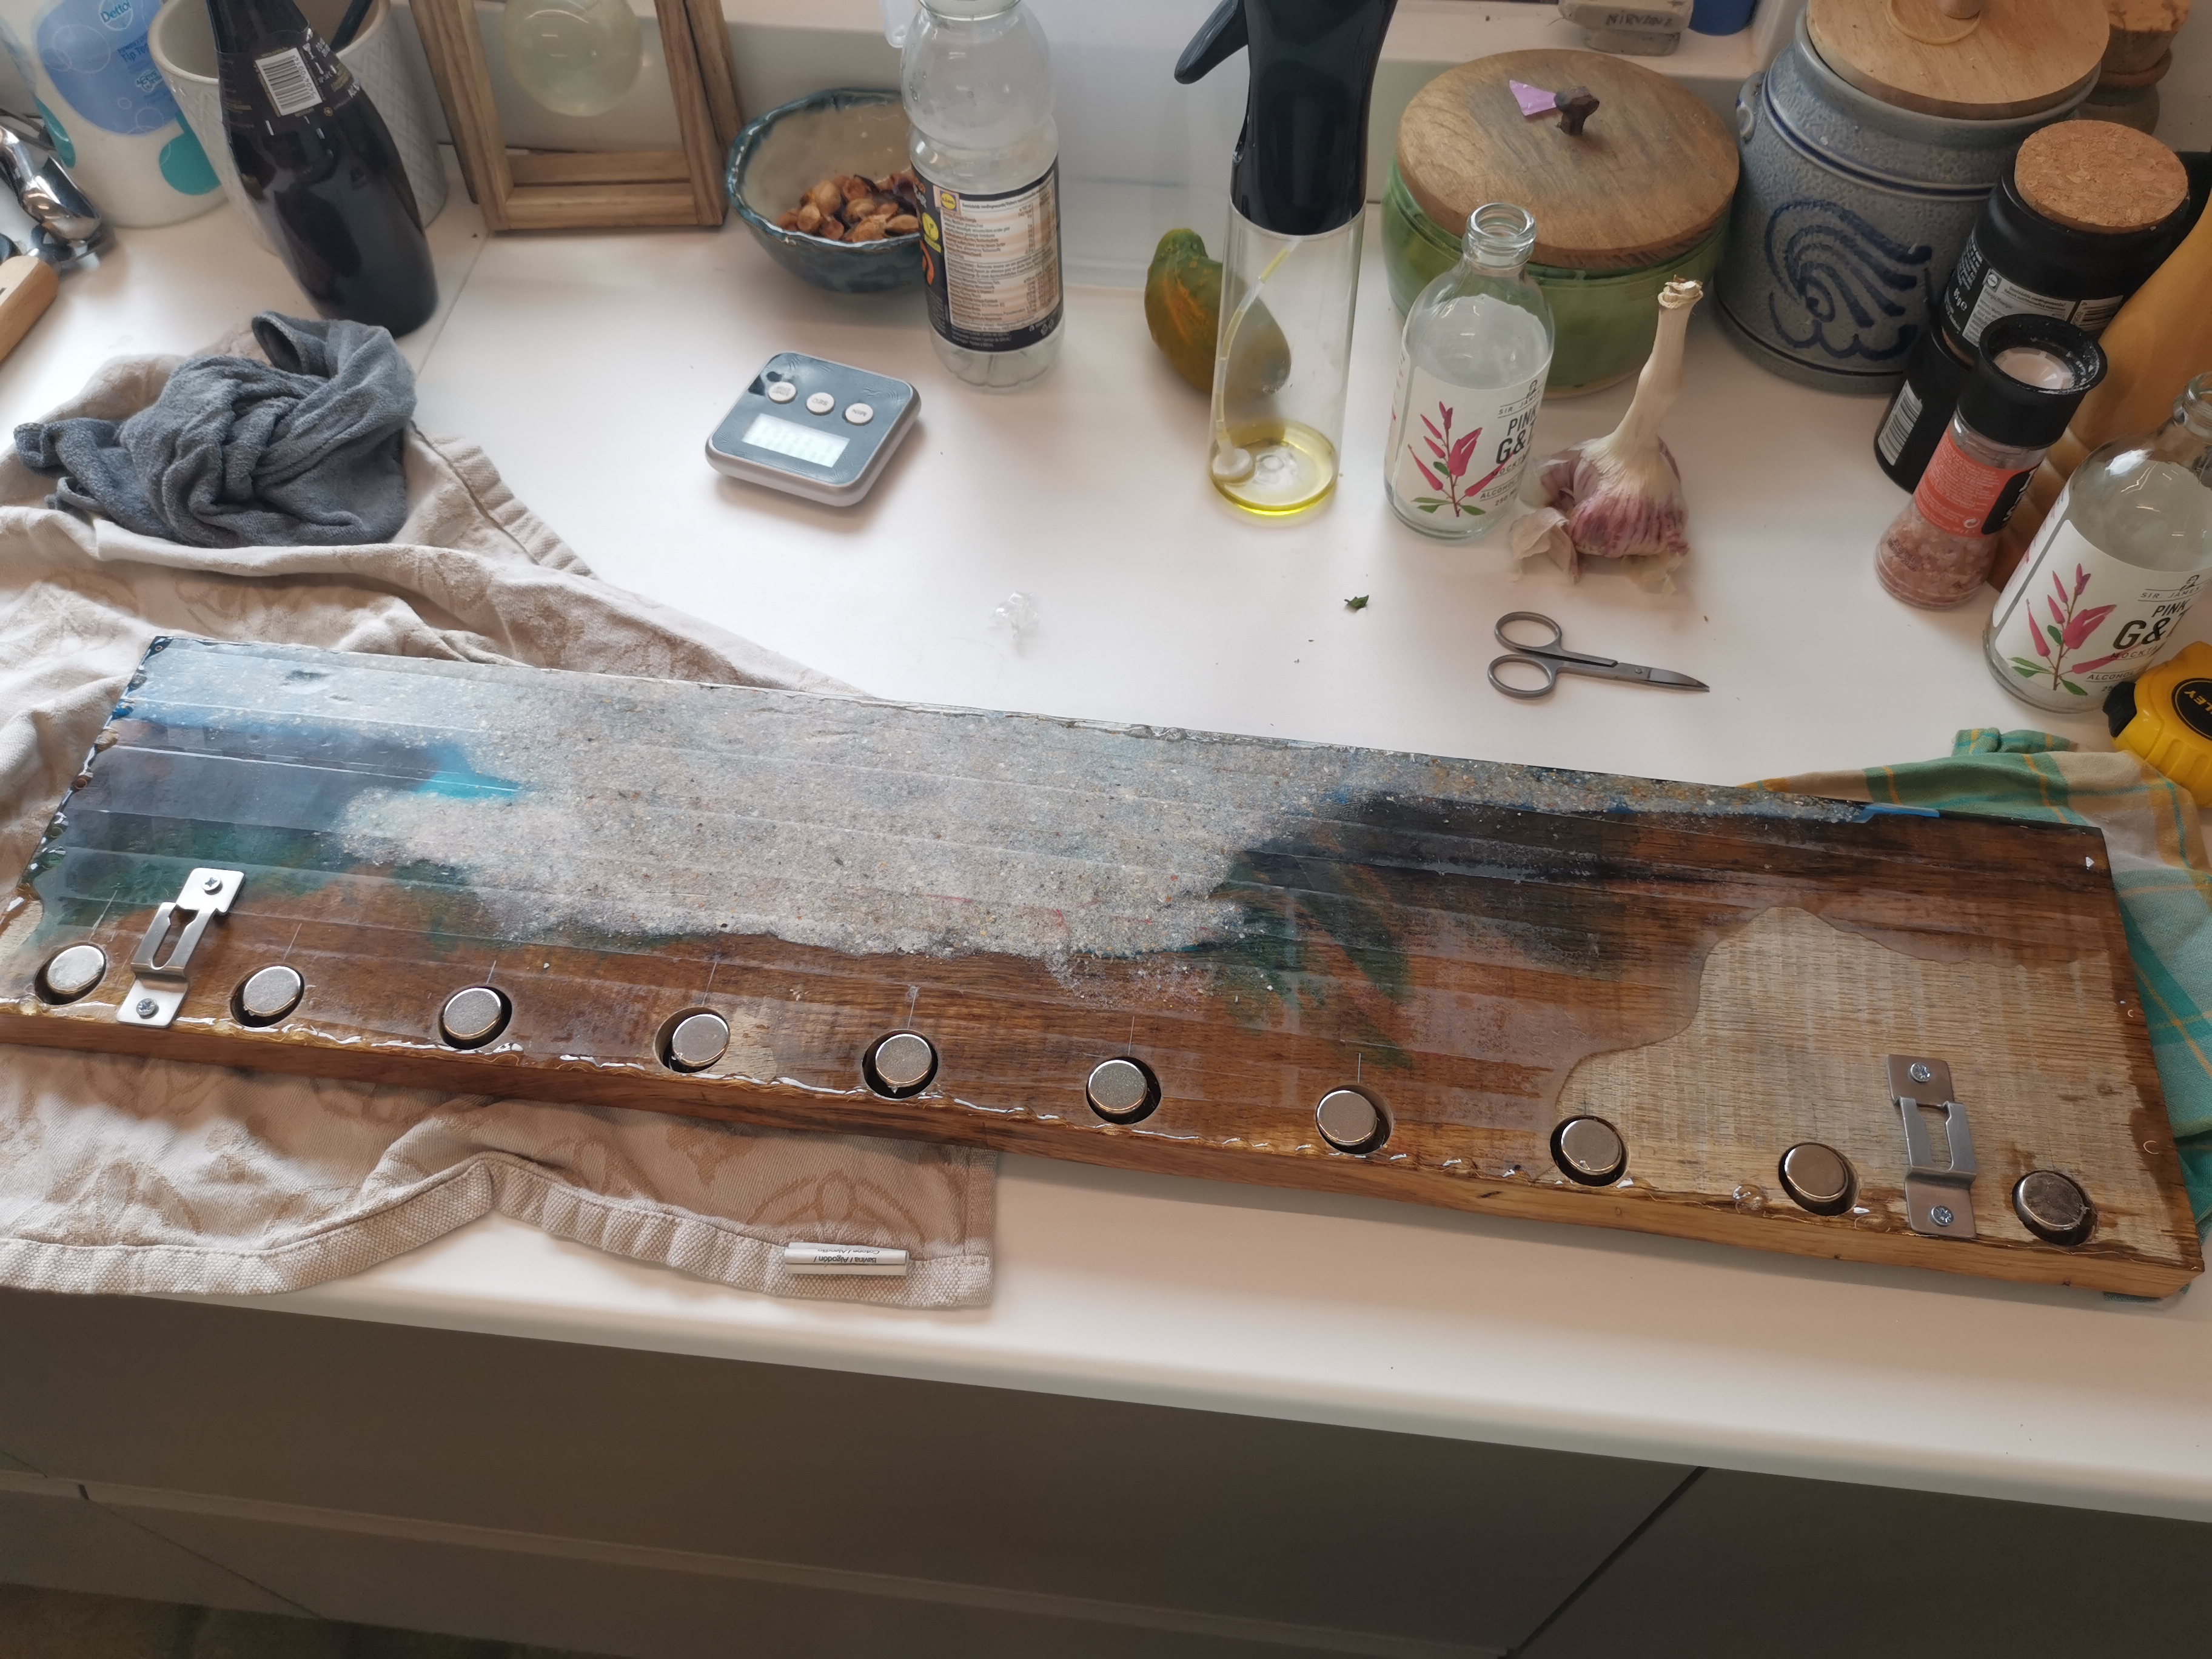
For the resin, I used Let’s Resin epoxy. I mixed real sand into the base layer to create the beach effect. Then I built water depth with blue alcohol ink shades. For the foamy waves, I used Ocean White resin pigment. Layer by layer, this created the sea-inspired look.
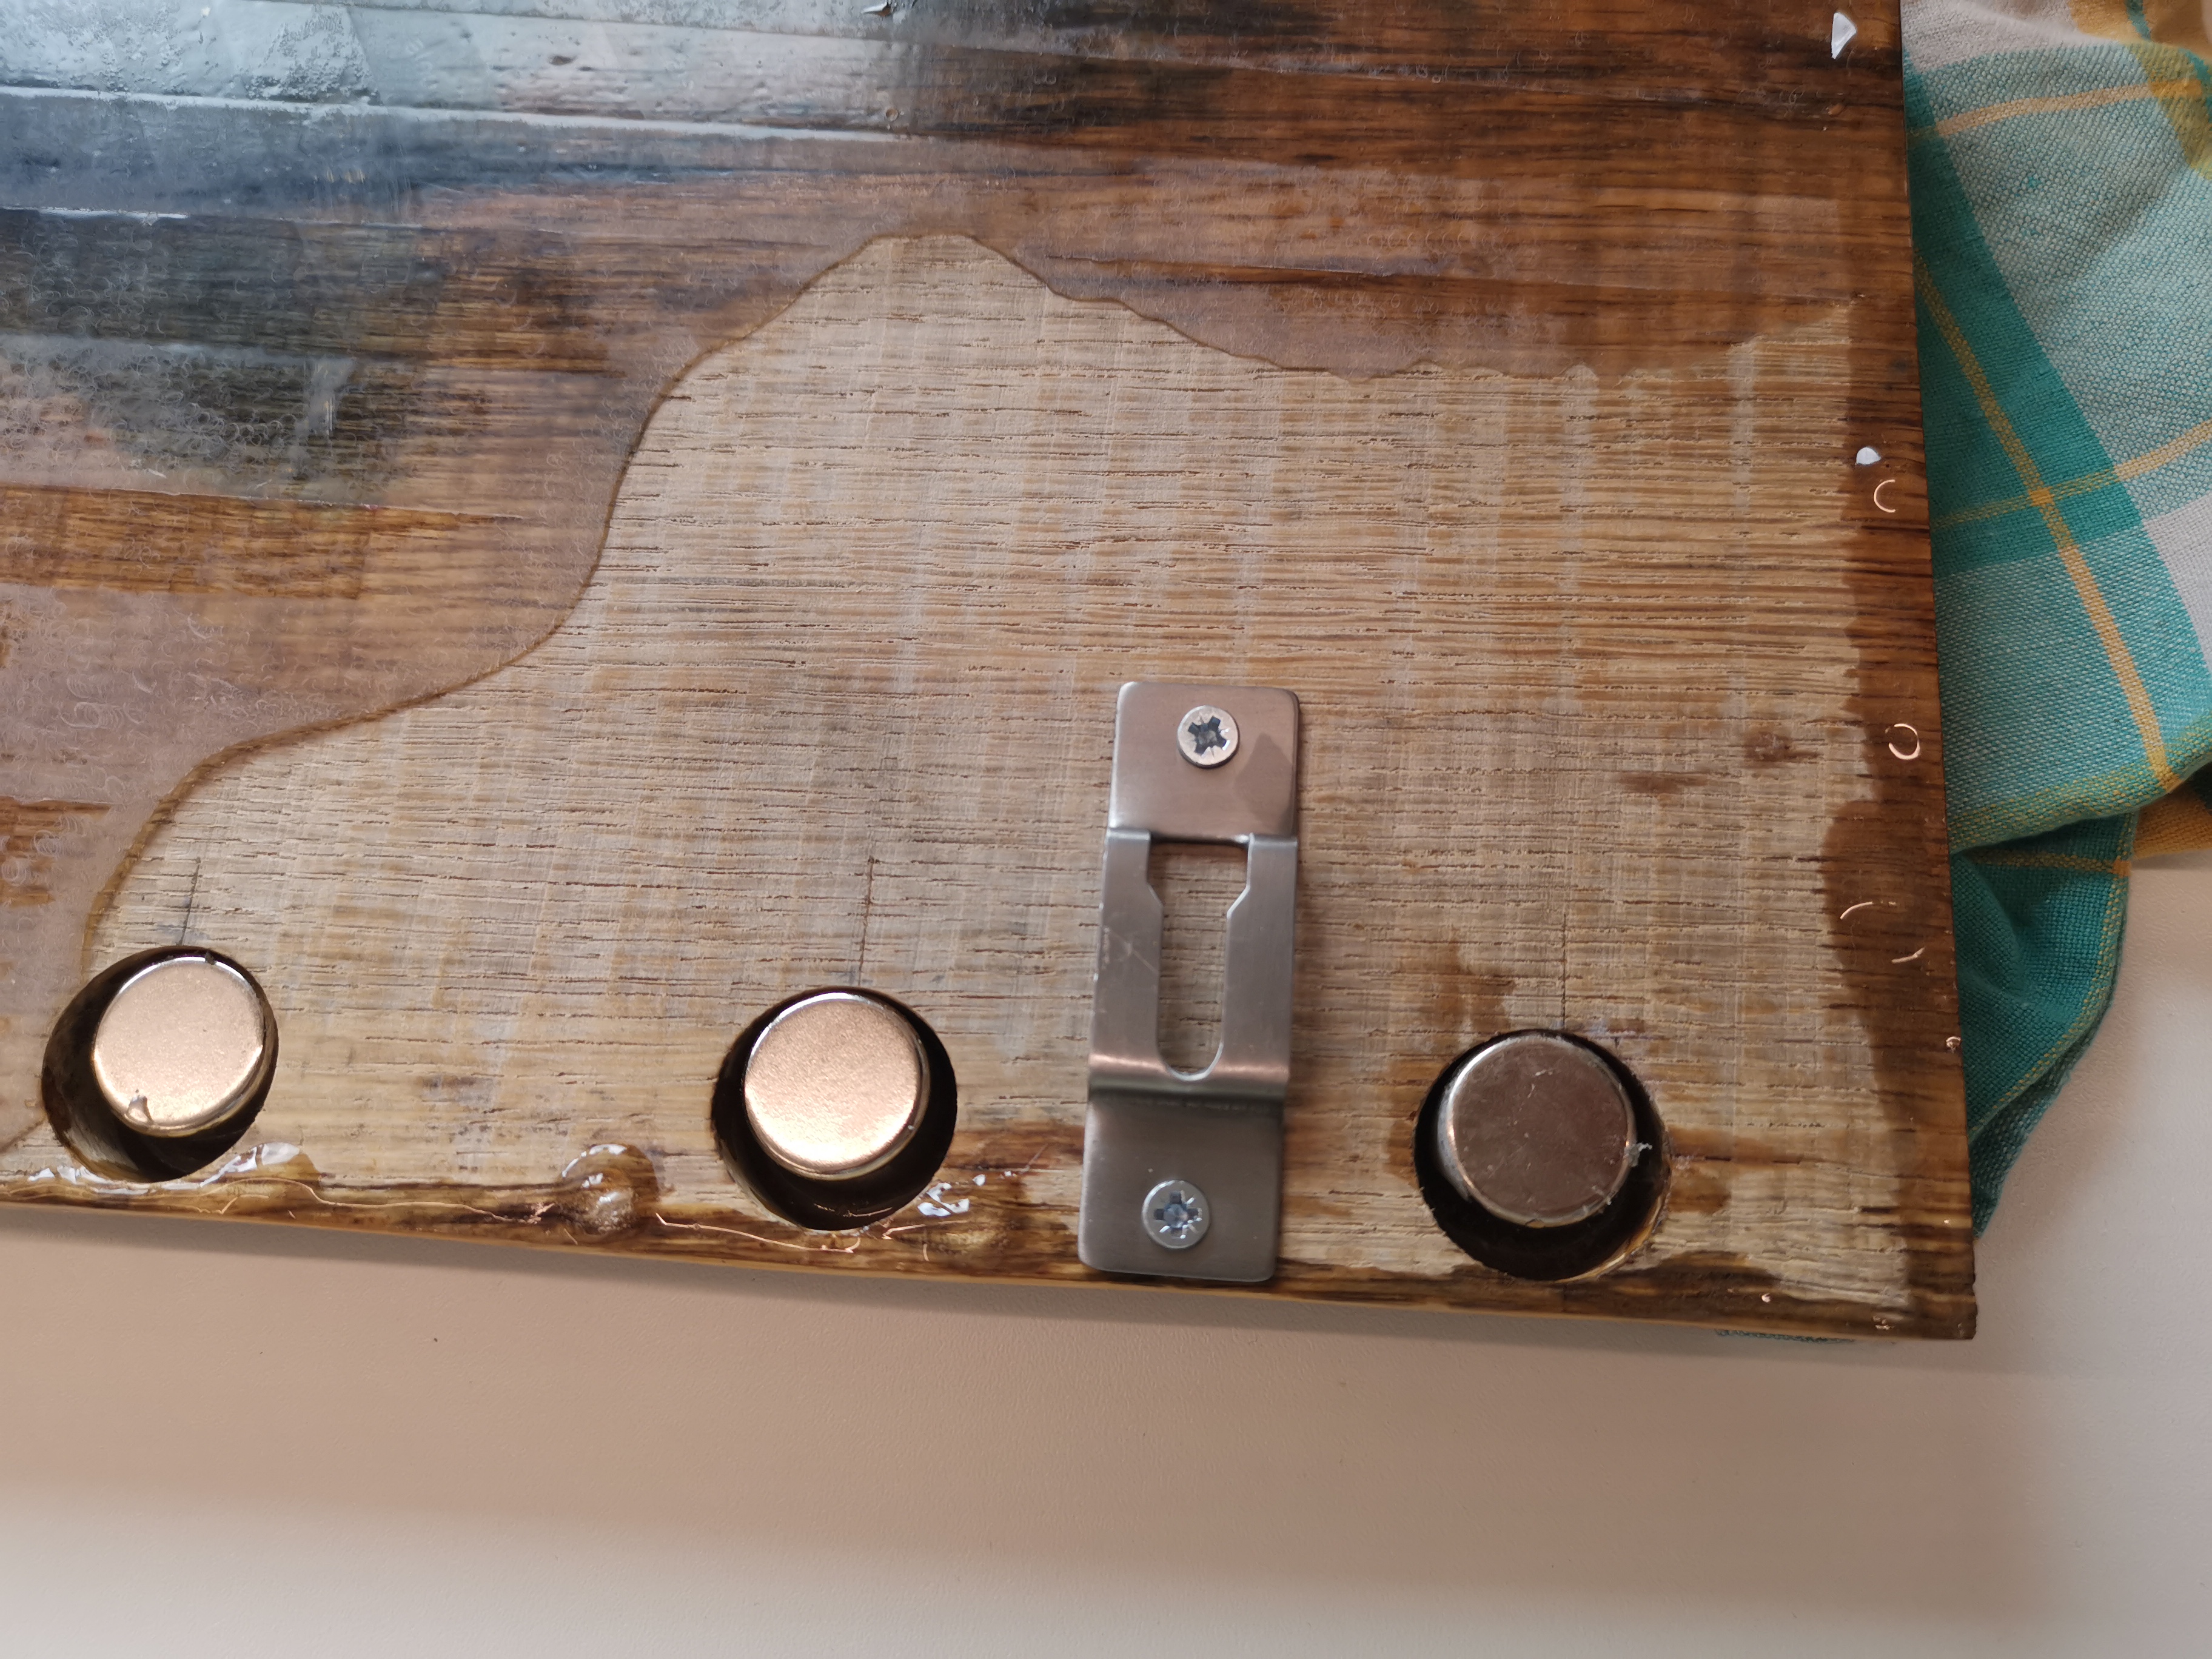
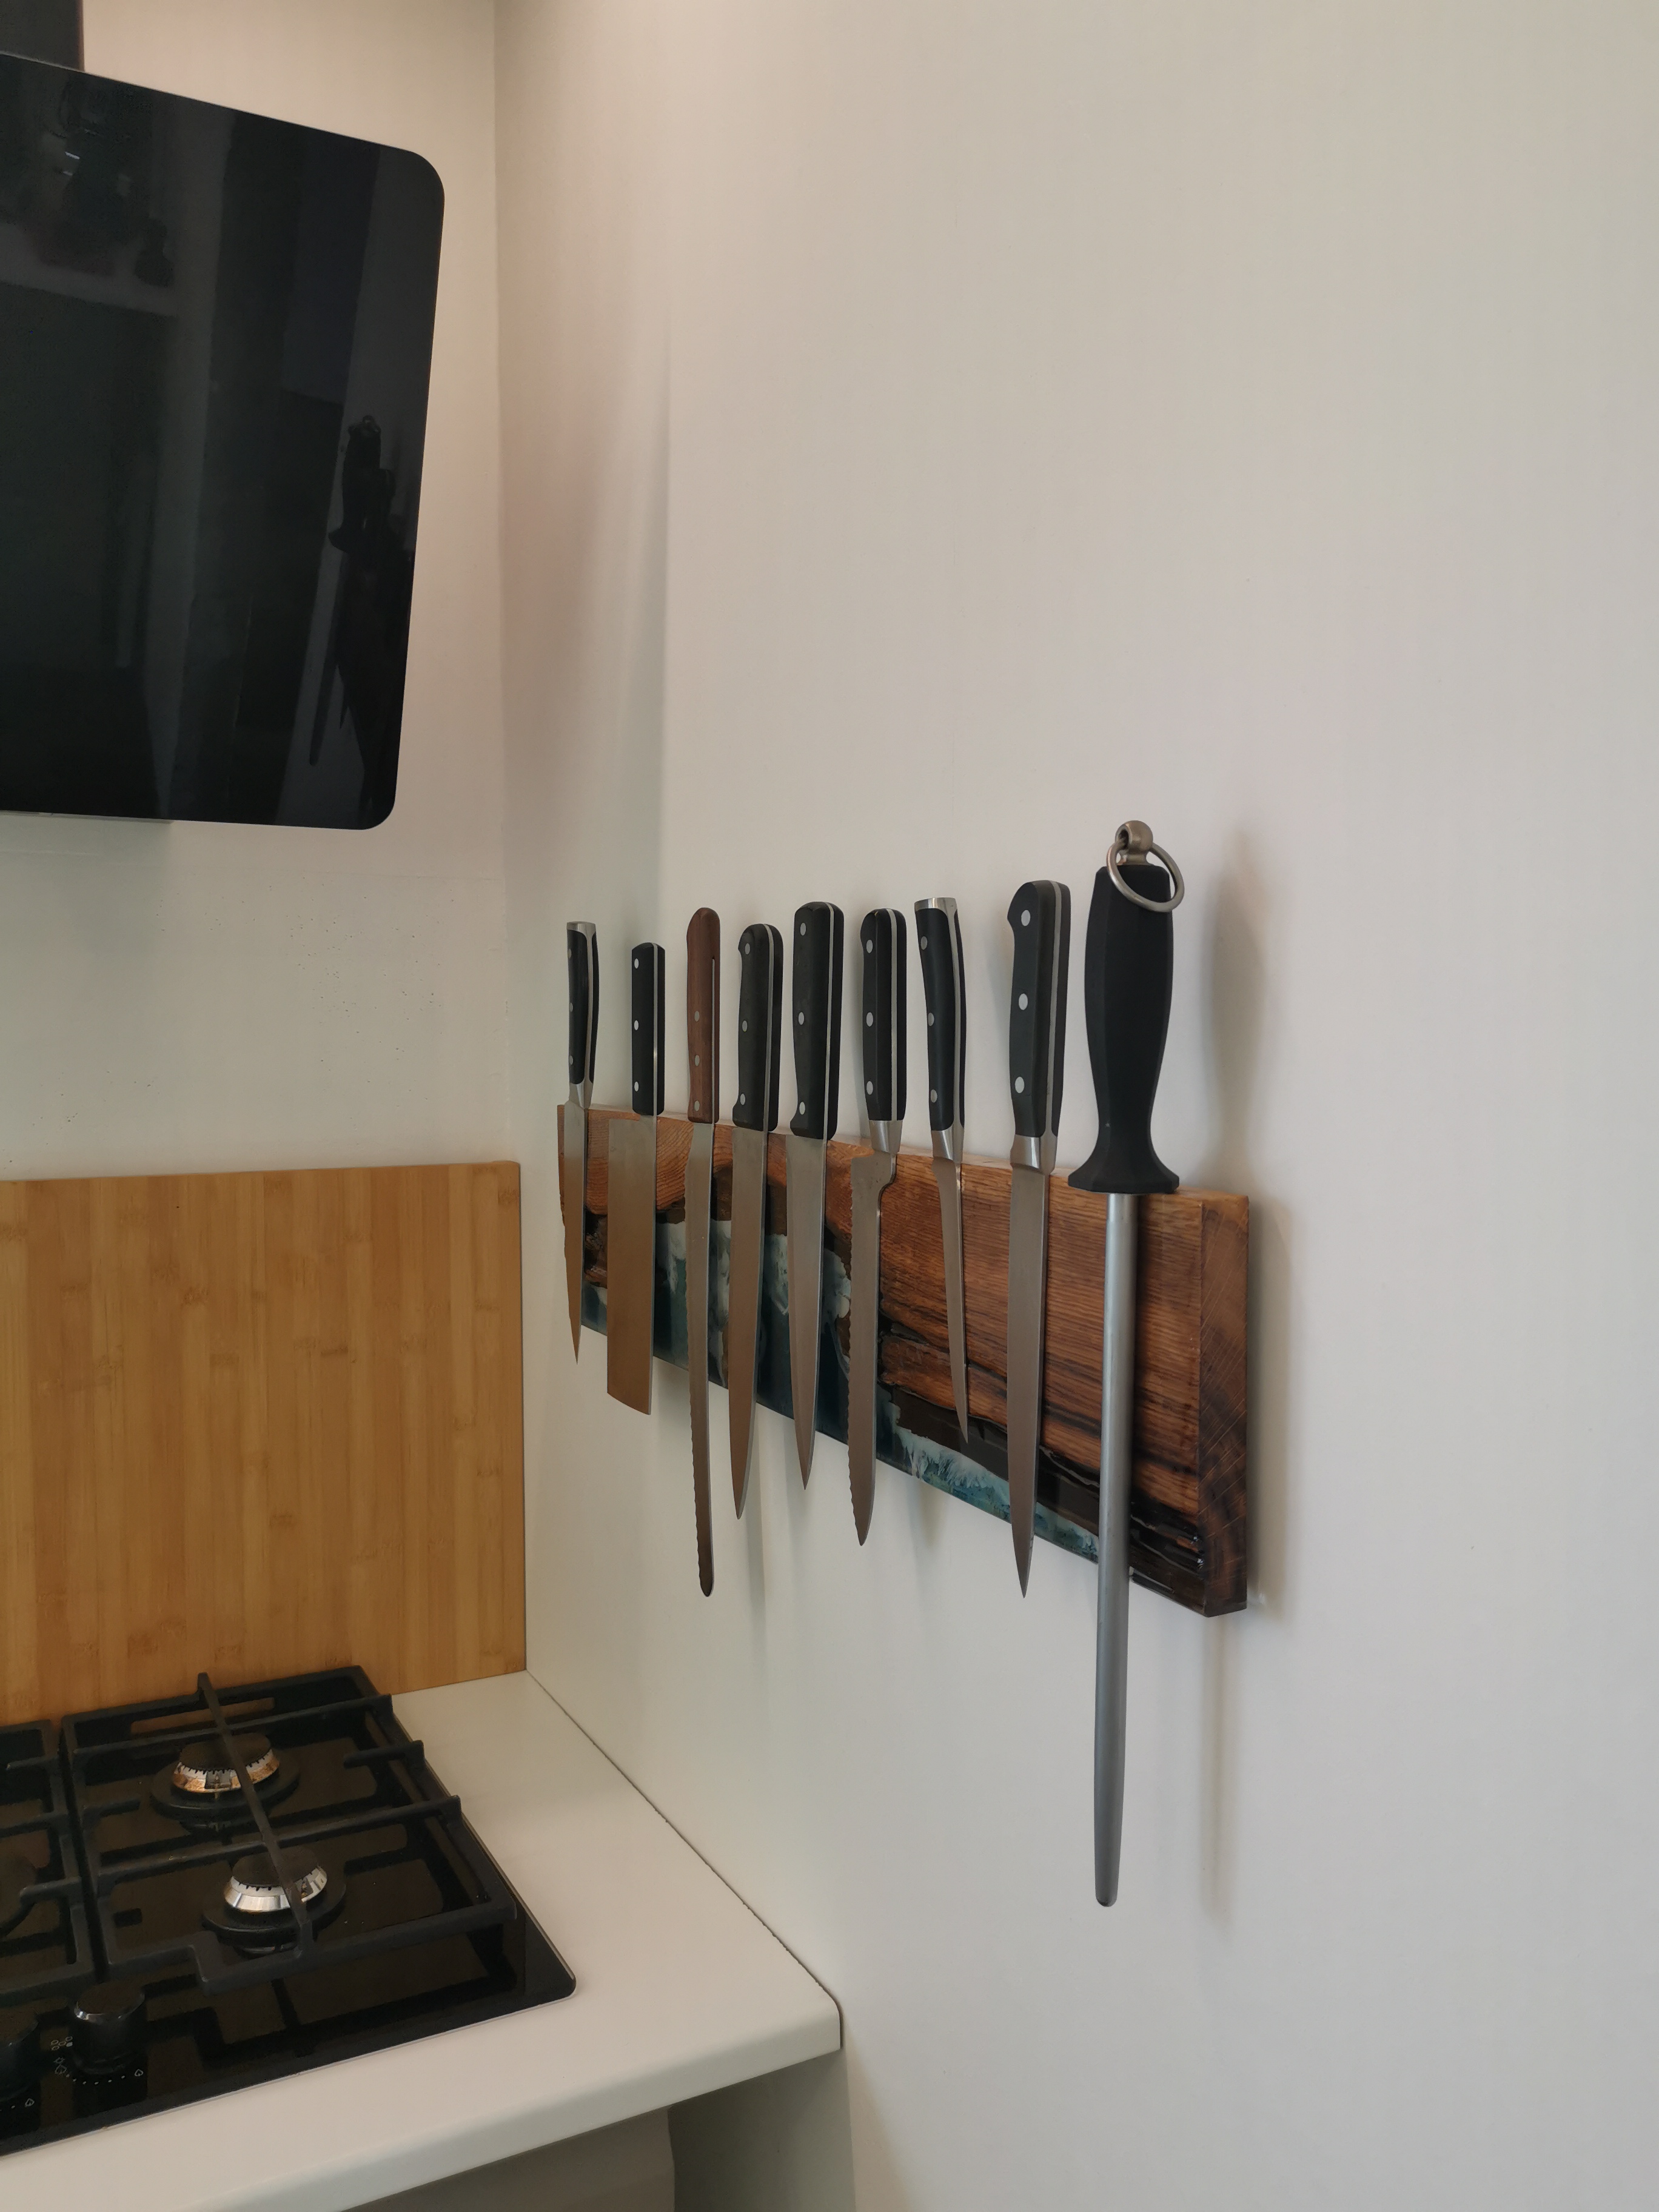
I built the mold myself from concrete plywood and lined it with packing tape so the cured epoxy would release cleanly. On the back side, I drilled evenly spaced holes for neodymium magnets and fixed them with two-component adhesive so the knives stay firmly in place.
Finally, I mounted the knife block to the kitchen wall with sturdy hooks. A piece of firewood got a second life, and at the same time became a lasting memory of a beautiful family trip.

More epoxy reading
Do you want to make your own DIY epoxy knife holder? Also read which epoxy yellows the least, how to prevent amine blush, and which epoxy resin to choose for each project.
Mijn gebruikte materialen:
Let’s Resin epoxyhars set met mica poeder
Let’s Resin epoxyhars set met pompen en toebehoren
Let’s Resin alcoholinkt set (26 flesjes)
DecoRom pigmentpasta voor oceaangolven
Affiliate disclaimer: some links are affiliate links. If you buy via such a link, I may receive a small commission at no extra cost to you.