Making epoxy coasters is one of the best beginner projects to start with resin. You don’t need expensive equipment, the materials are affordable and the result is immediately usable and can be given away. In this manual I will take you step by step — and I will show you how I made freeform molds with a glue gun without purchasing a mold. With varying degrees of success, to be honest. Because not everything goes smoothly, and that’s okay.
Two ways: purchased mold vs. homemade freeform mold
Both methods work great for beginners. The big difference:
- Purchased silicone mold: tight, even thickness, result is finished immediately — ideal if you want quick results and make a uniform set
- Homemade freeform mold: completely free in shape, no additional purchase necessary if you already have a glue gun, each piece is unique — but please note: not all hot glue works. I will teach you later in this post exactly what went wrong for me.
Below I discuss both methods. The mixing, casting and finishing steps are identical for both — the only thing different is how you make the mold.
What do you need?
The great thing about coasters is that you can really get by with very little. This is what you need:
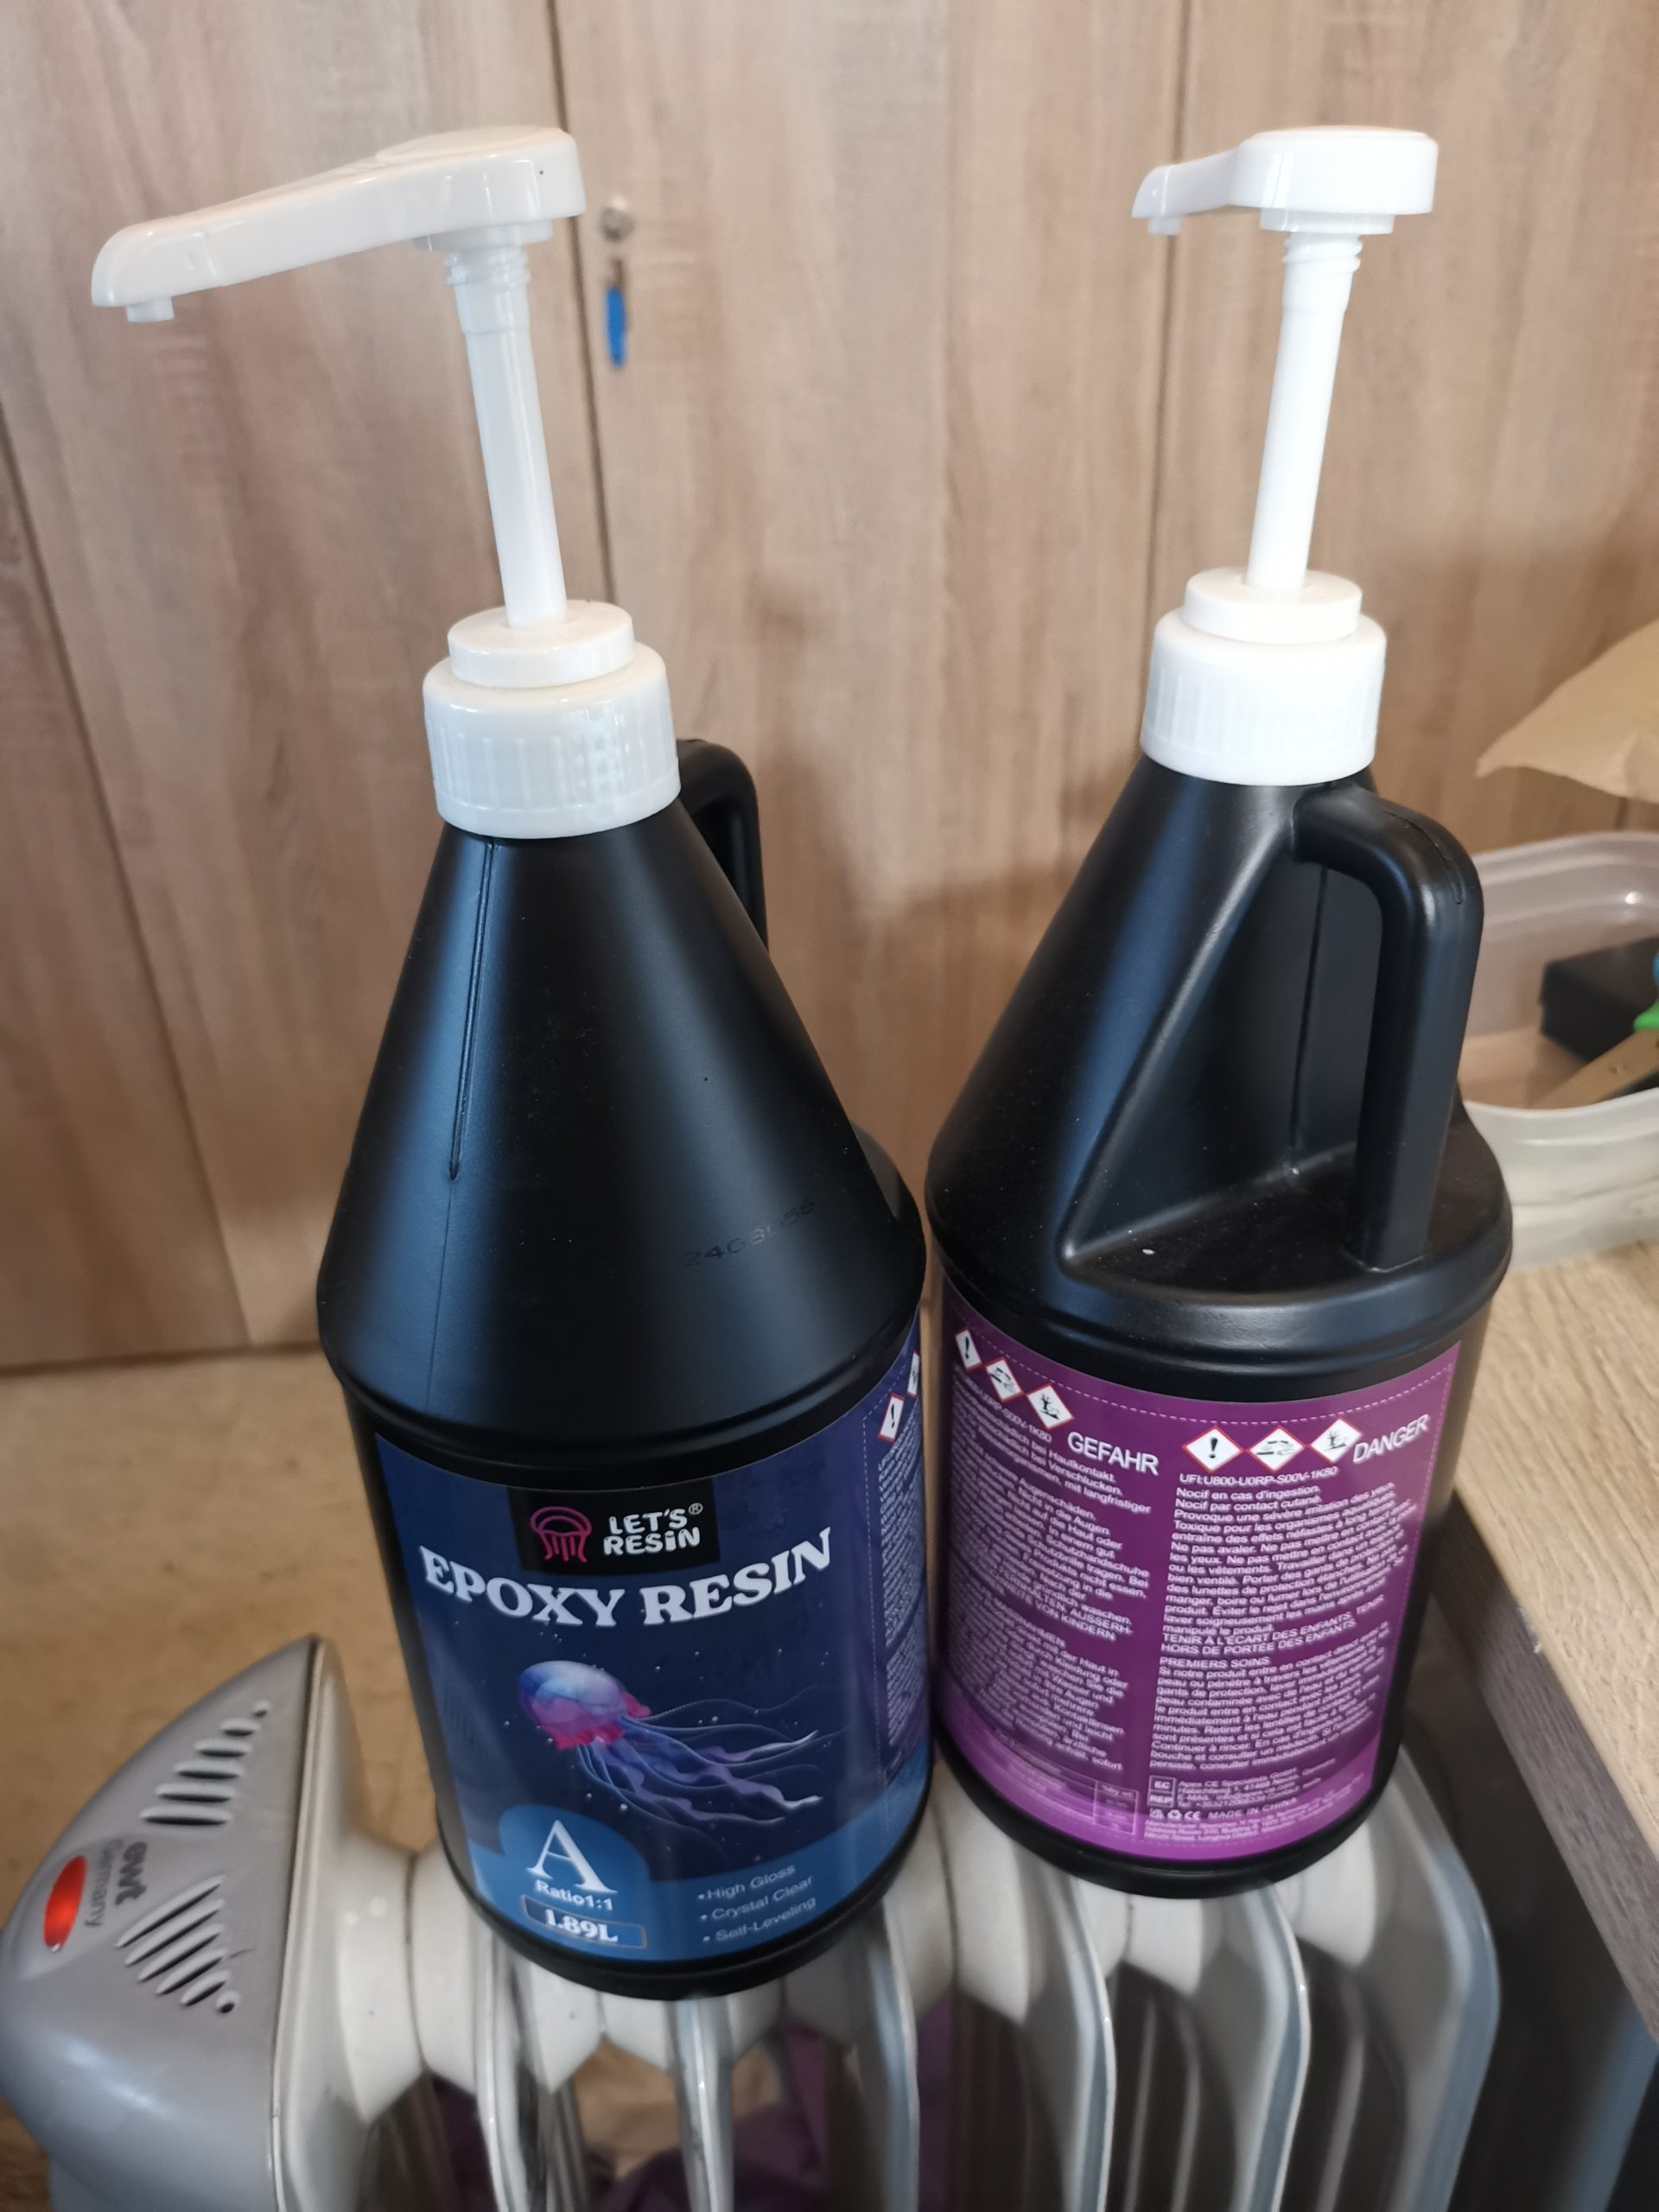
- Casting epoxy (coating epoxy, no coating epoxy) — choose a clear, UV-stable variant. I used Let’s Resin Crystal Clear 1:1.
- Mold of your choice: a purchased silicone mold for coasters (round or square, ±9–10 cm) or a glue gun + silicone mat (see below)
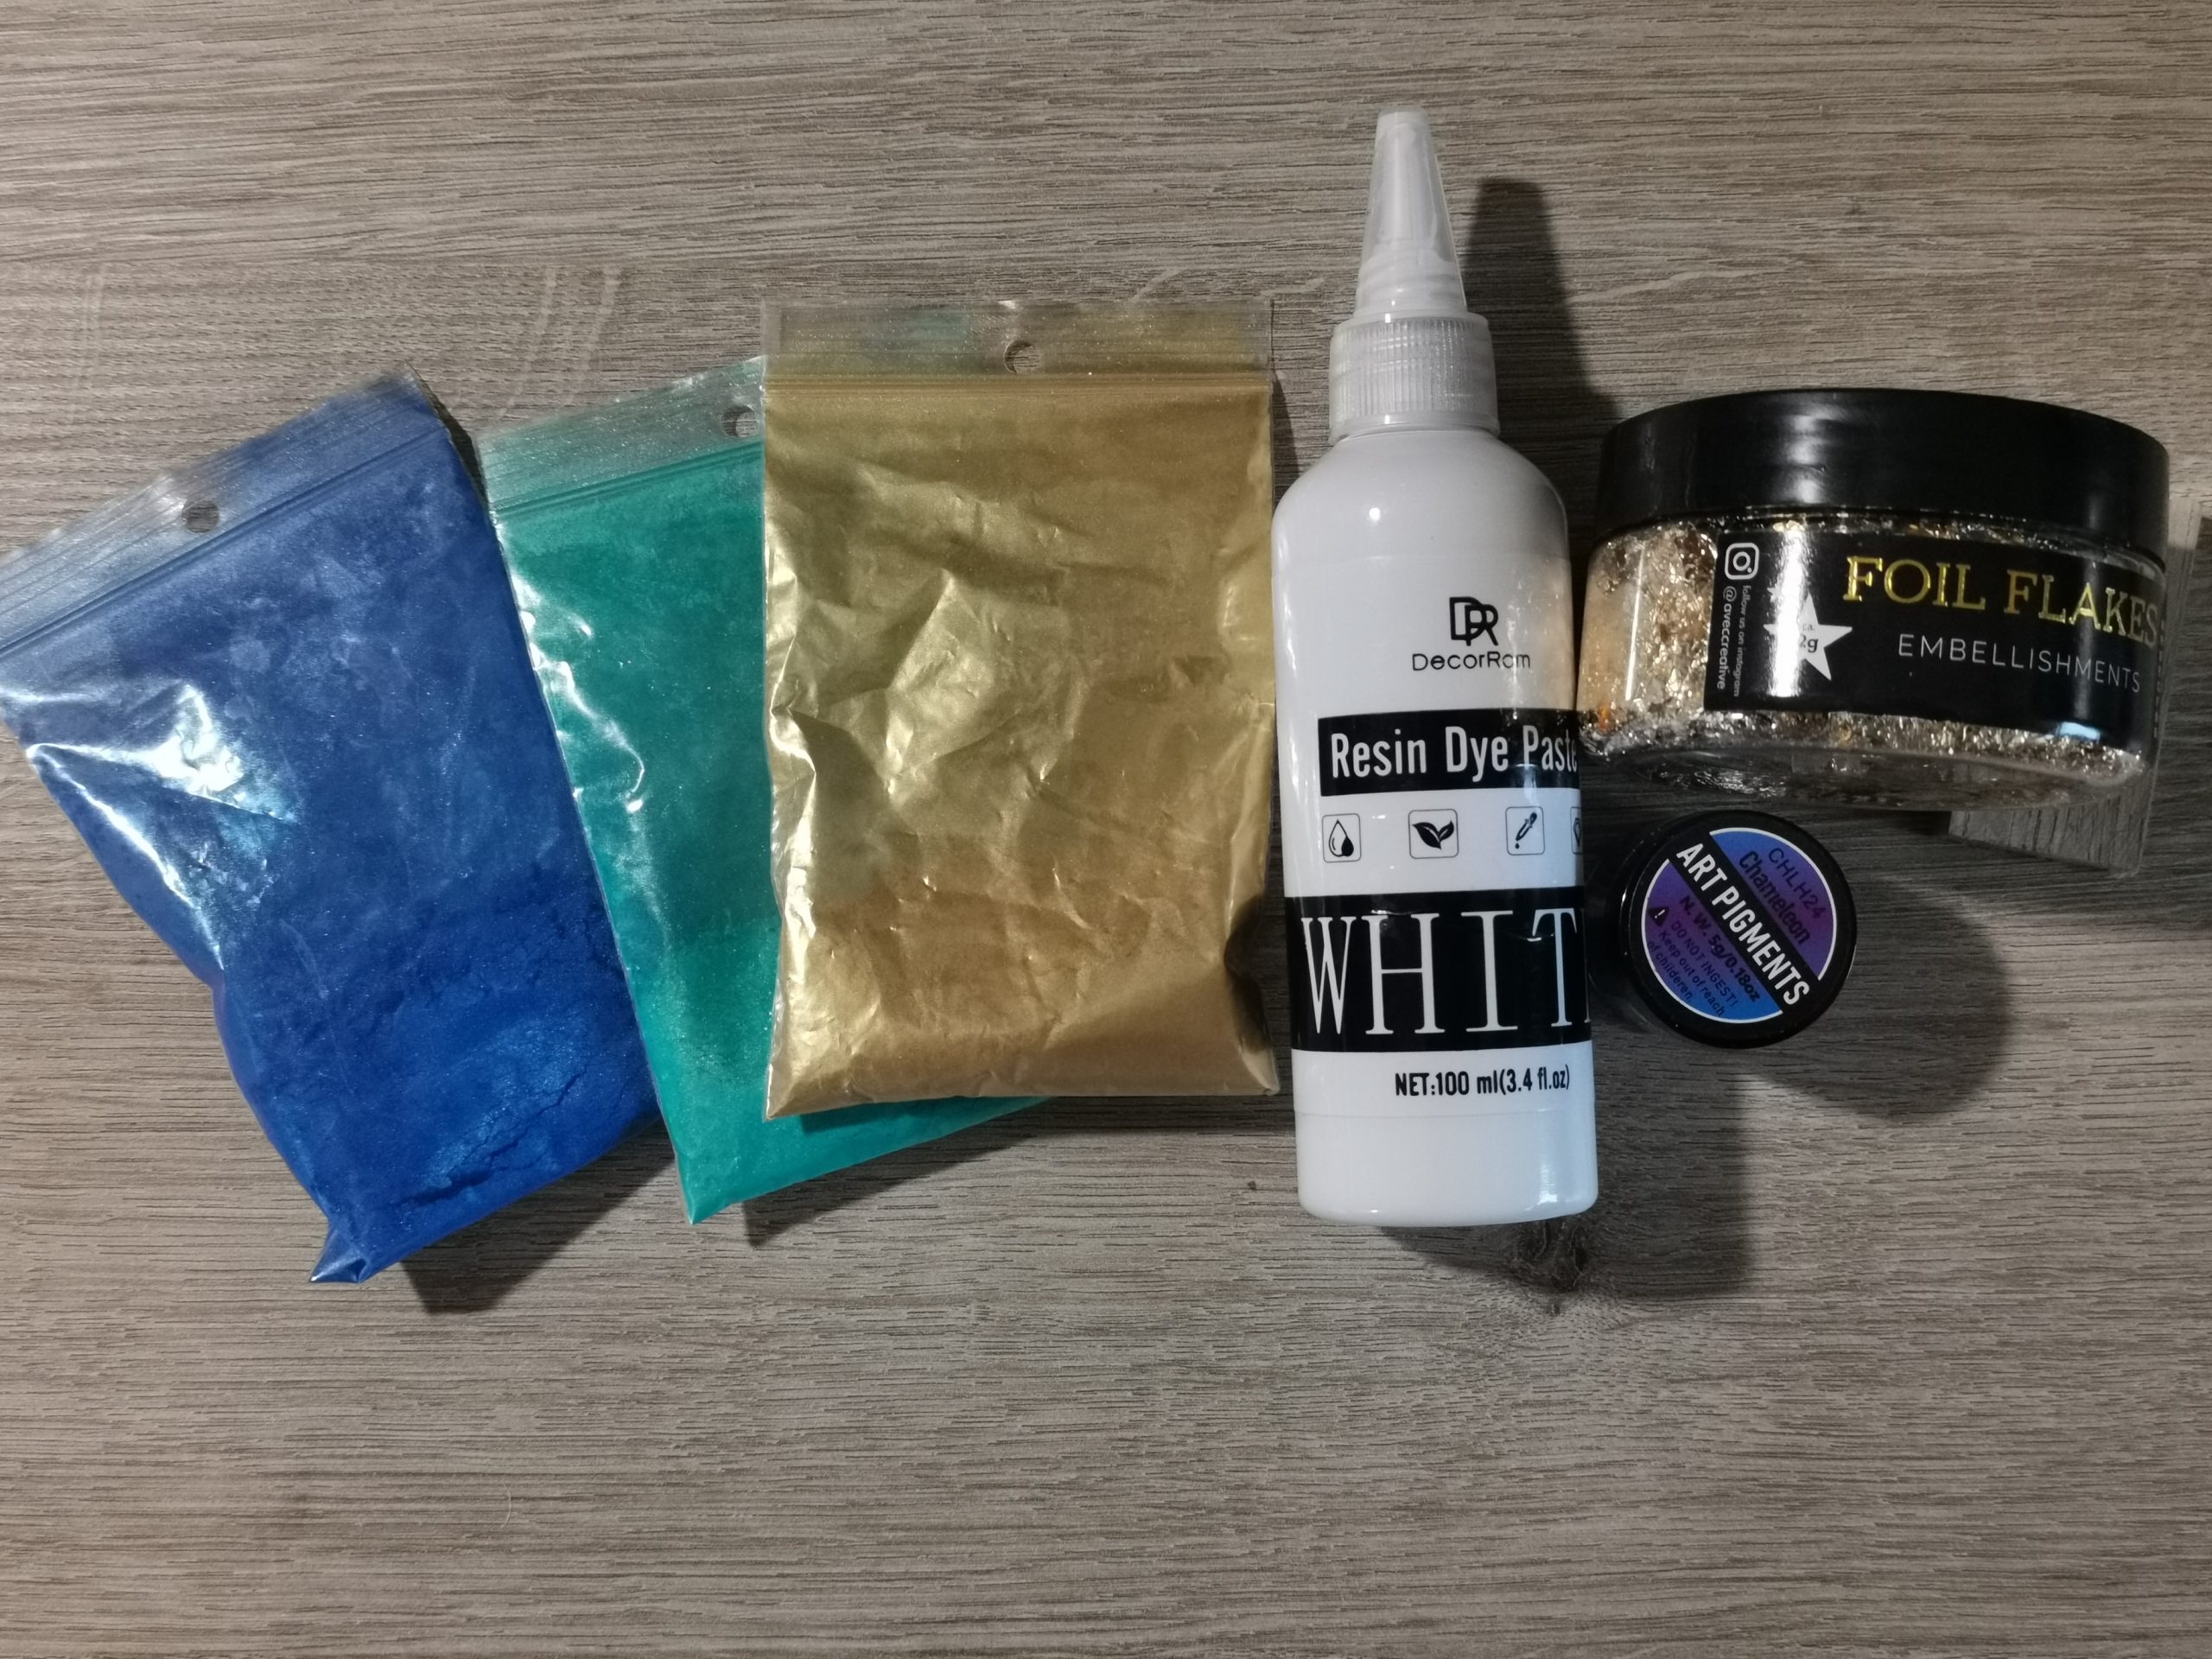
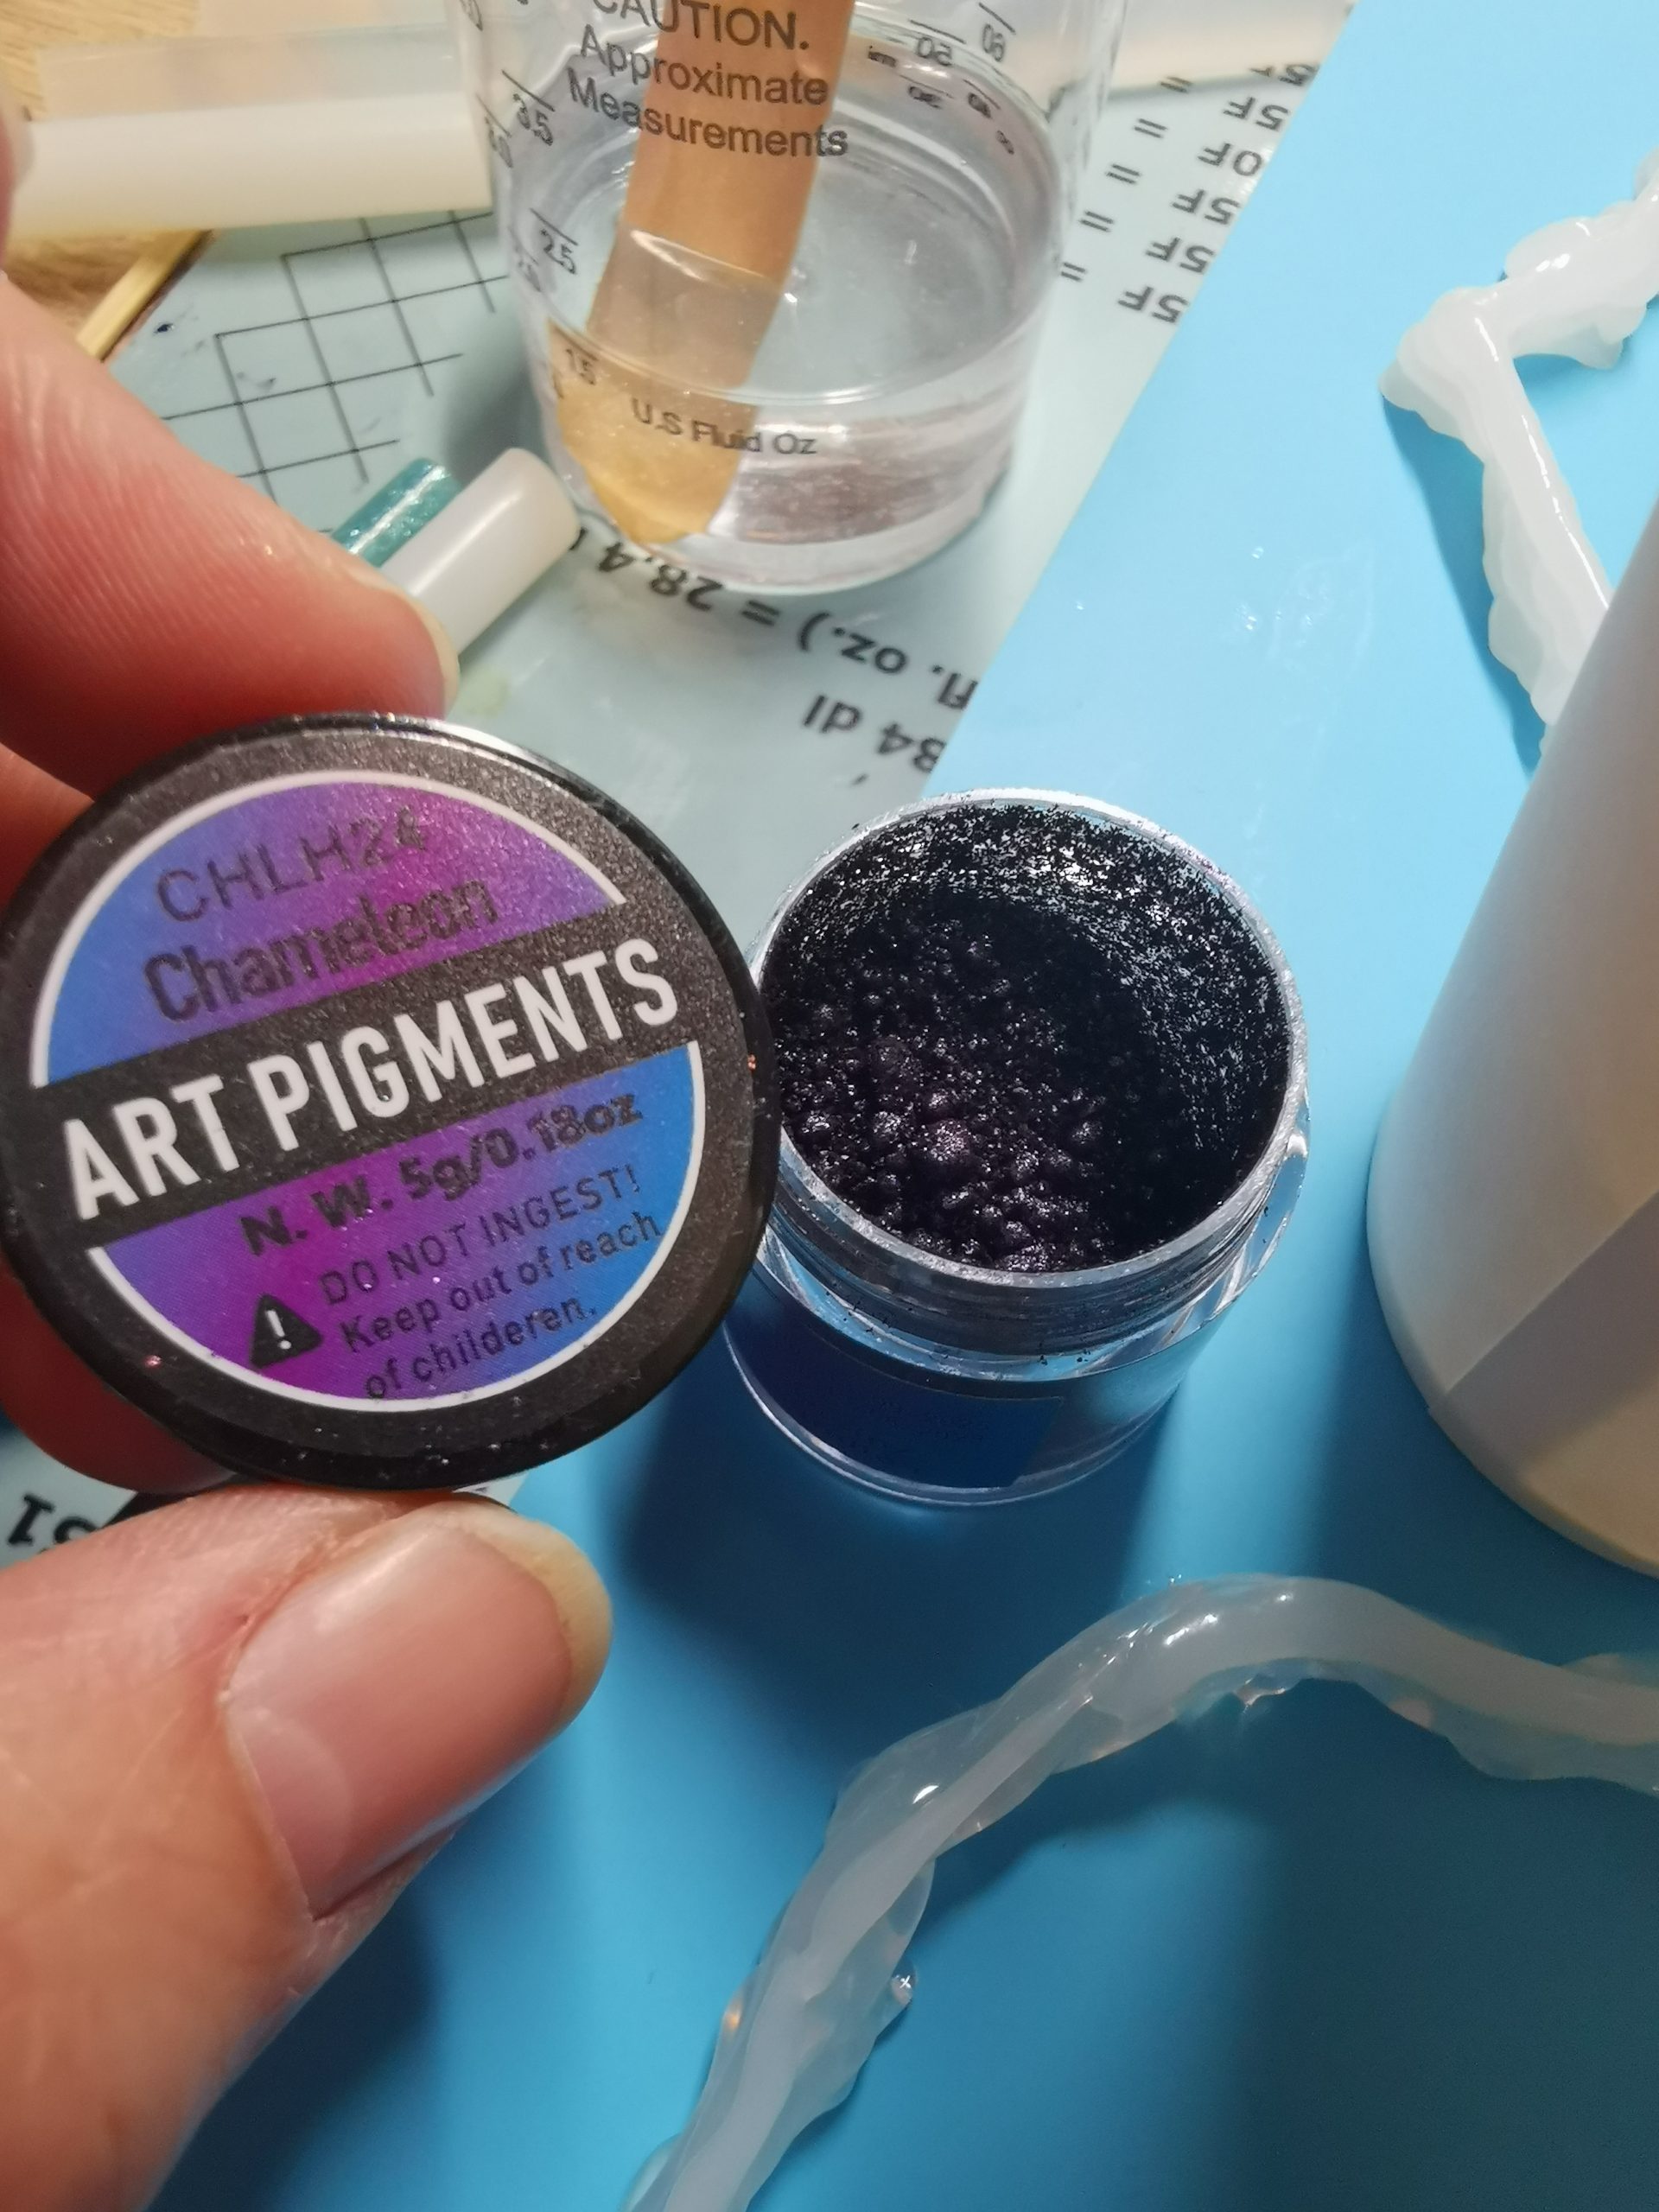
- Pigment paste or mica powder for color — I used mica powder in blue, teal and gold, white Resin Dye Paste and Art Pigments Chameleon CHLHX6
- Gold Leaf (Foil Flakes) for that geode look
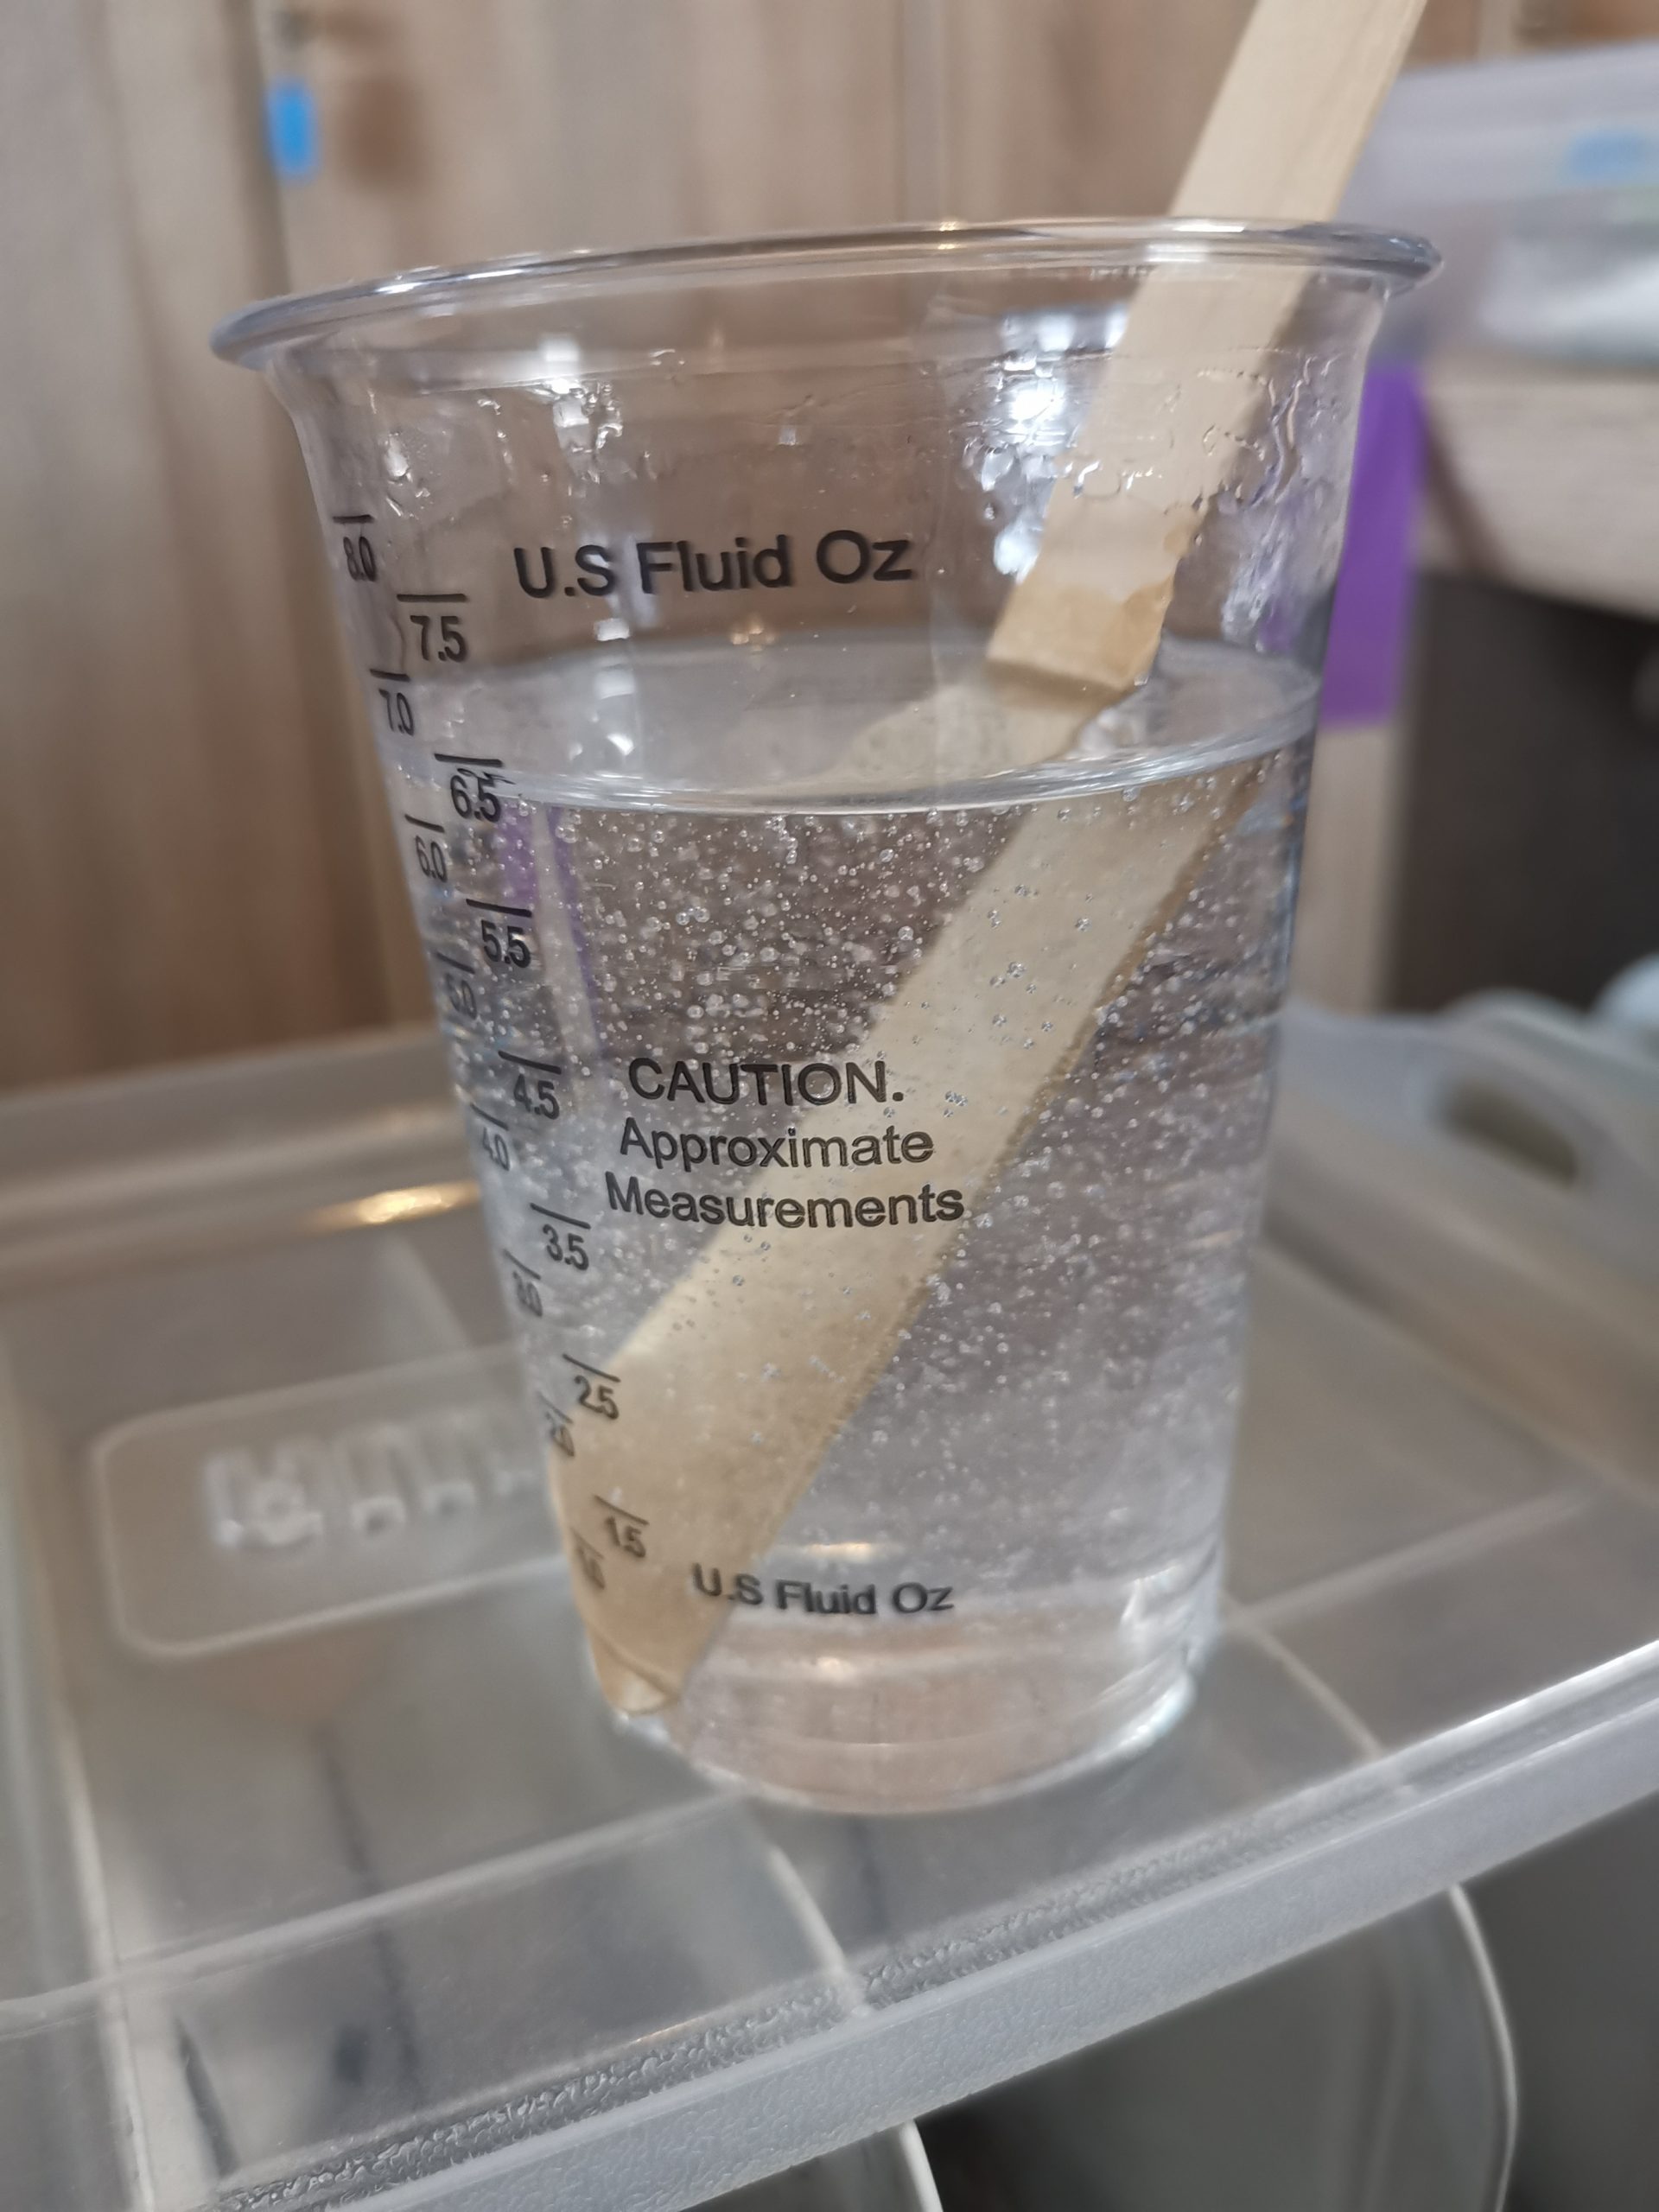
- Measuring cup (accurate)
- Paper cups or silicone/plastic pots for mixing colors
- Stirrers (wooden popsicle sticks work great)
- Protective gloves and face mask
- Flat surface (use a spirit level to be sure)
- Cover foil or cardboard to protect your worktop
- Optional: alcohol to remove bubbles
What you don’t need: a vacuum chamber, a heating mat or other expensive equipment. Everything on the above list costs less than $40 if you already have a scale.
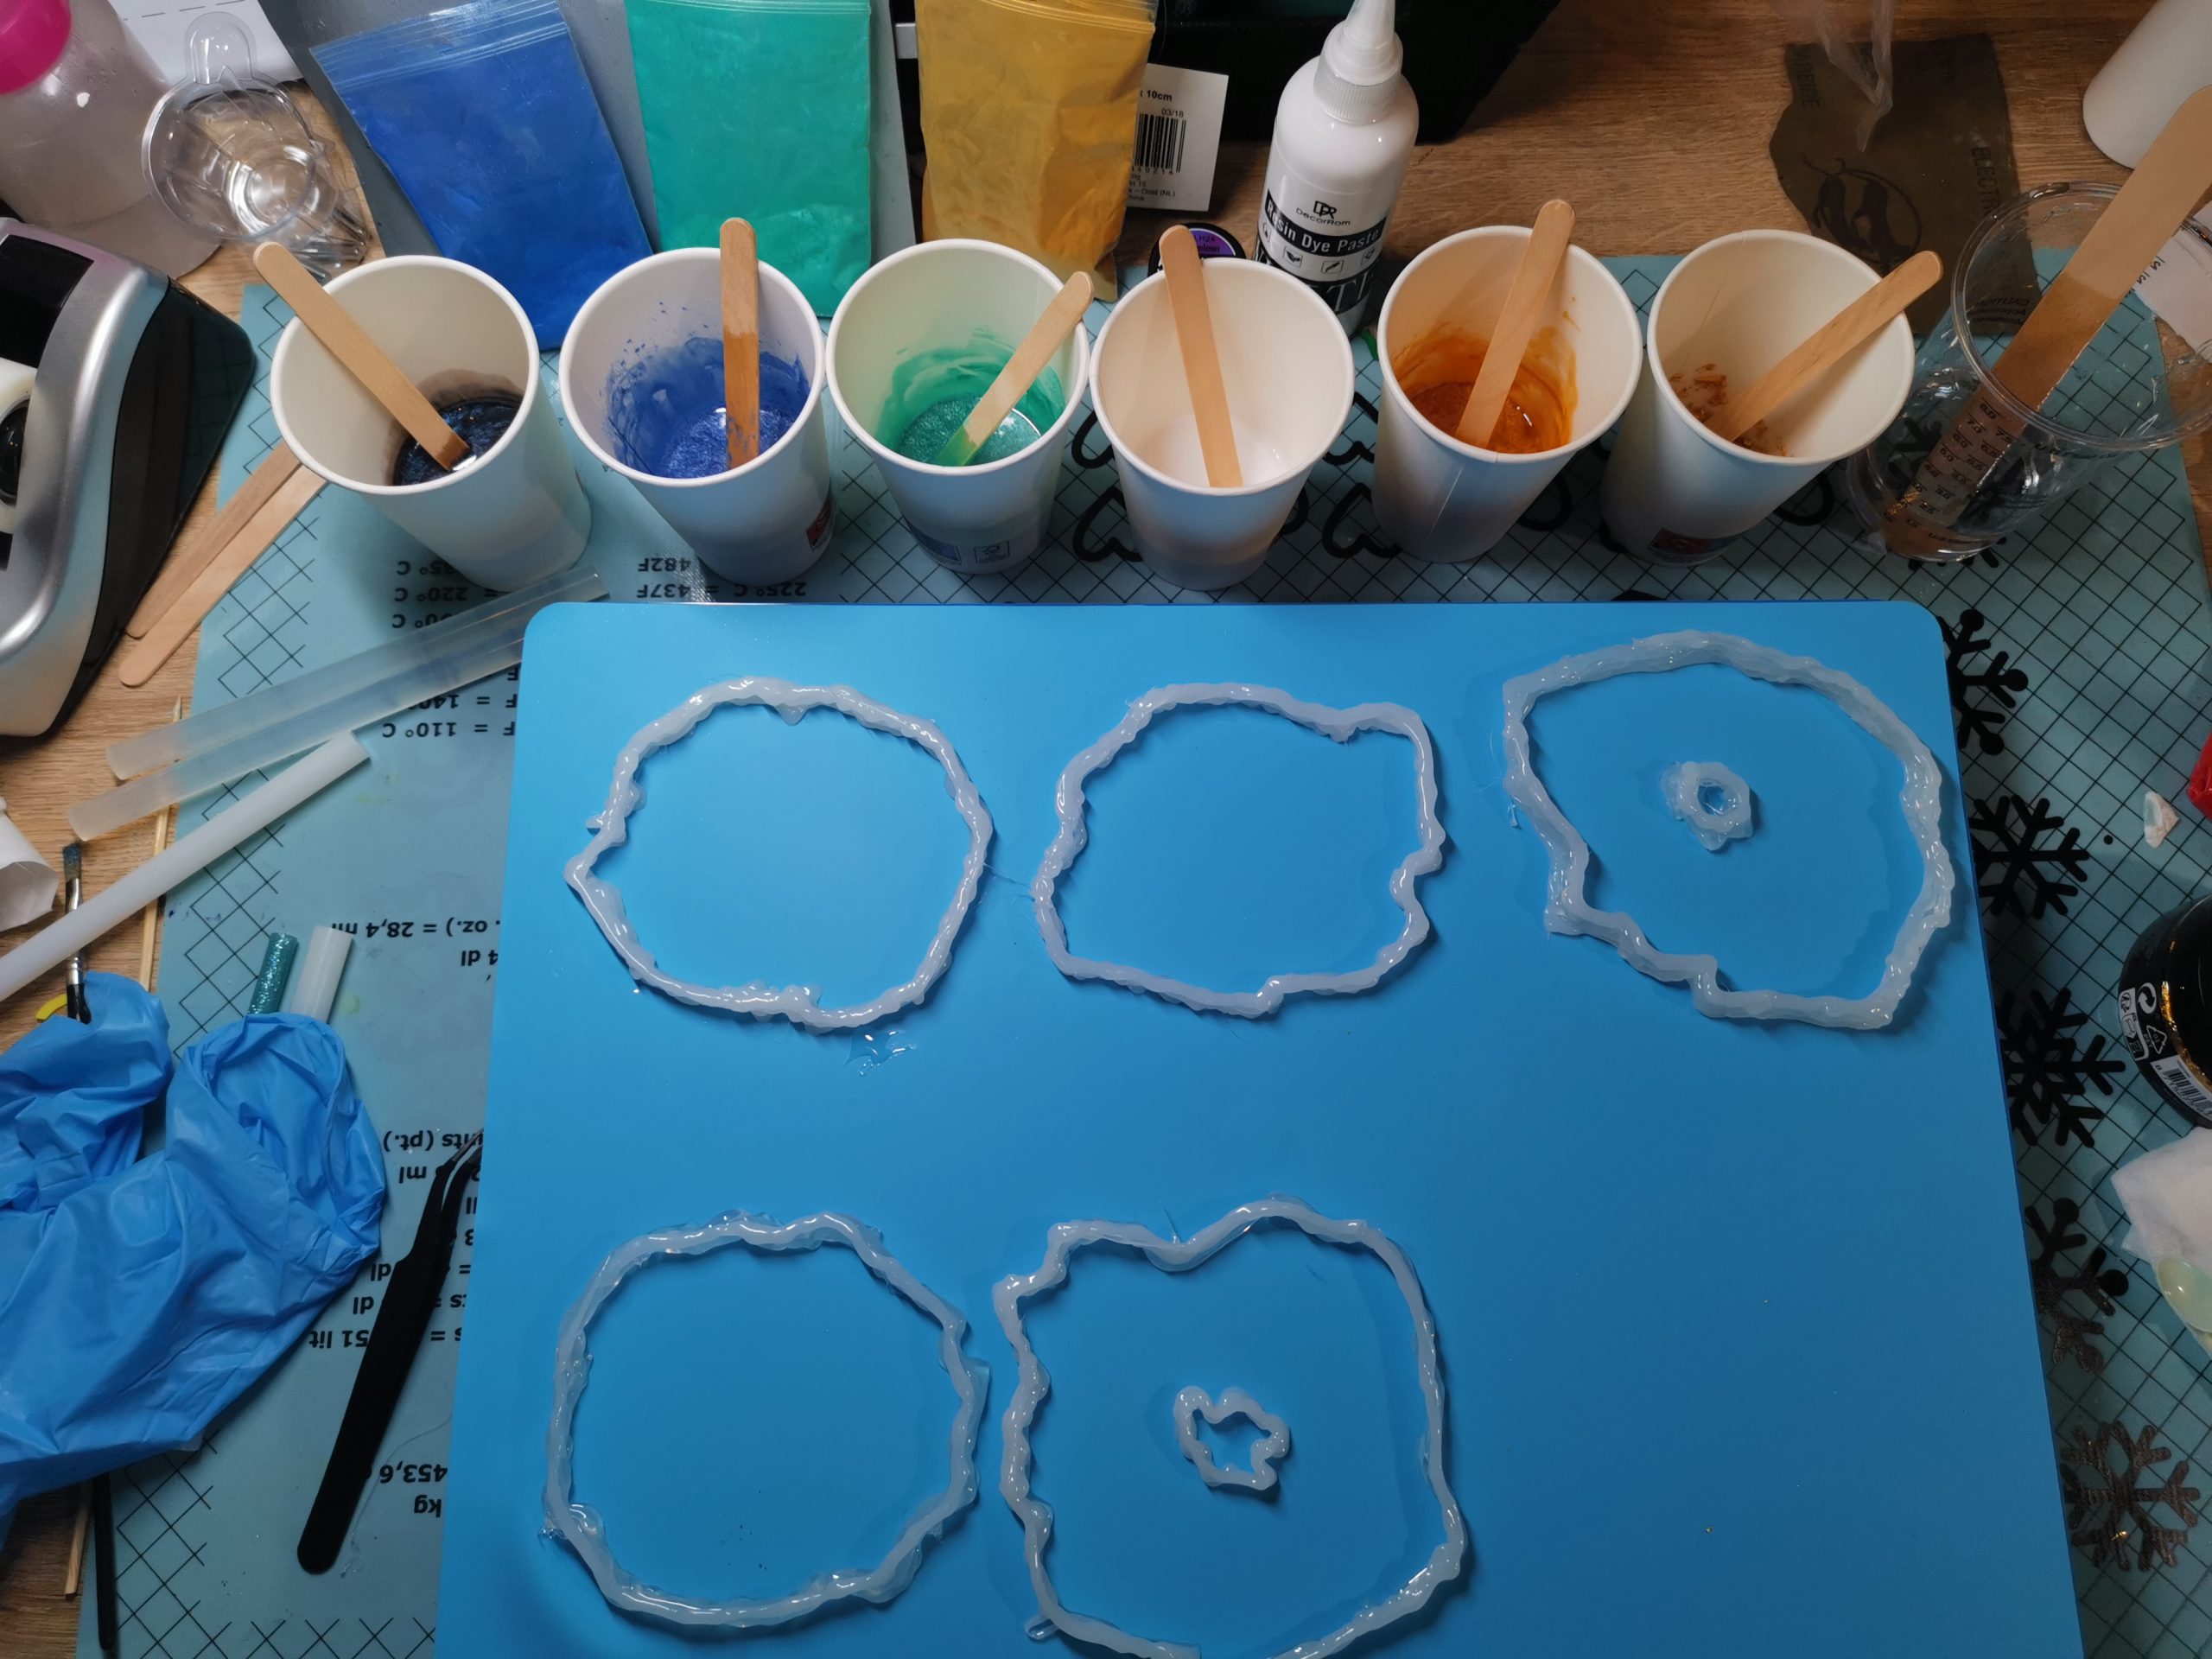
Making a freeform mold with a glue gun
This is the technique that gives you freedom. Instead of a fixed round or square shape, you spray the contour of your coaster onto a silicone mat with a glue gun. Epoxy does not adhere to silicone — so you can peel off the cured coaster afterwards.
How to do it:
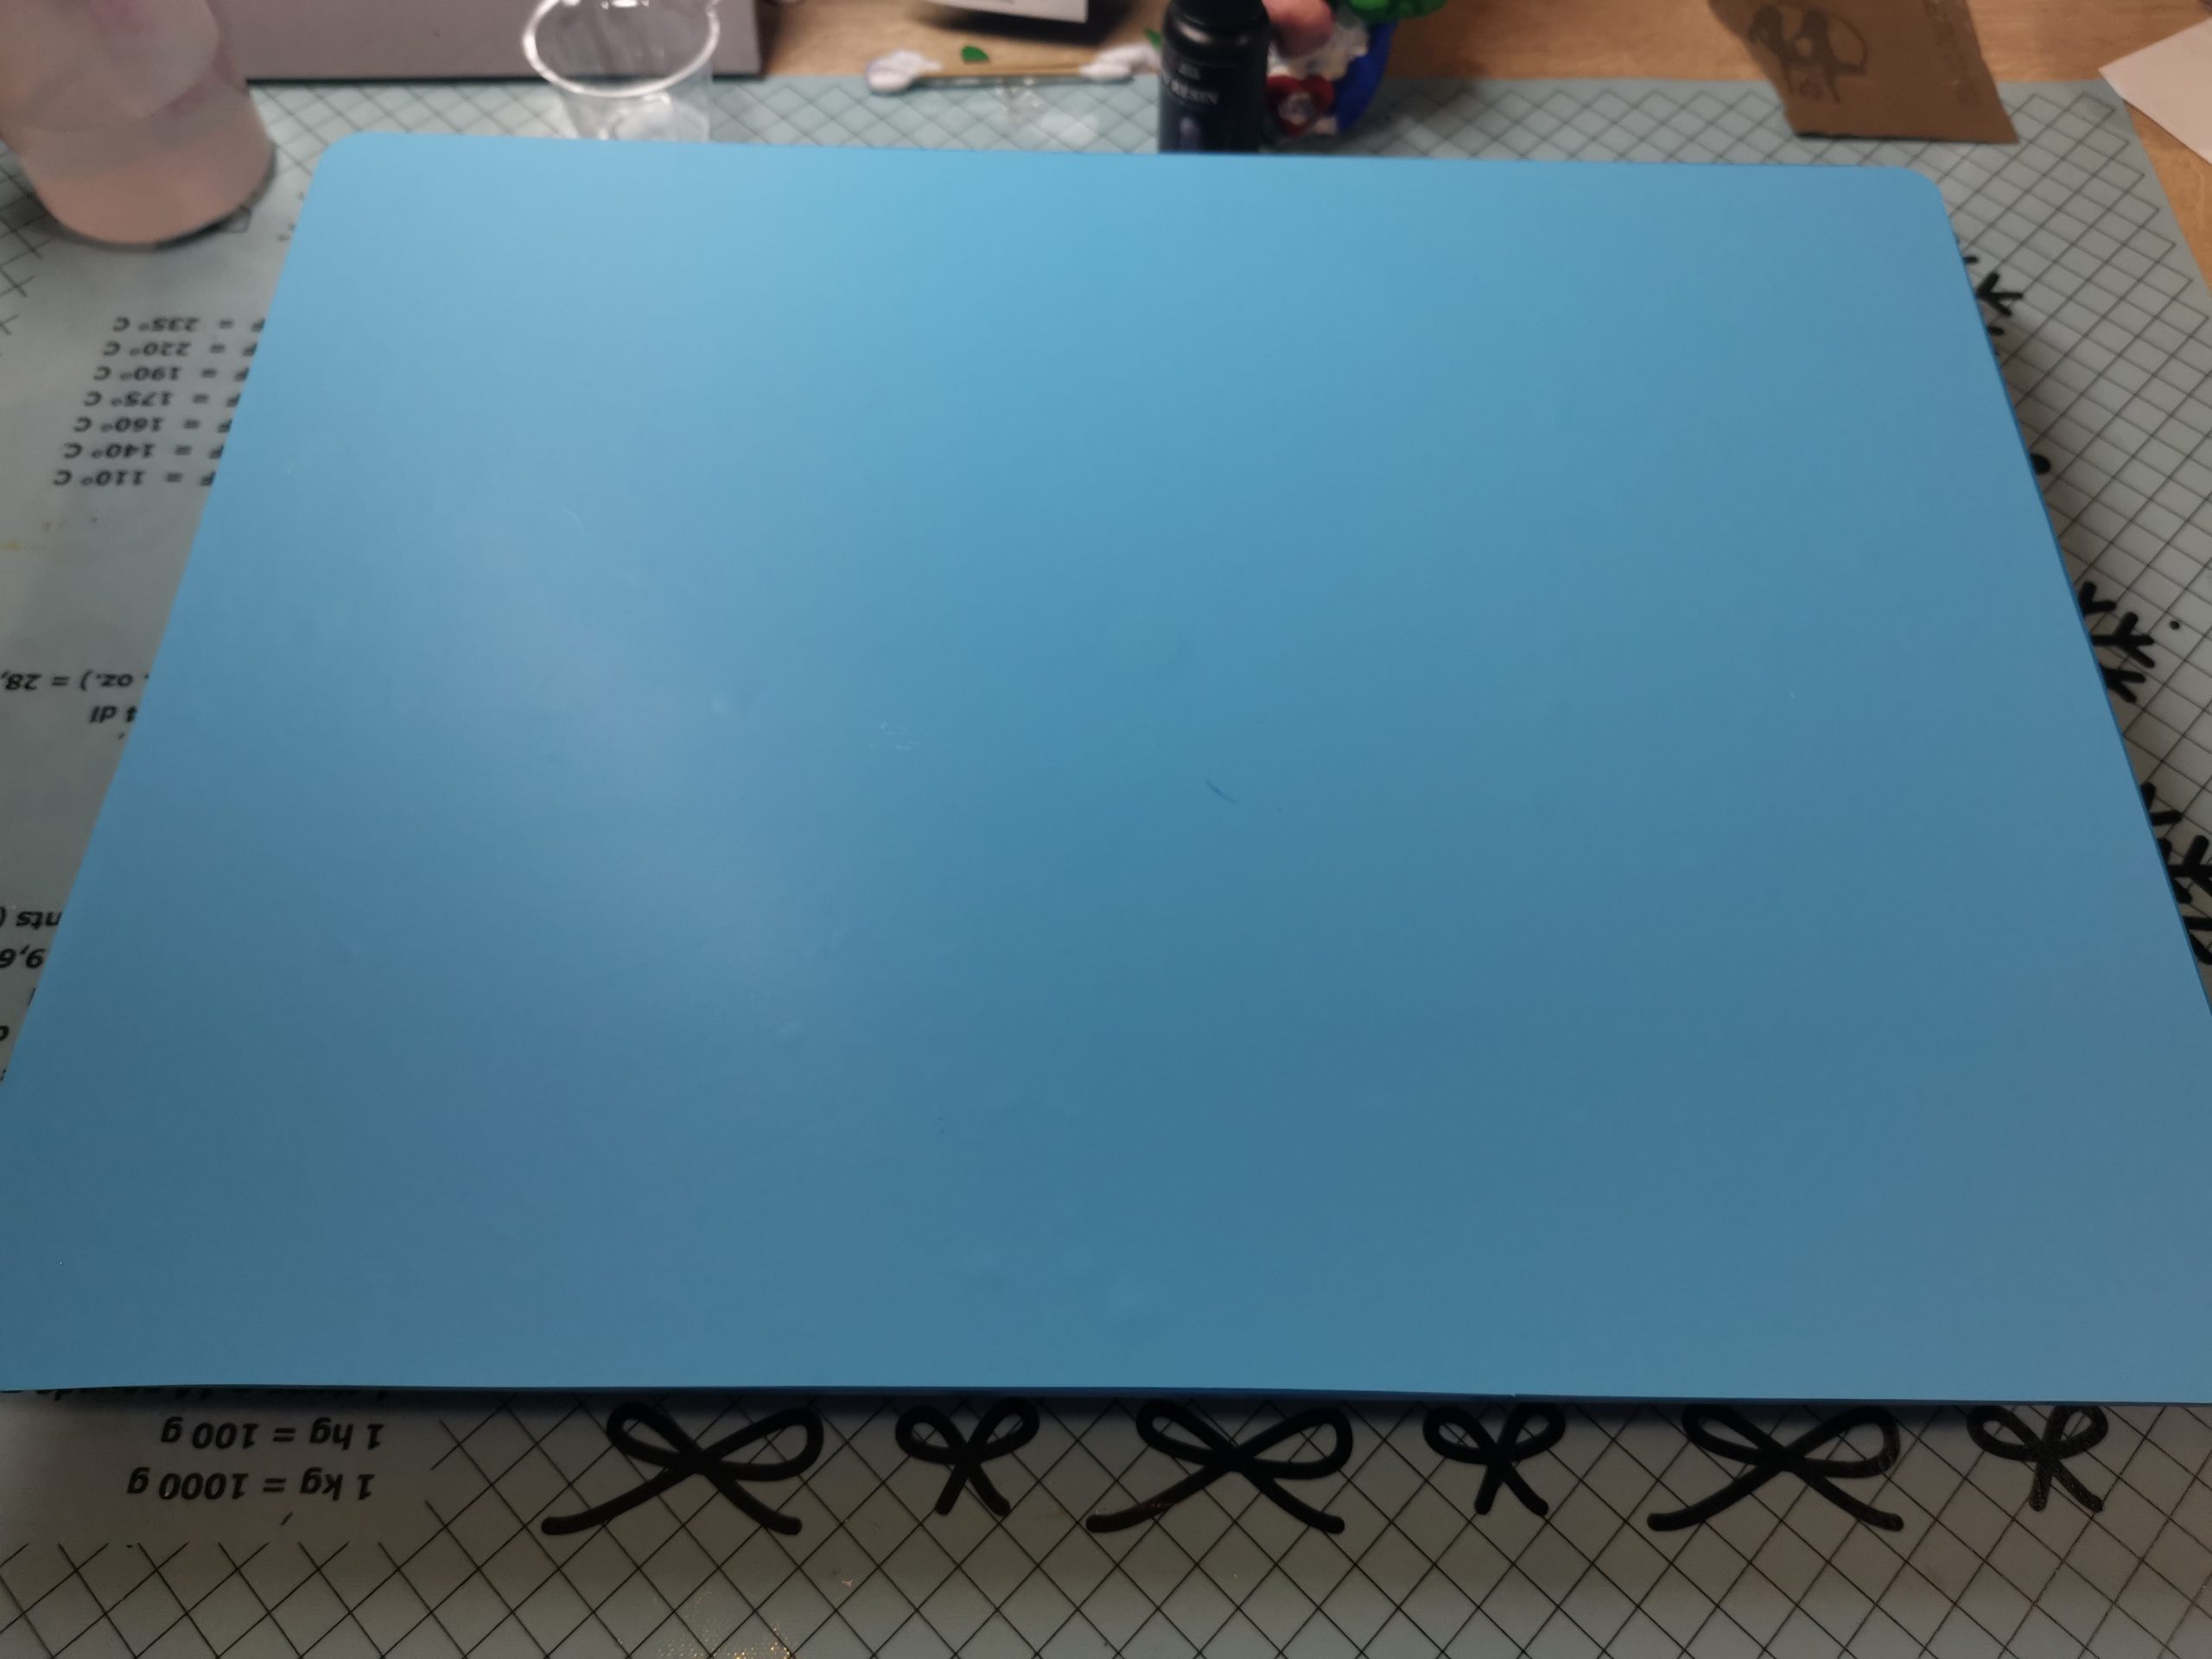
- Place your silicone mat flat on your work surface.
- Spray a closed contour in the shape you want with the glue gun: round, oval, organic, leaf shape — anything is possible. Make the glue edge at least 5–10 mm high so that the epoxy does not flow over the edge.
- Allow the adhesive edge to cool completely (±2 minutes). Check that there are no holes or thin spots. (for me it is…)
- Press the edge lightly on the mat so that the bottom fits properly.
- Your mold is ready. Pour in your mixed epoxy.
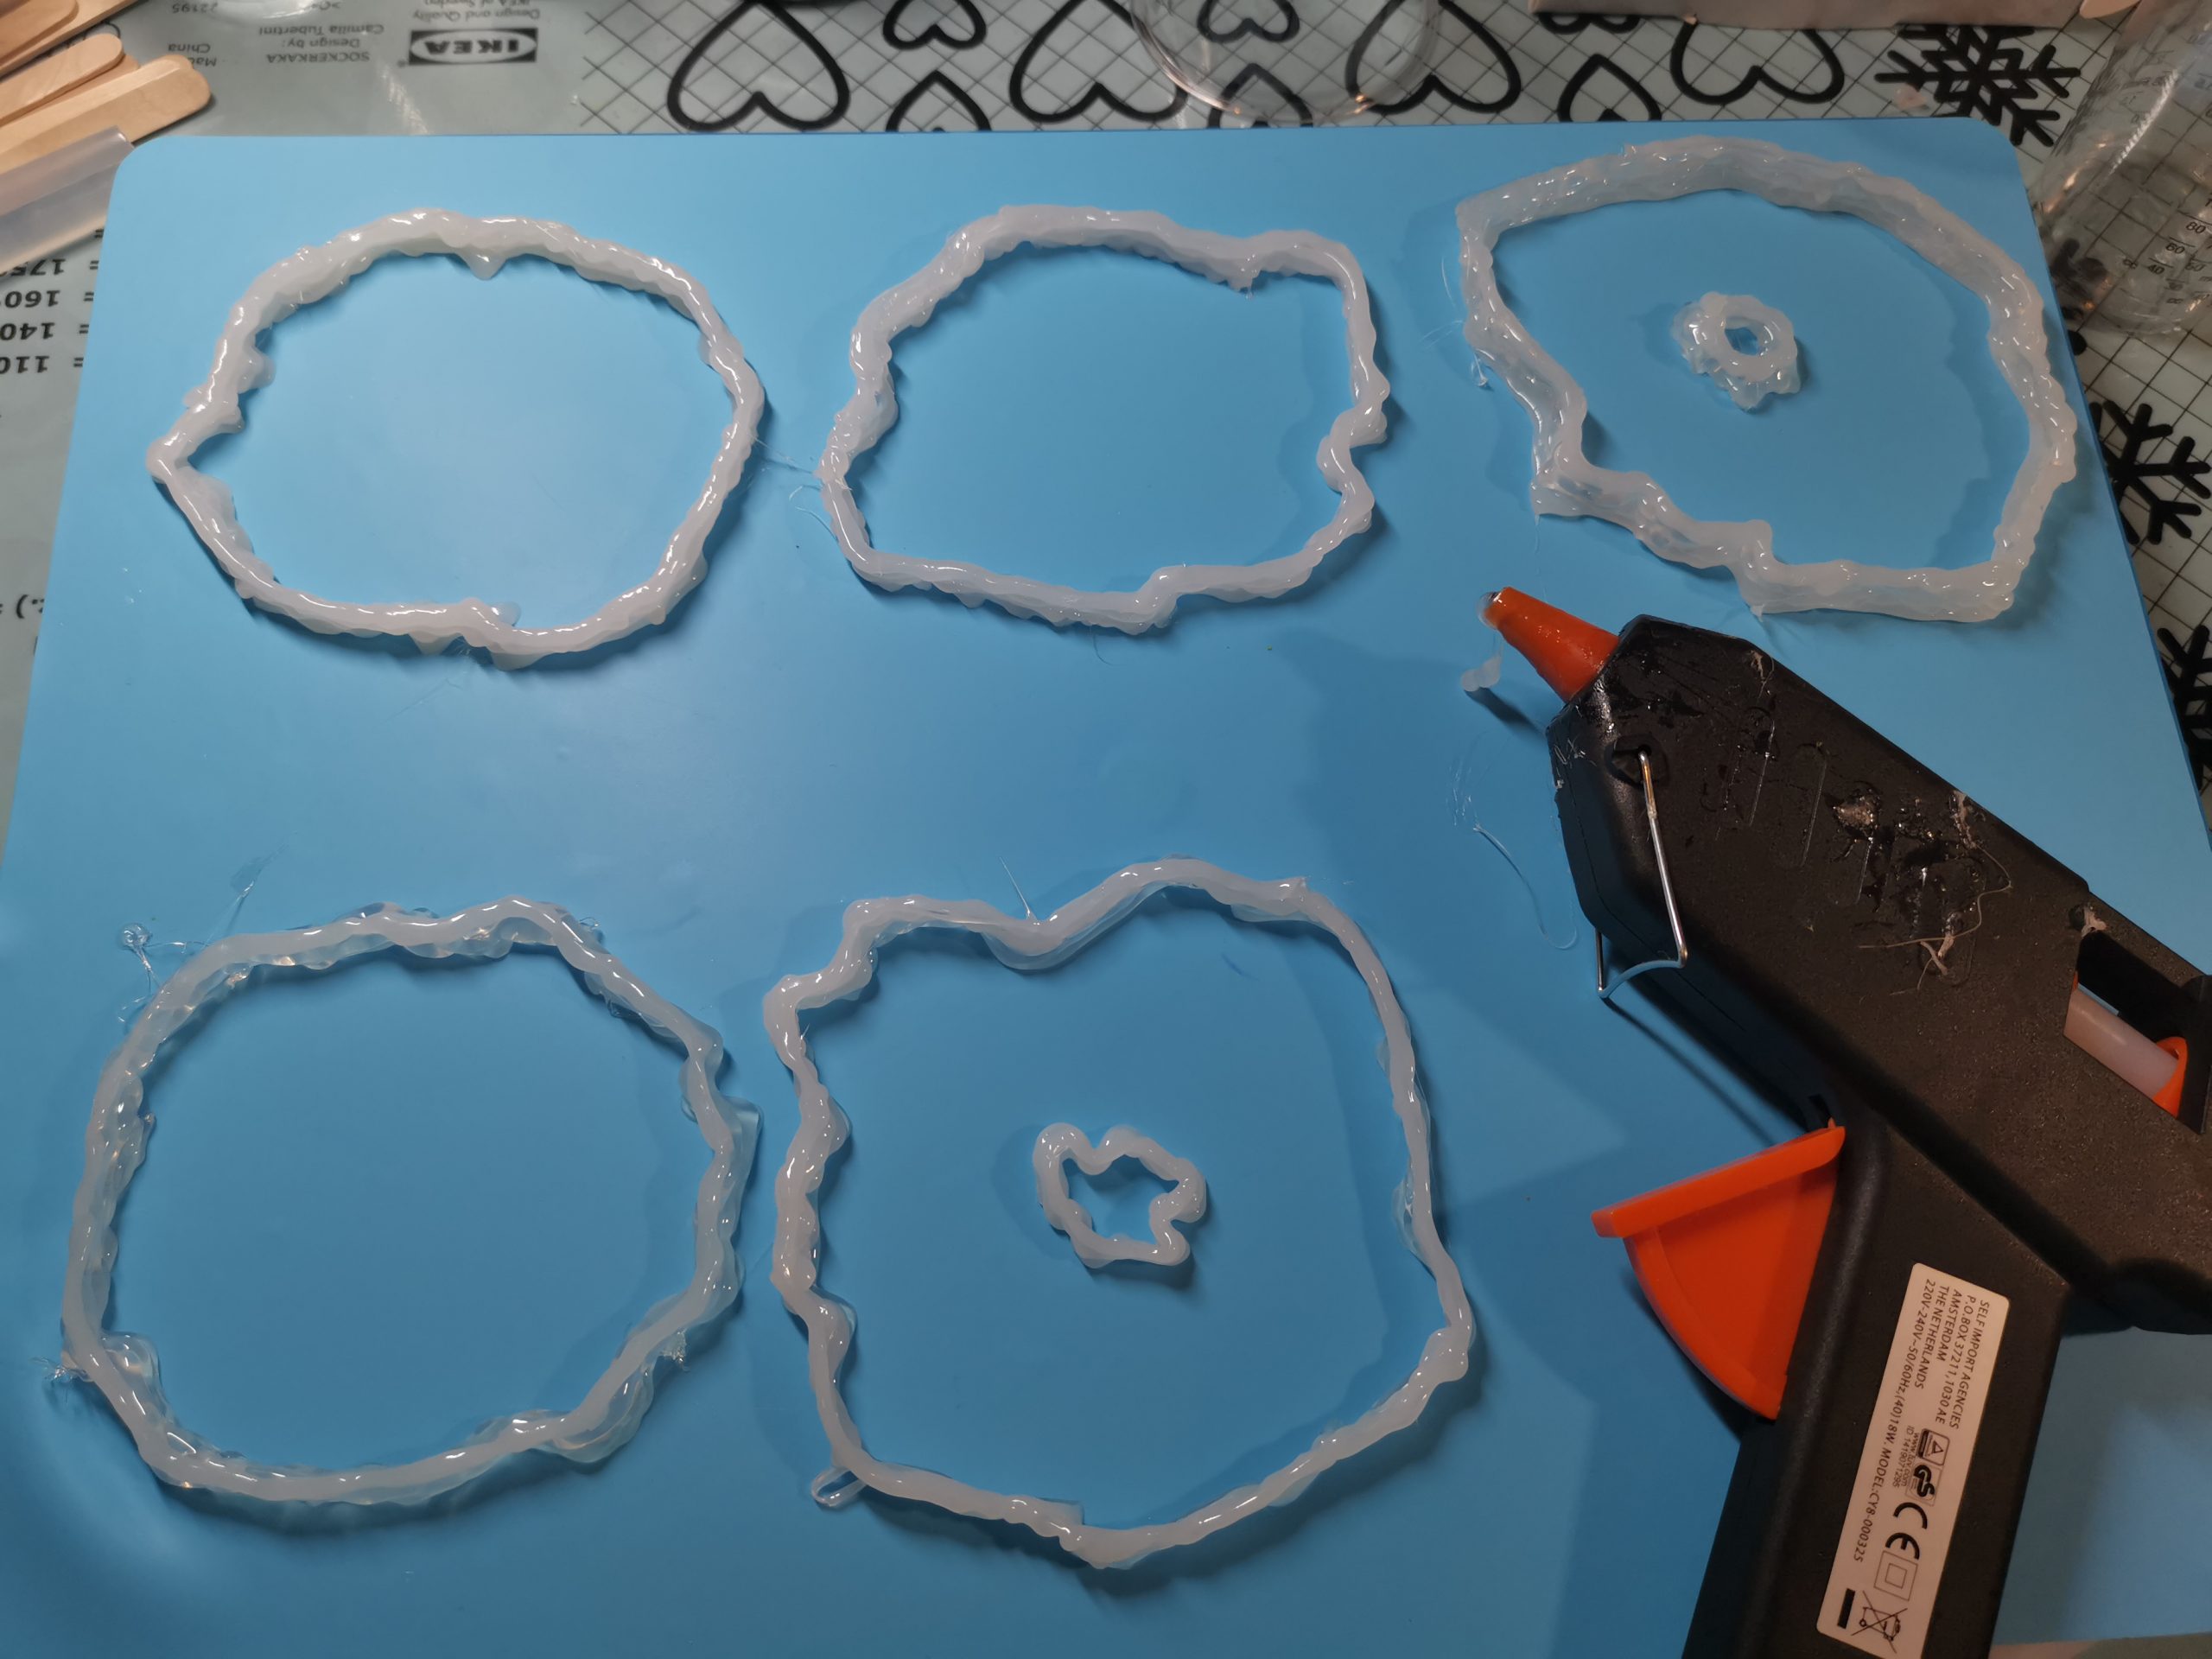
⚠️ Important tip about hot glue: Not all hot glue is the same. Use transparent craft hot glue (the soft, flexible variety). Regular universal hot glue sometimes adheres so strongly to the resin edge after the epoxy has hardened that you can no longer remove it — not even with pliers, hairdryer or sandpaper. I know this from my own (painful) experience. More about this later in this post.
From here on, casting into a mold is the same, this is the only step that is different.
Step 1: Ensure a flat, clean surface
Epoxy flows to the lowest point. If your surface is crooked, your coasters will be unevenly thick. Place a spirit level on your work surface and adjust where necessary. Protect the surface with a silicone mat, baking paper or cardboard.
Step 2: Mix to the correct ratio
This is the step where most beginners go wrong: too much haste. Read the ratio on your epoxy packaging carefully: with Let’s Resin this is 1:1 (part A to part B). Always weigh on a scale.
Stir the mixture gently and thoroughly: at least 3–4 minutes, along the edges and bottom of the beaker. Stirring too quickly draws extra air into the resin. Stirring too briefly leaves unmixed zones.
Step 3: Add Color
Divide your mixed epoxy over several cups and add a color per cup. For these coasters I used:
- Art Pigments Chameleon CHLHX6: a dark purple shimmer pigment that changes color depending on the light — the base of the outer edge
- Mica powder blue and teal: for the intermediate layers
- Mica powder gold/orange: for the warm core
- Resin Dye Paste White: for the white center
- Foil Flakes: sprinkled in the layer around the center
Do not add too much pigment: about 3–6% of the total weight is sufficient. Too much pigment disrupts curing.
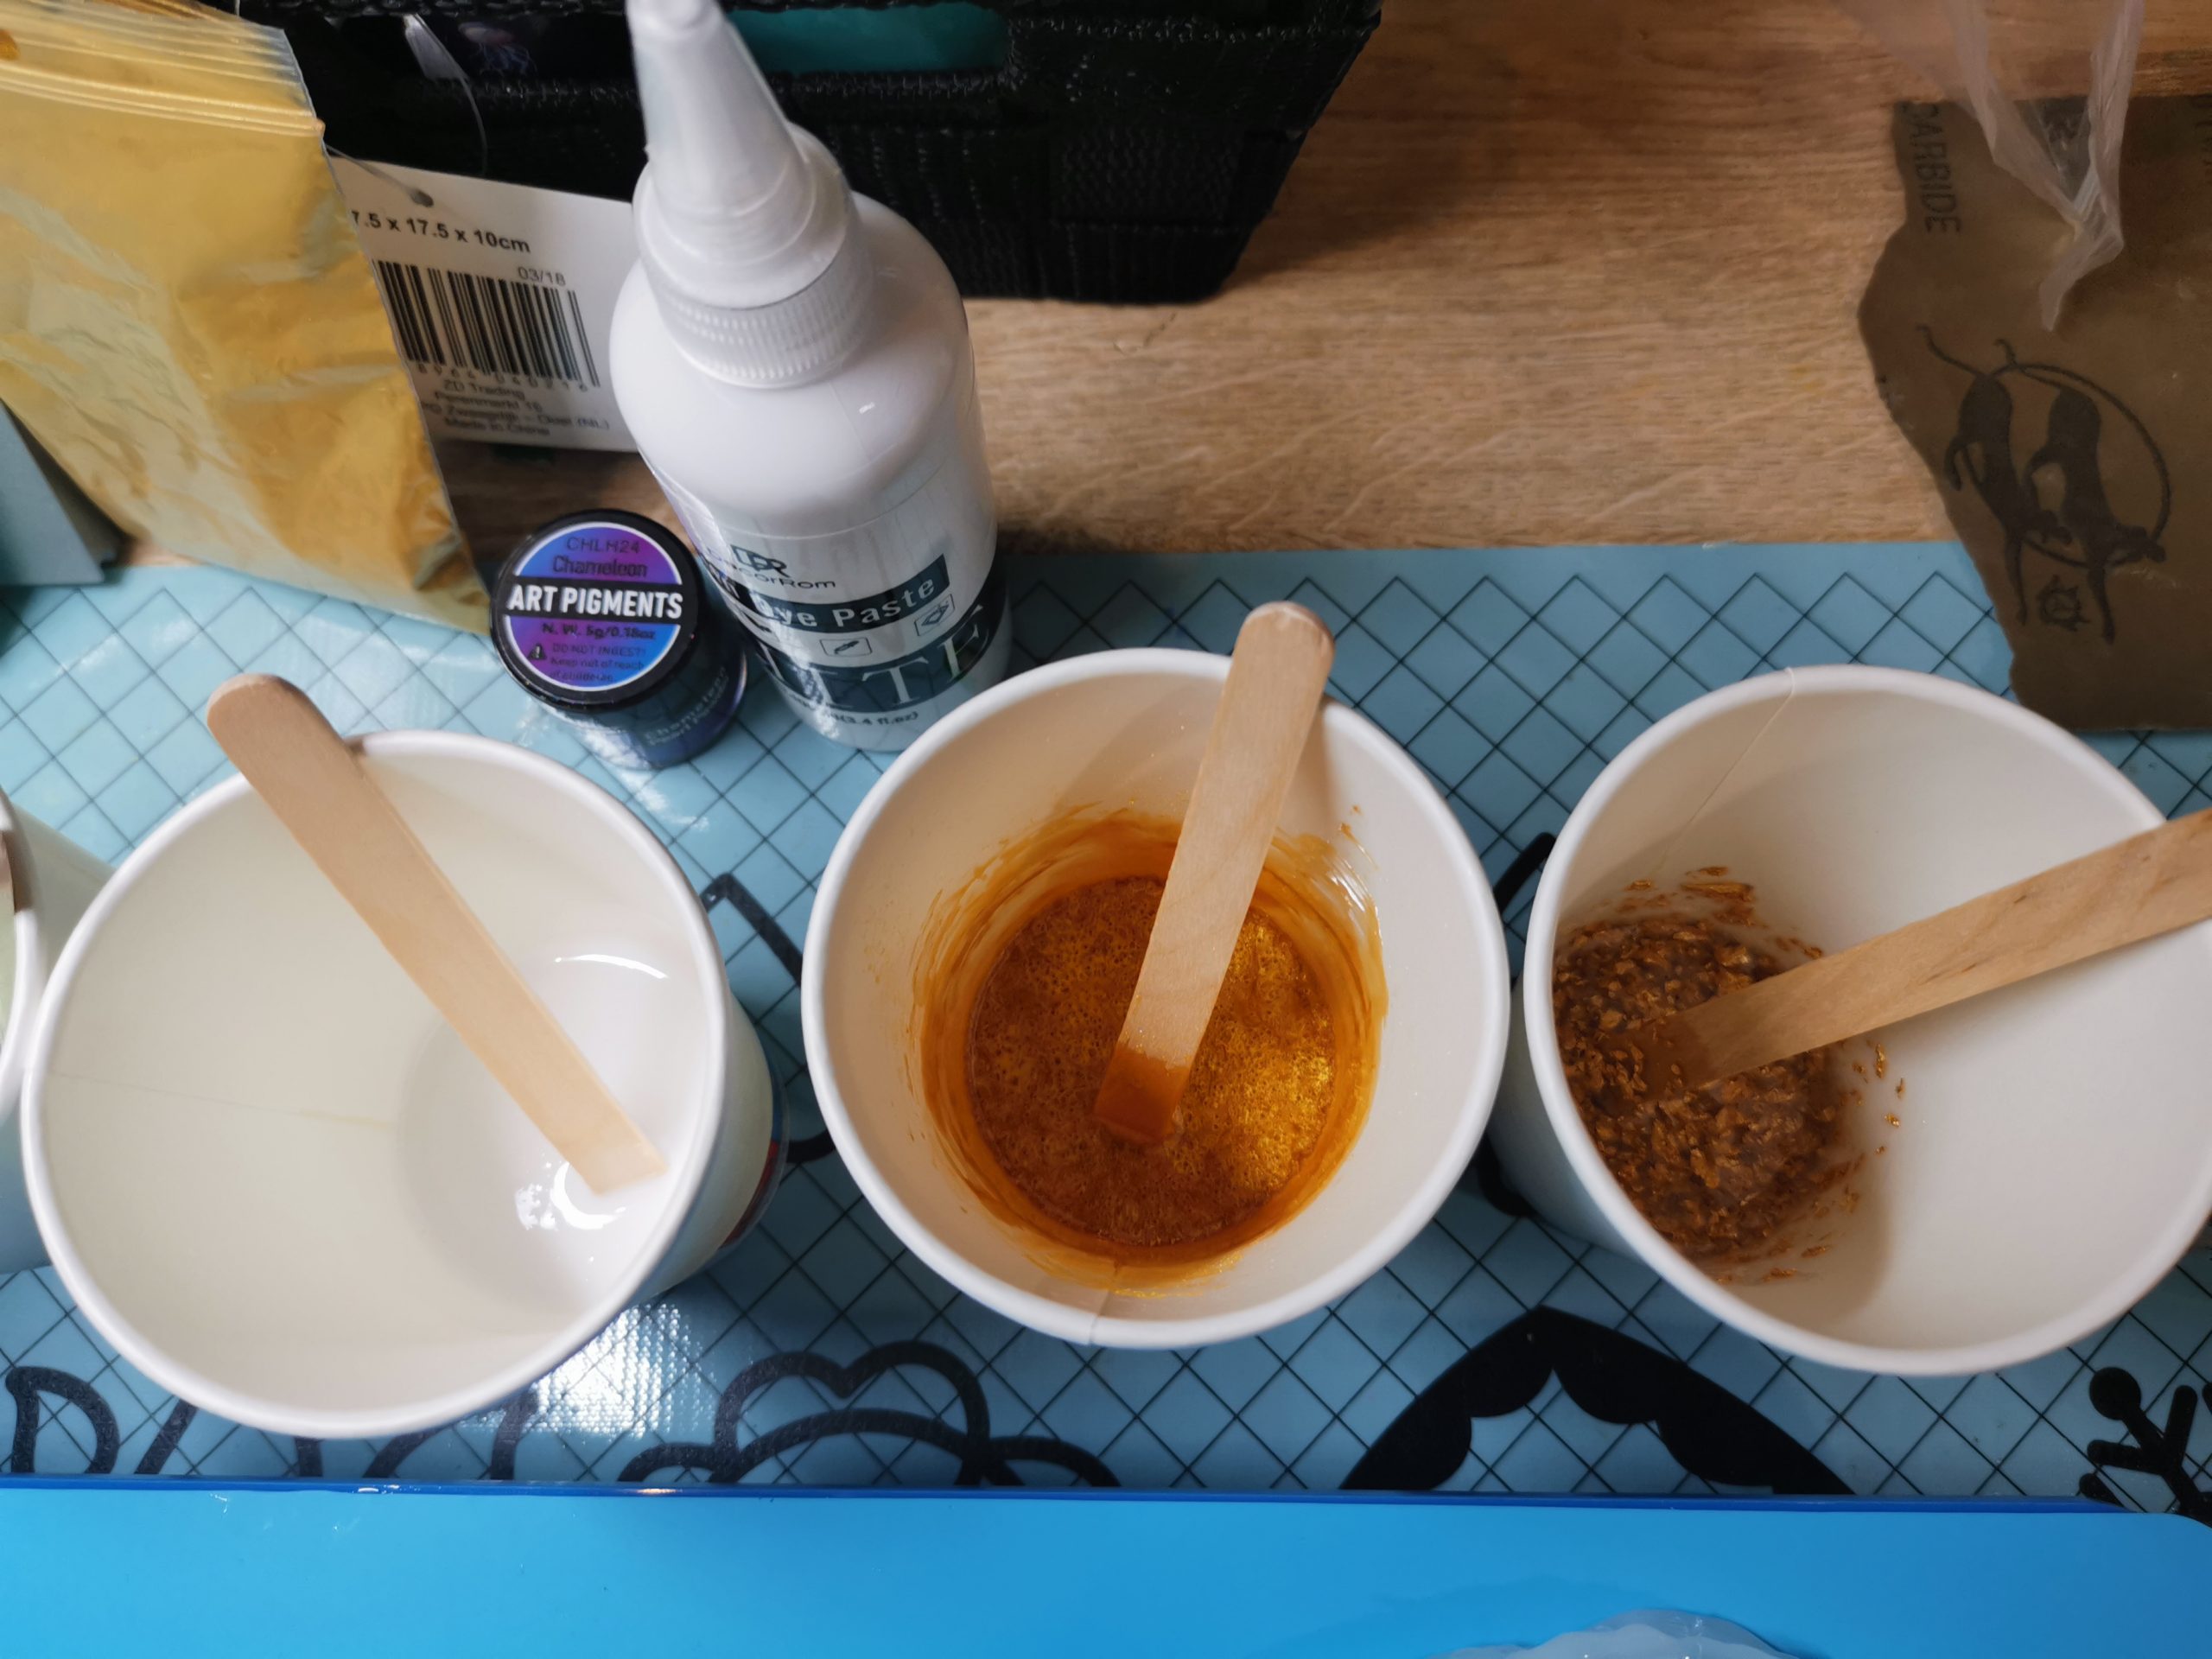 White resin and two gold-orange mixtures — the warm core of every coaster starts here.
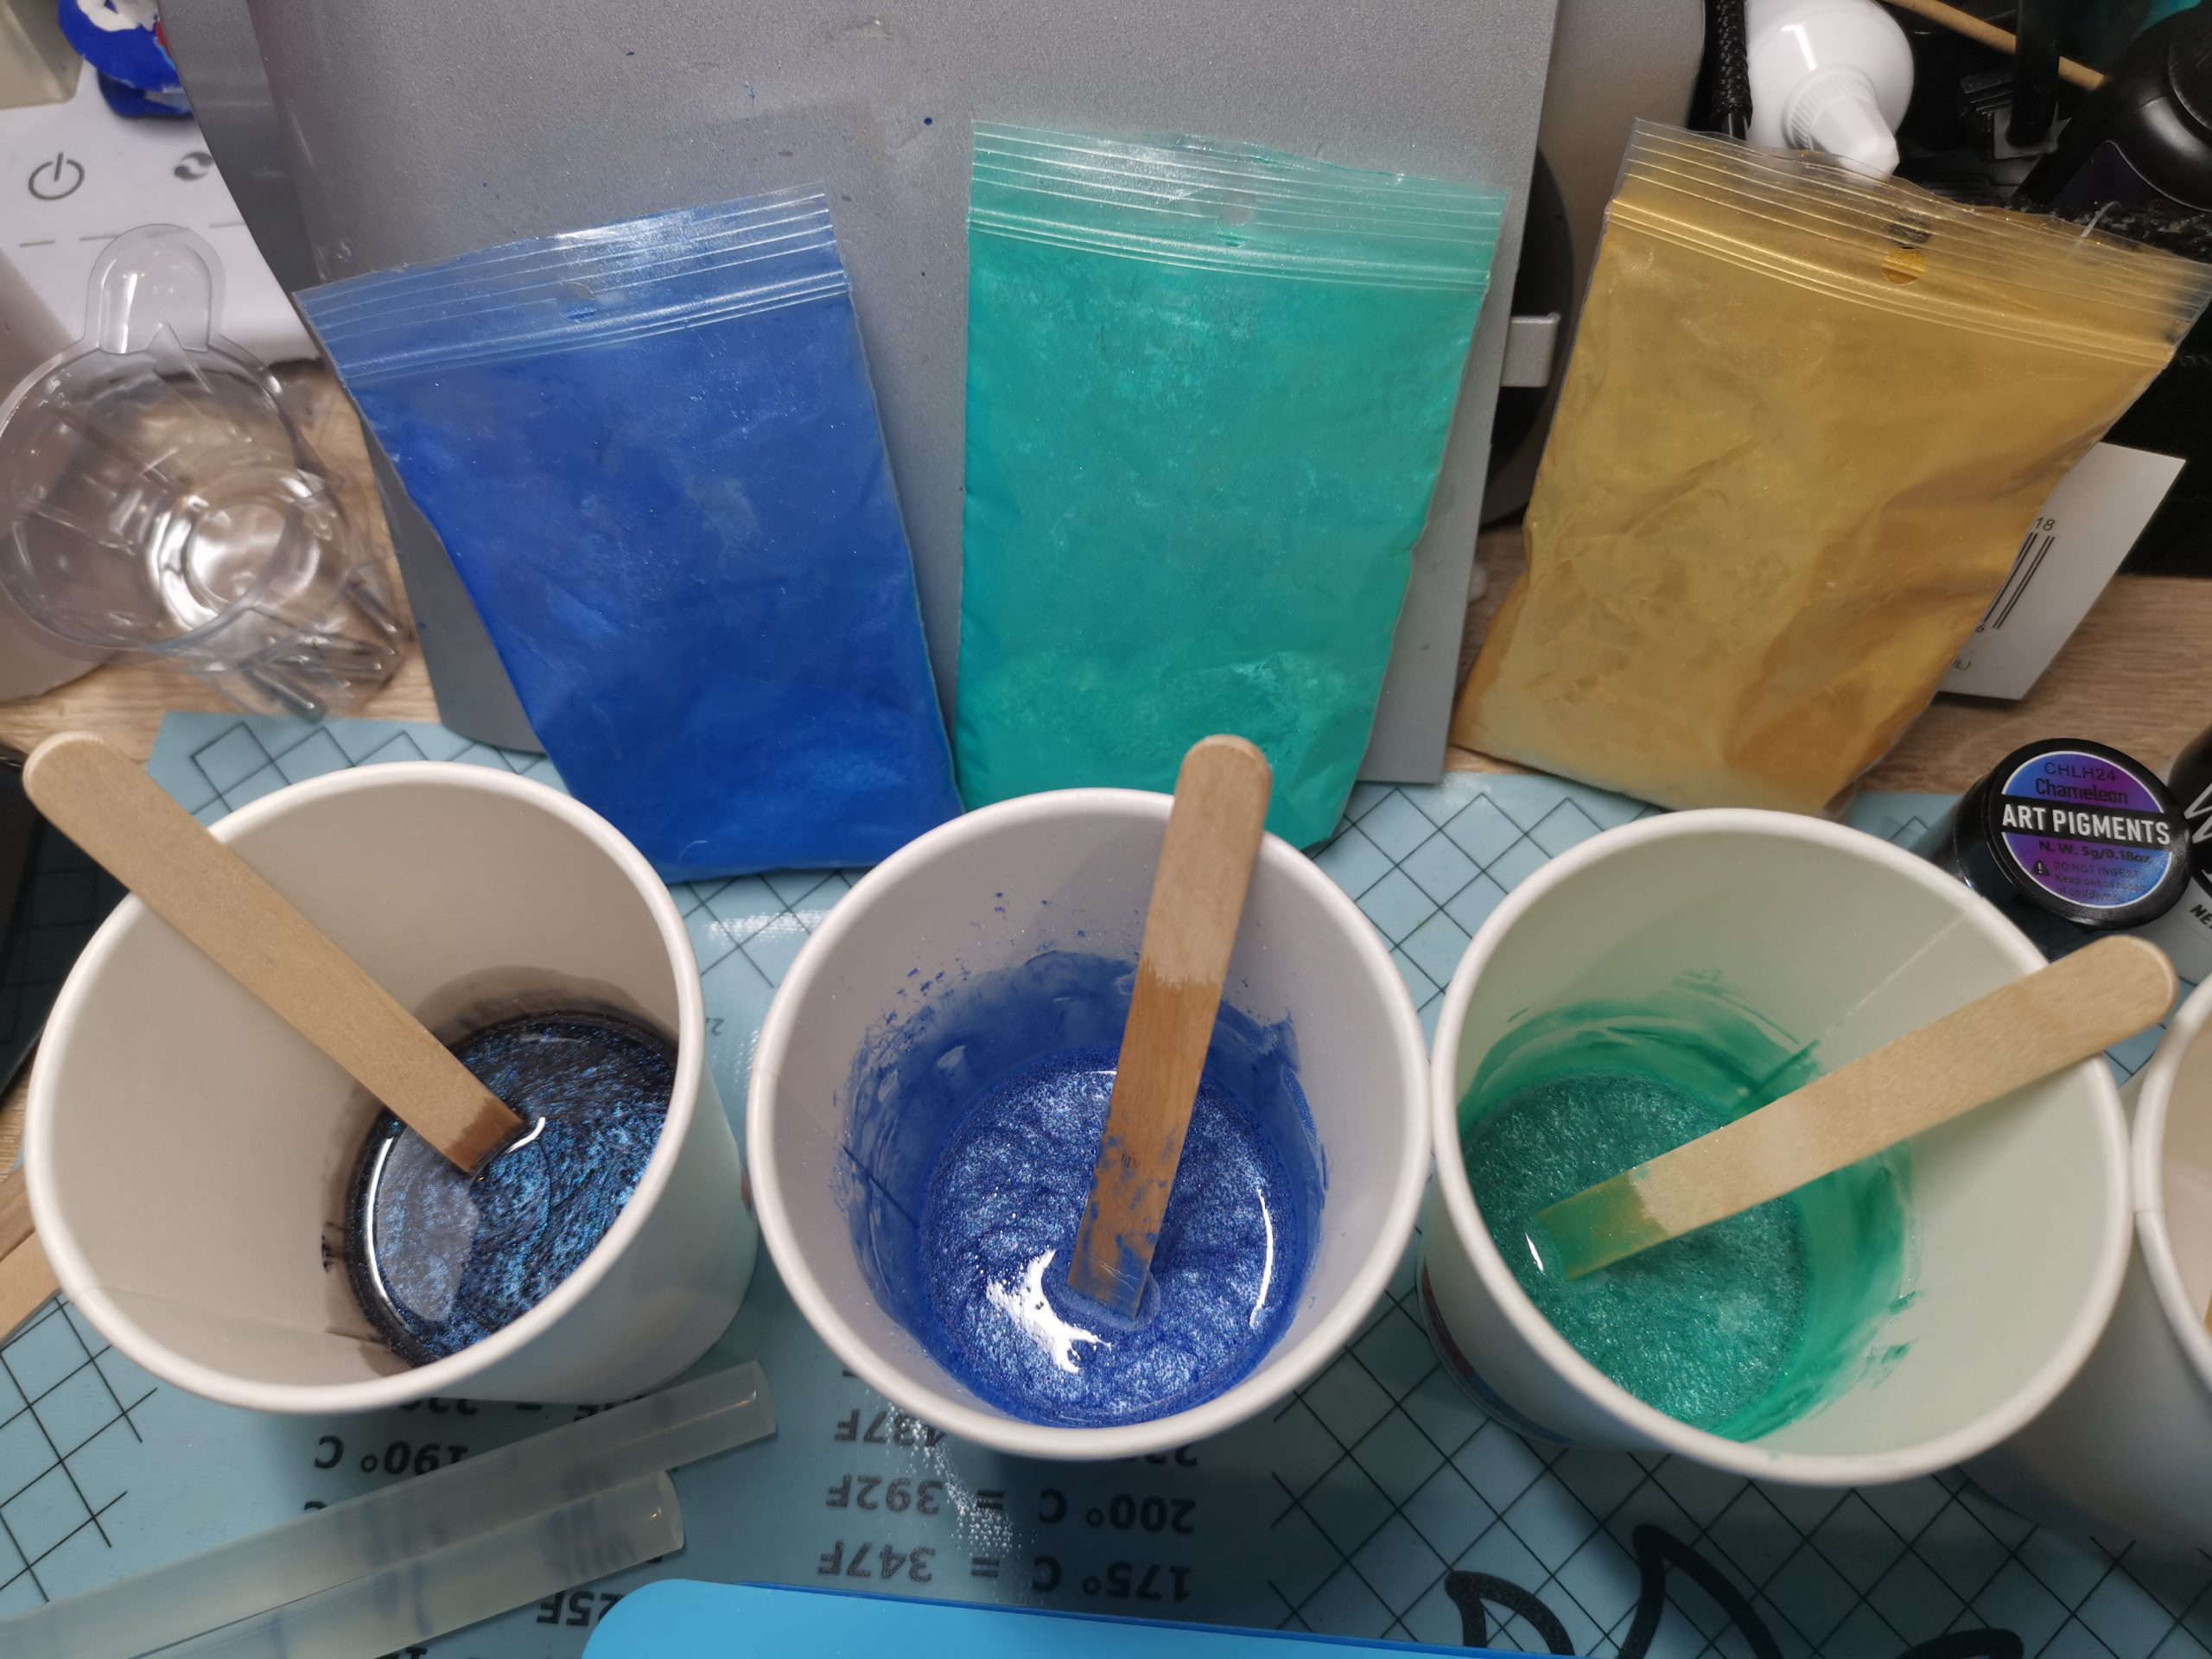
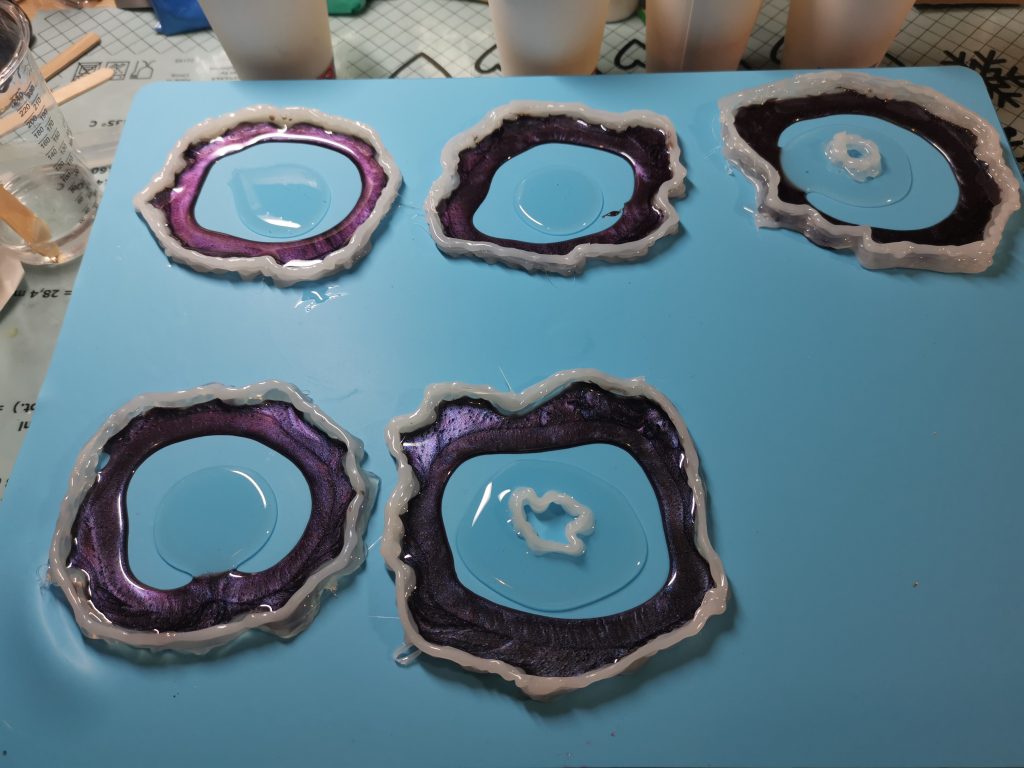
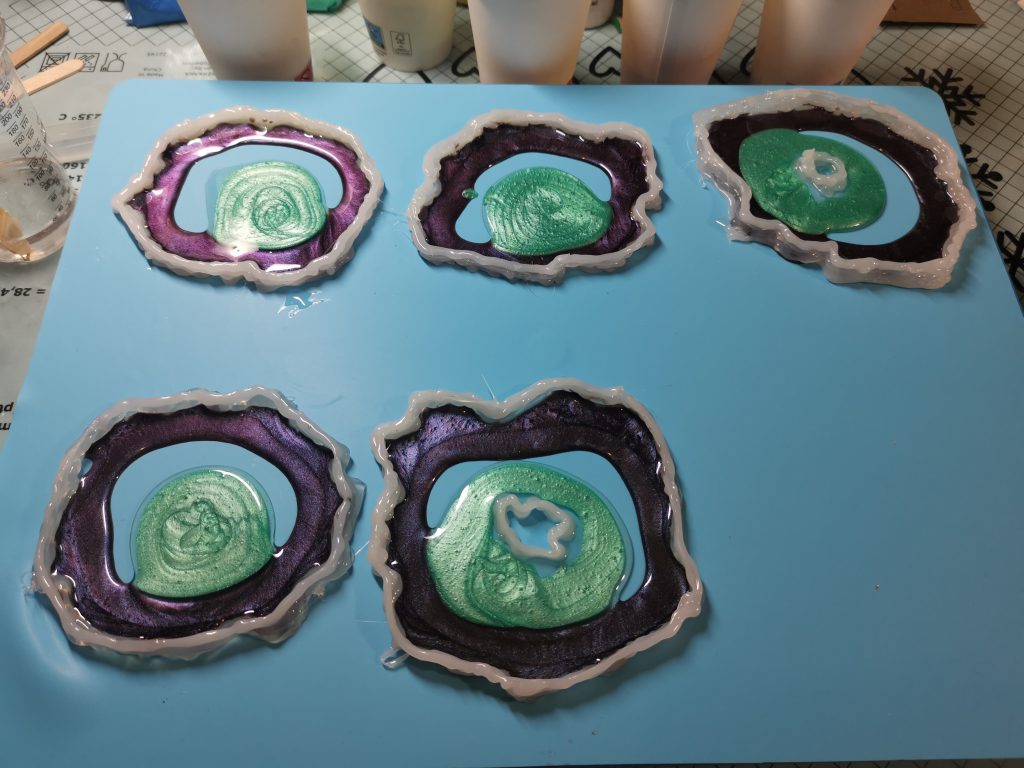
Step 4: Casting into the mold
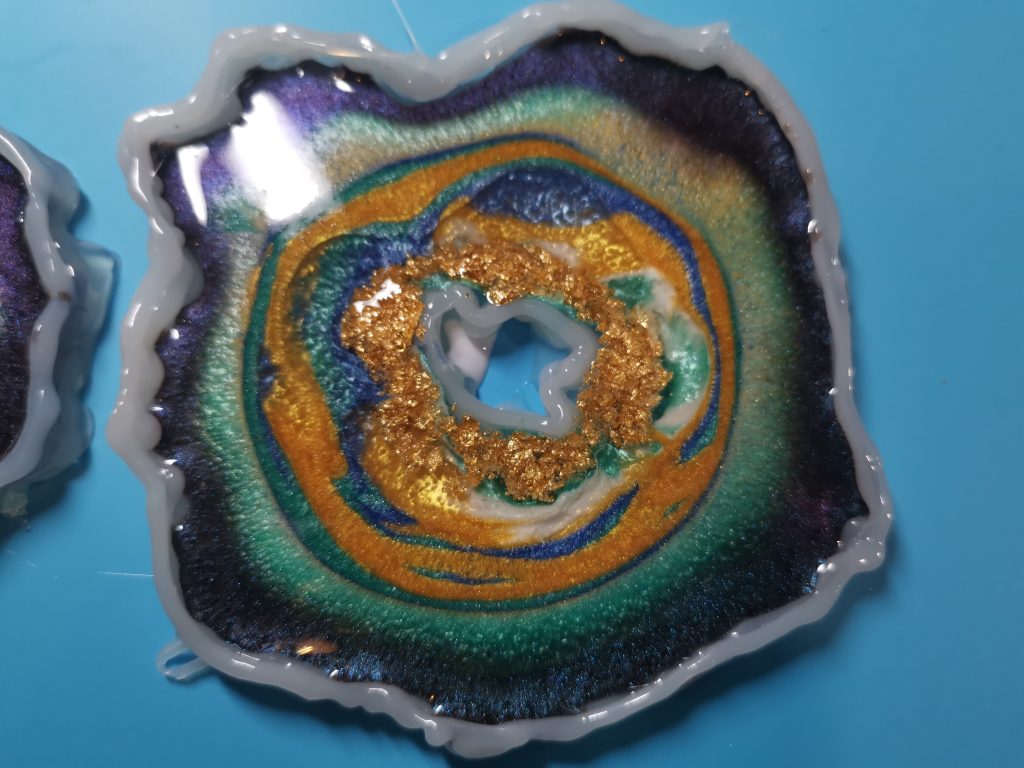
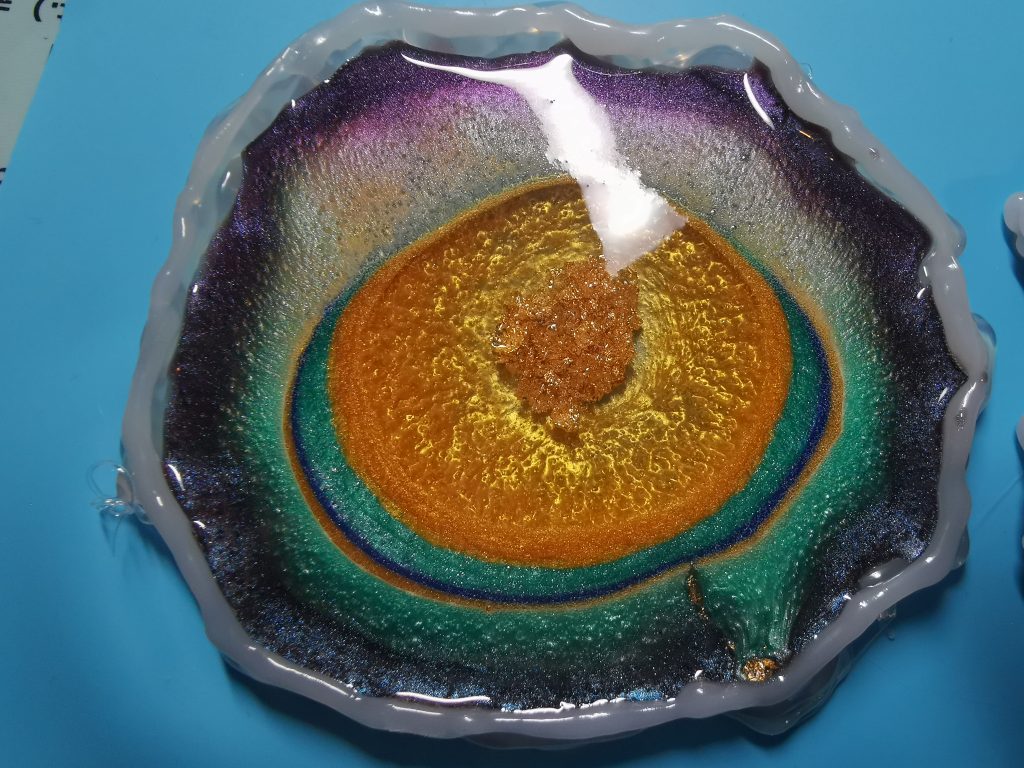
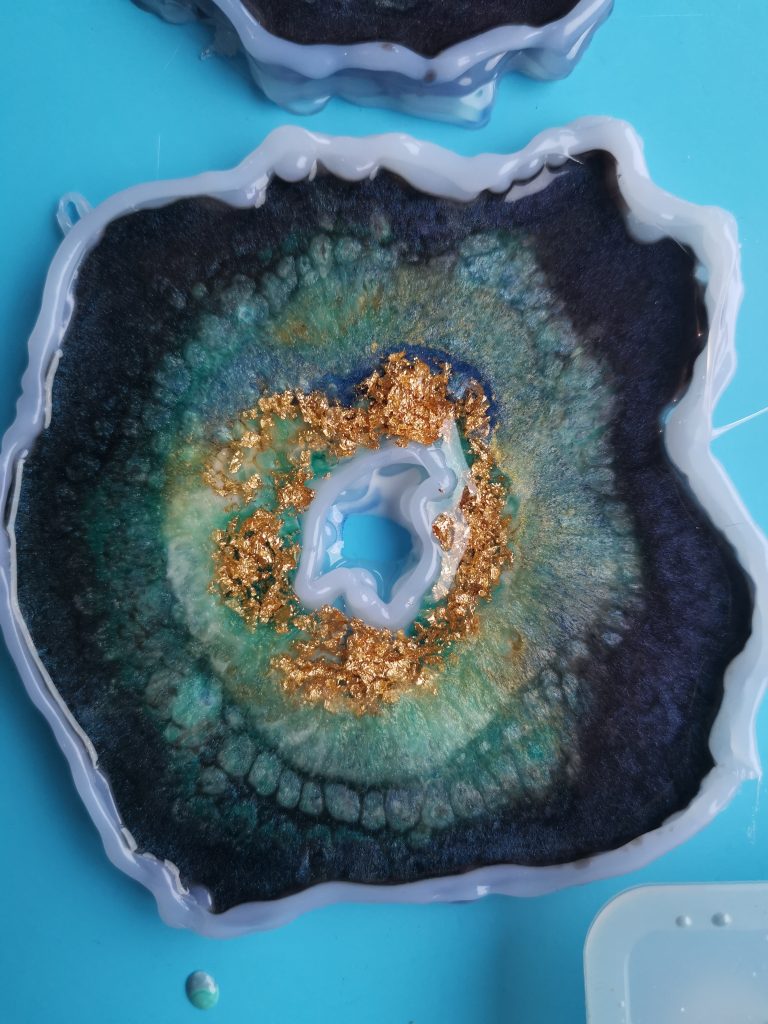
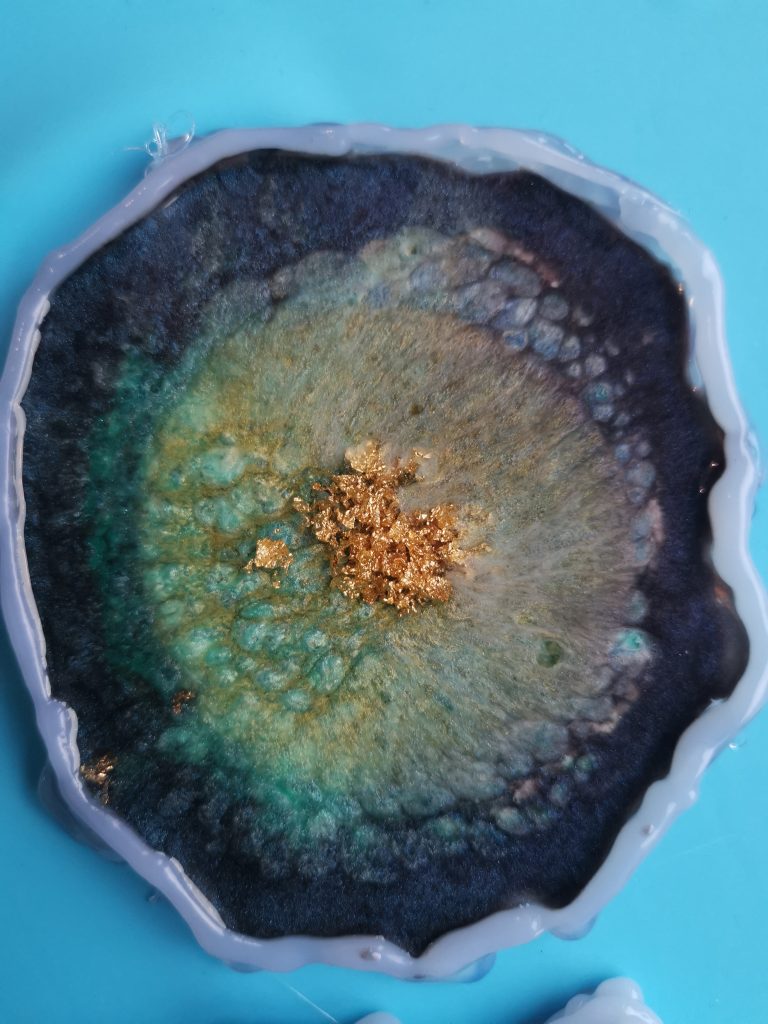
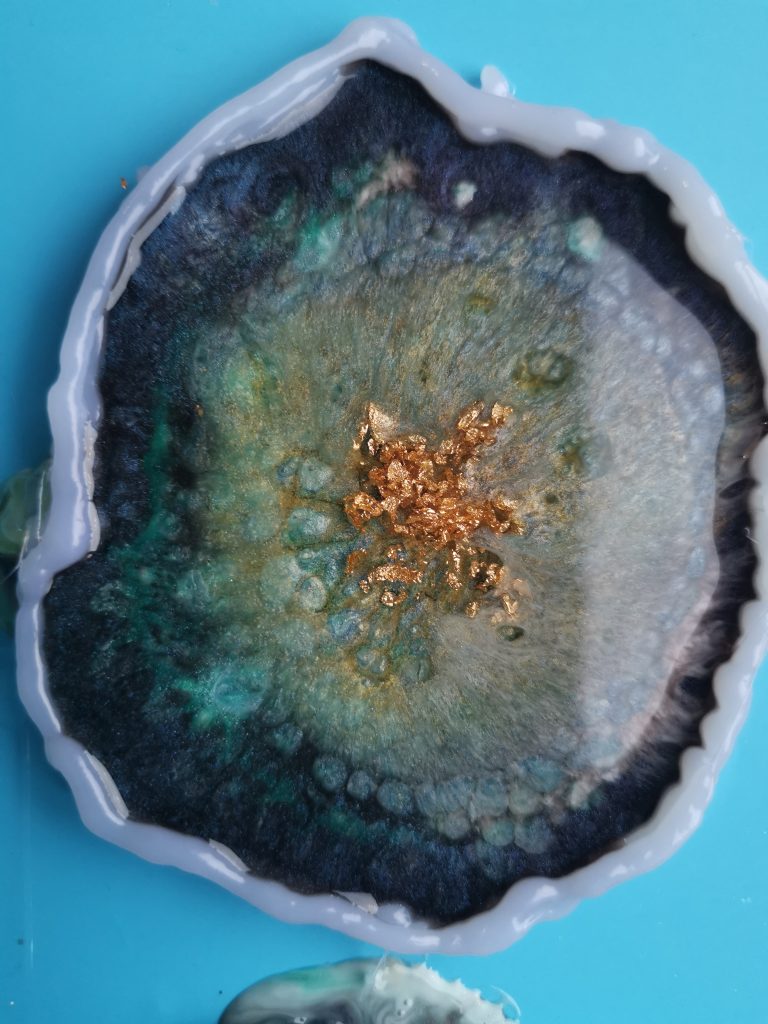
For the freeform coasters I poured layer by layer: first the dark outer edge, then the teal and blue intermediate layers, then the gold-orange core, and finally a white layer in the center with gold leaf on top. After each layer, wait until the previous layer has hardened slightly, so that the colors do not blend too much.
Work quickly: epoxy starts to thicken after 20–30 minutes.

Step 5: Remove Bubbles
After pouring you will probably see small air bubbles on the surface. Use a small burner or heat gun and move it quickly and at a distance over the surface. No burner? A straw also works — blow gently over the surface.
Step 6: Cover and allow to harden
Cover your mold with a box or cardboard — not with foil touching the surface. Dust particles and hair that fall into the wet epoxy are almost impossible to remove after curing. Allow to cure for 24–48 hours depending on your epoxy brand and room temperature.
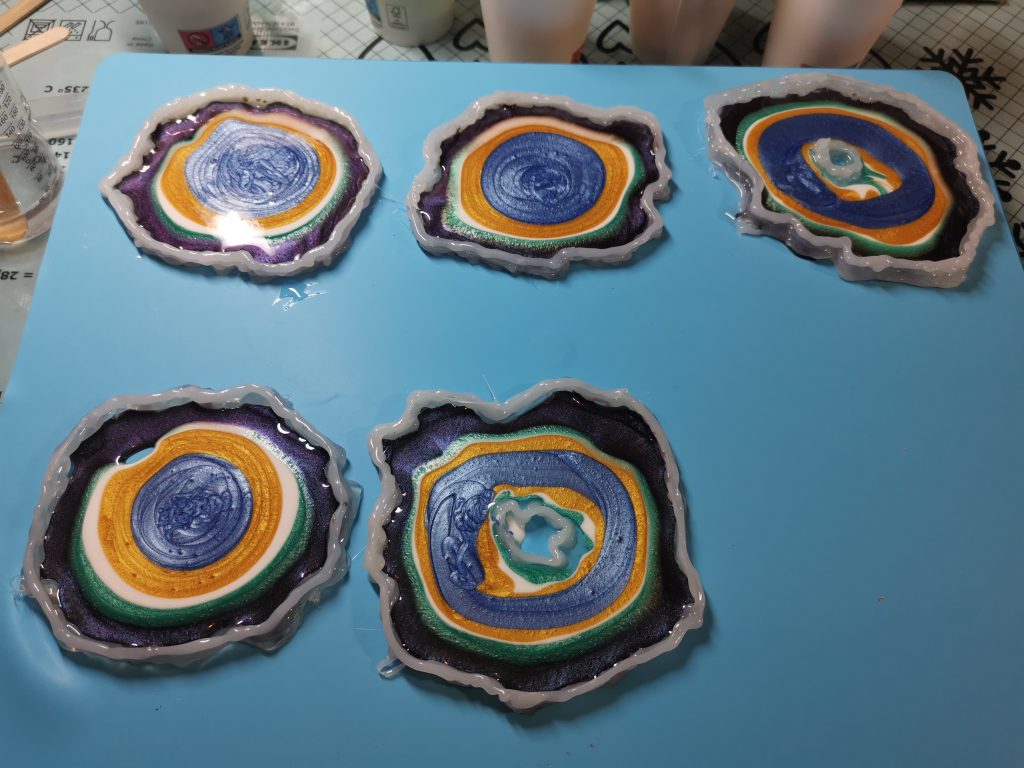
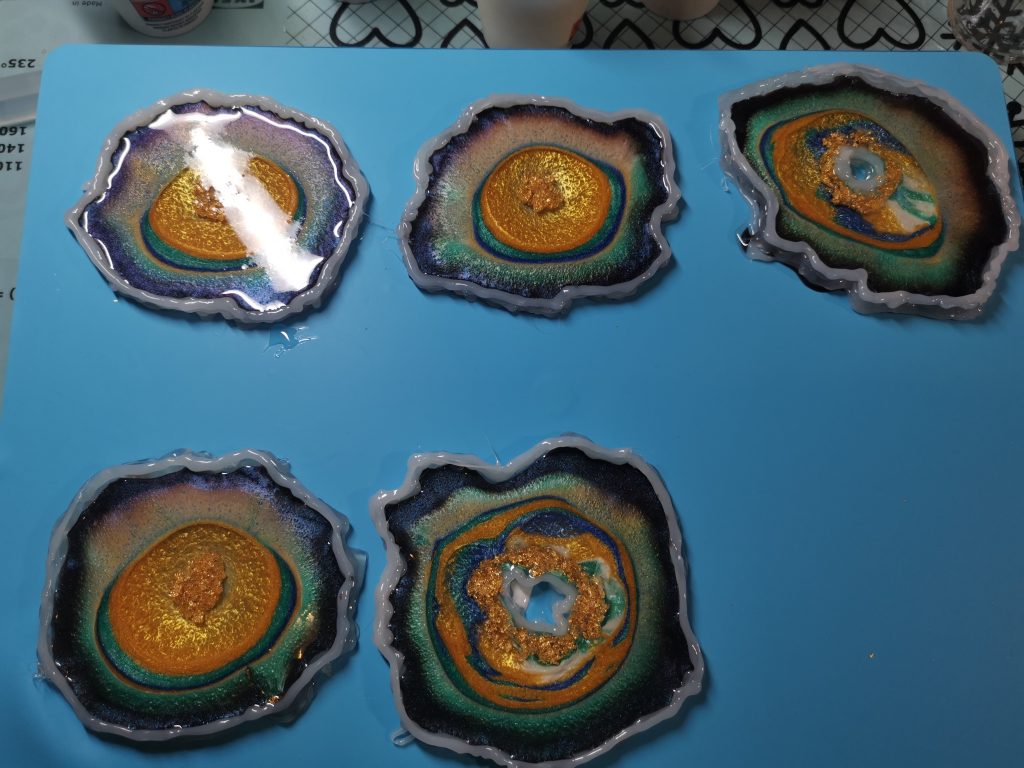
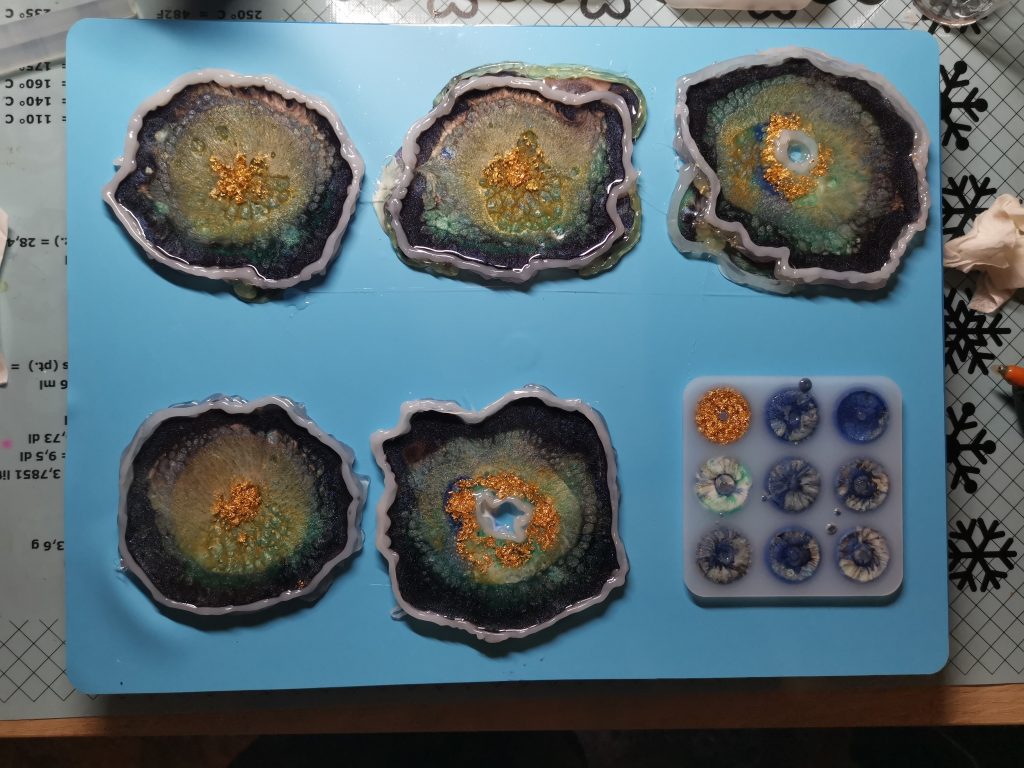
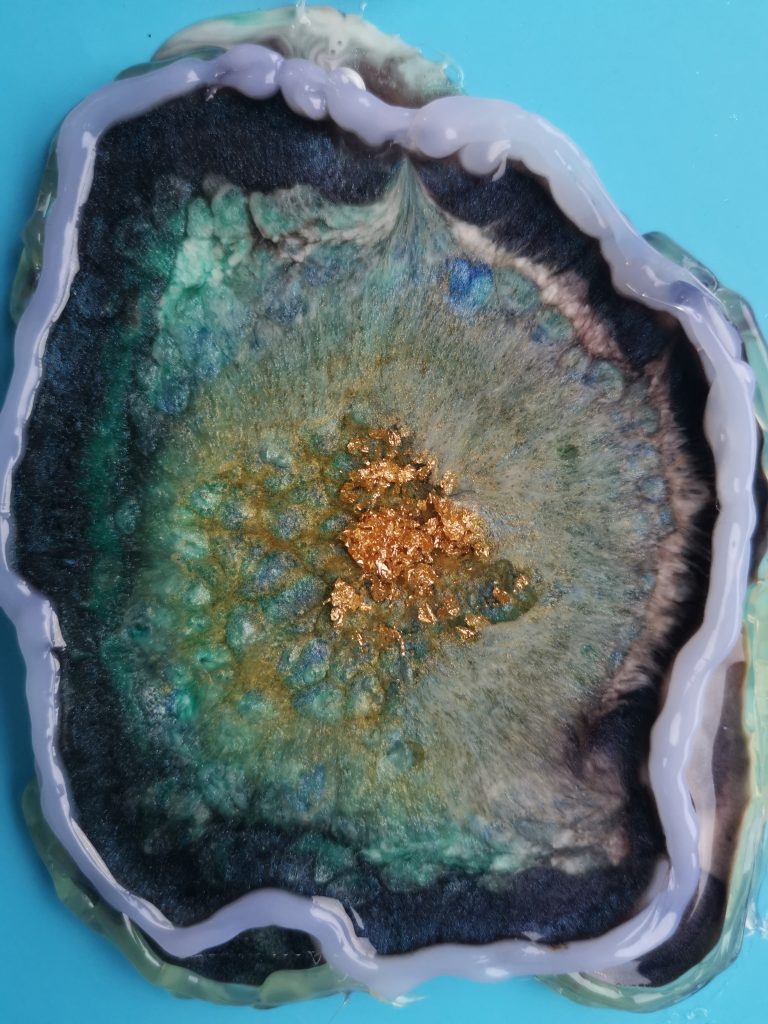
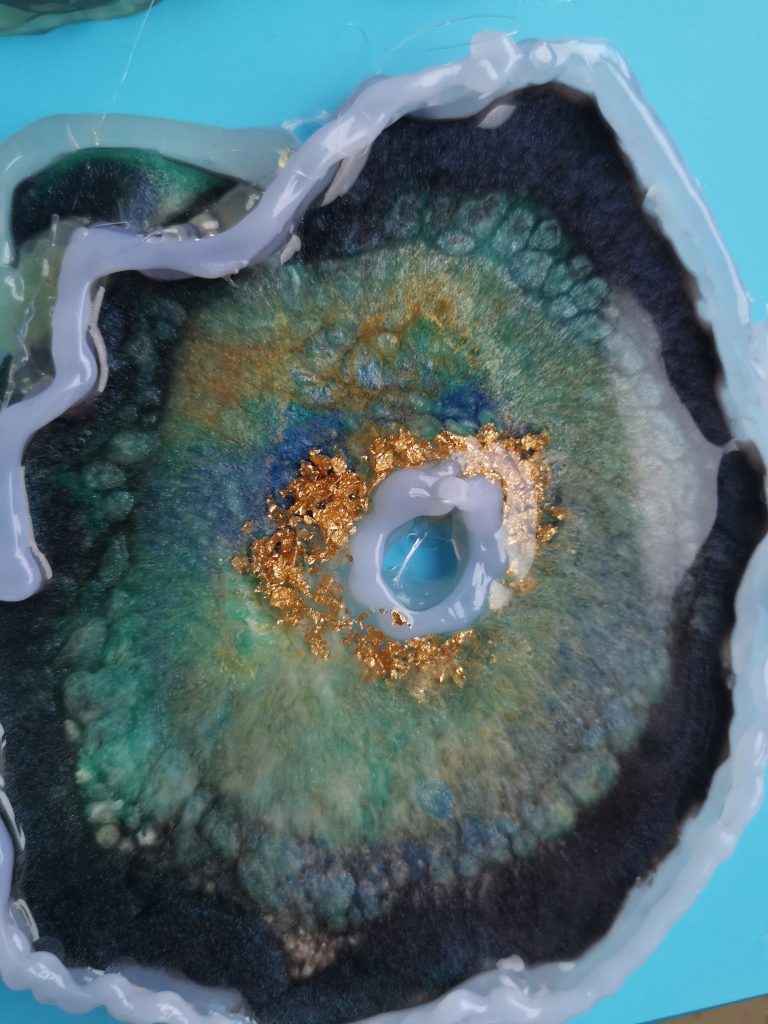
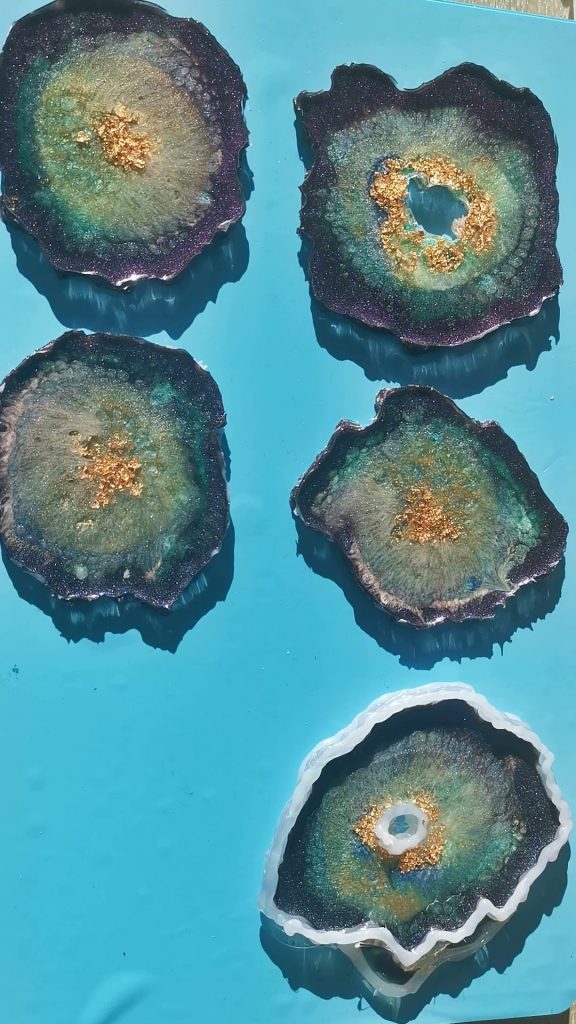
The result — beautiful in the mold
After curing I was in love. The colors, the composition, the way the chameleon pigment reflects light — I thought they were beautiful. Below is a selection of photos, all while the coasters were still in their molds.
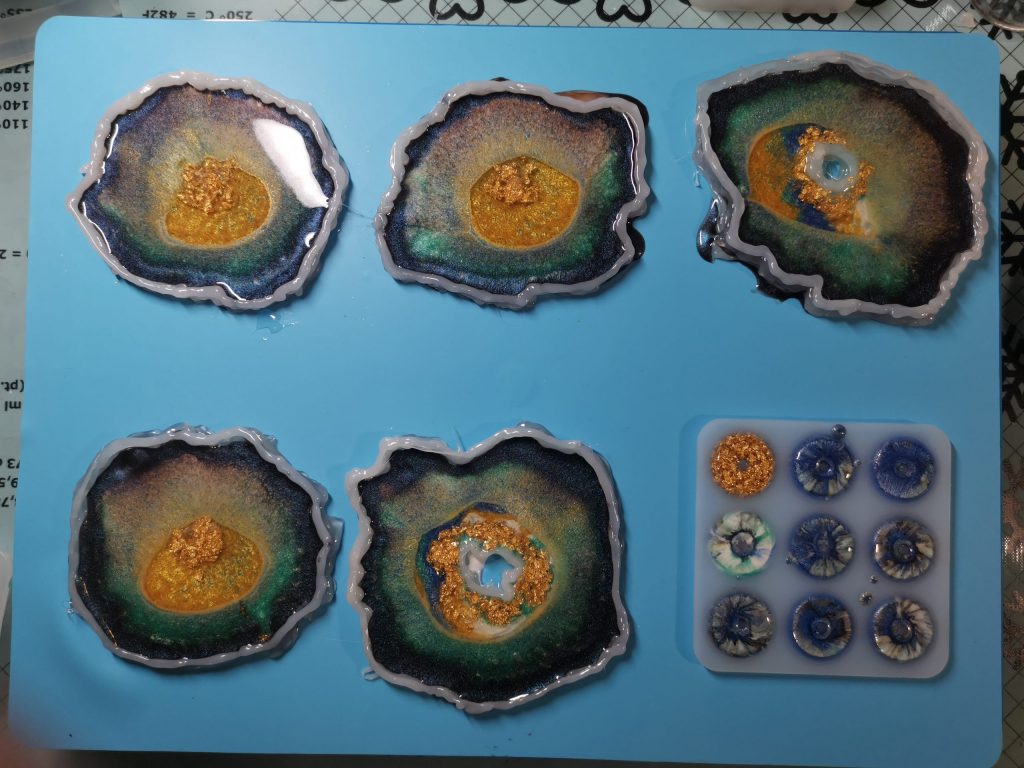
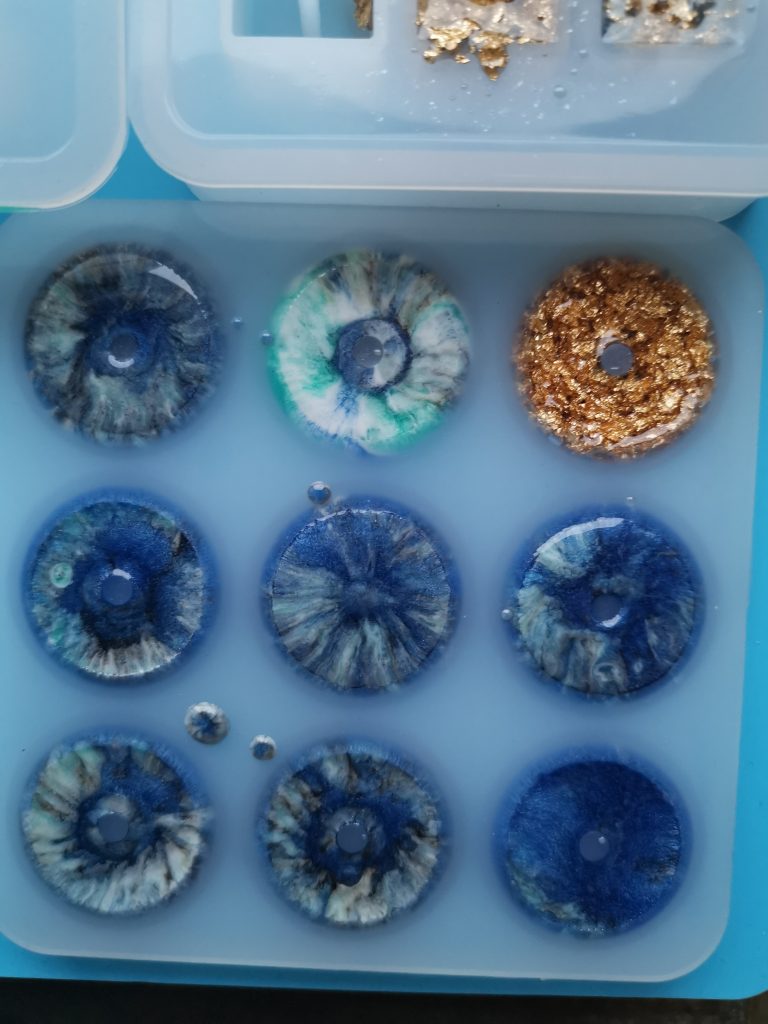
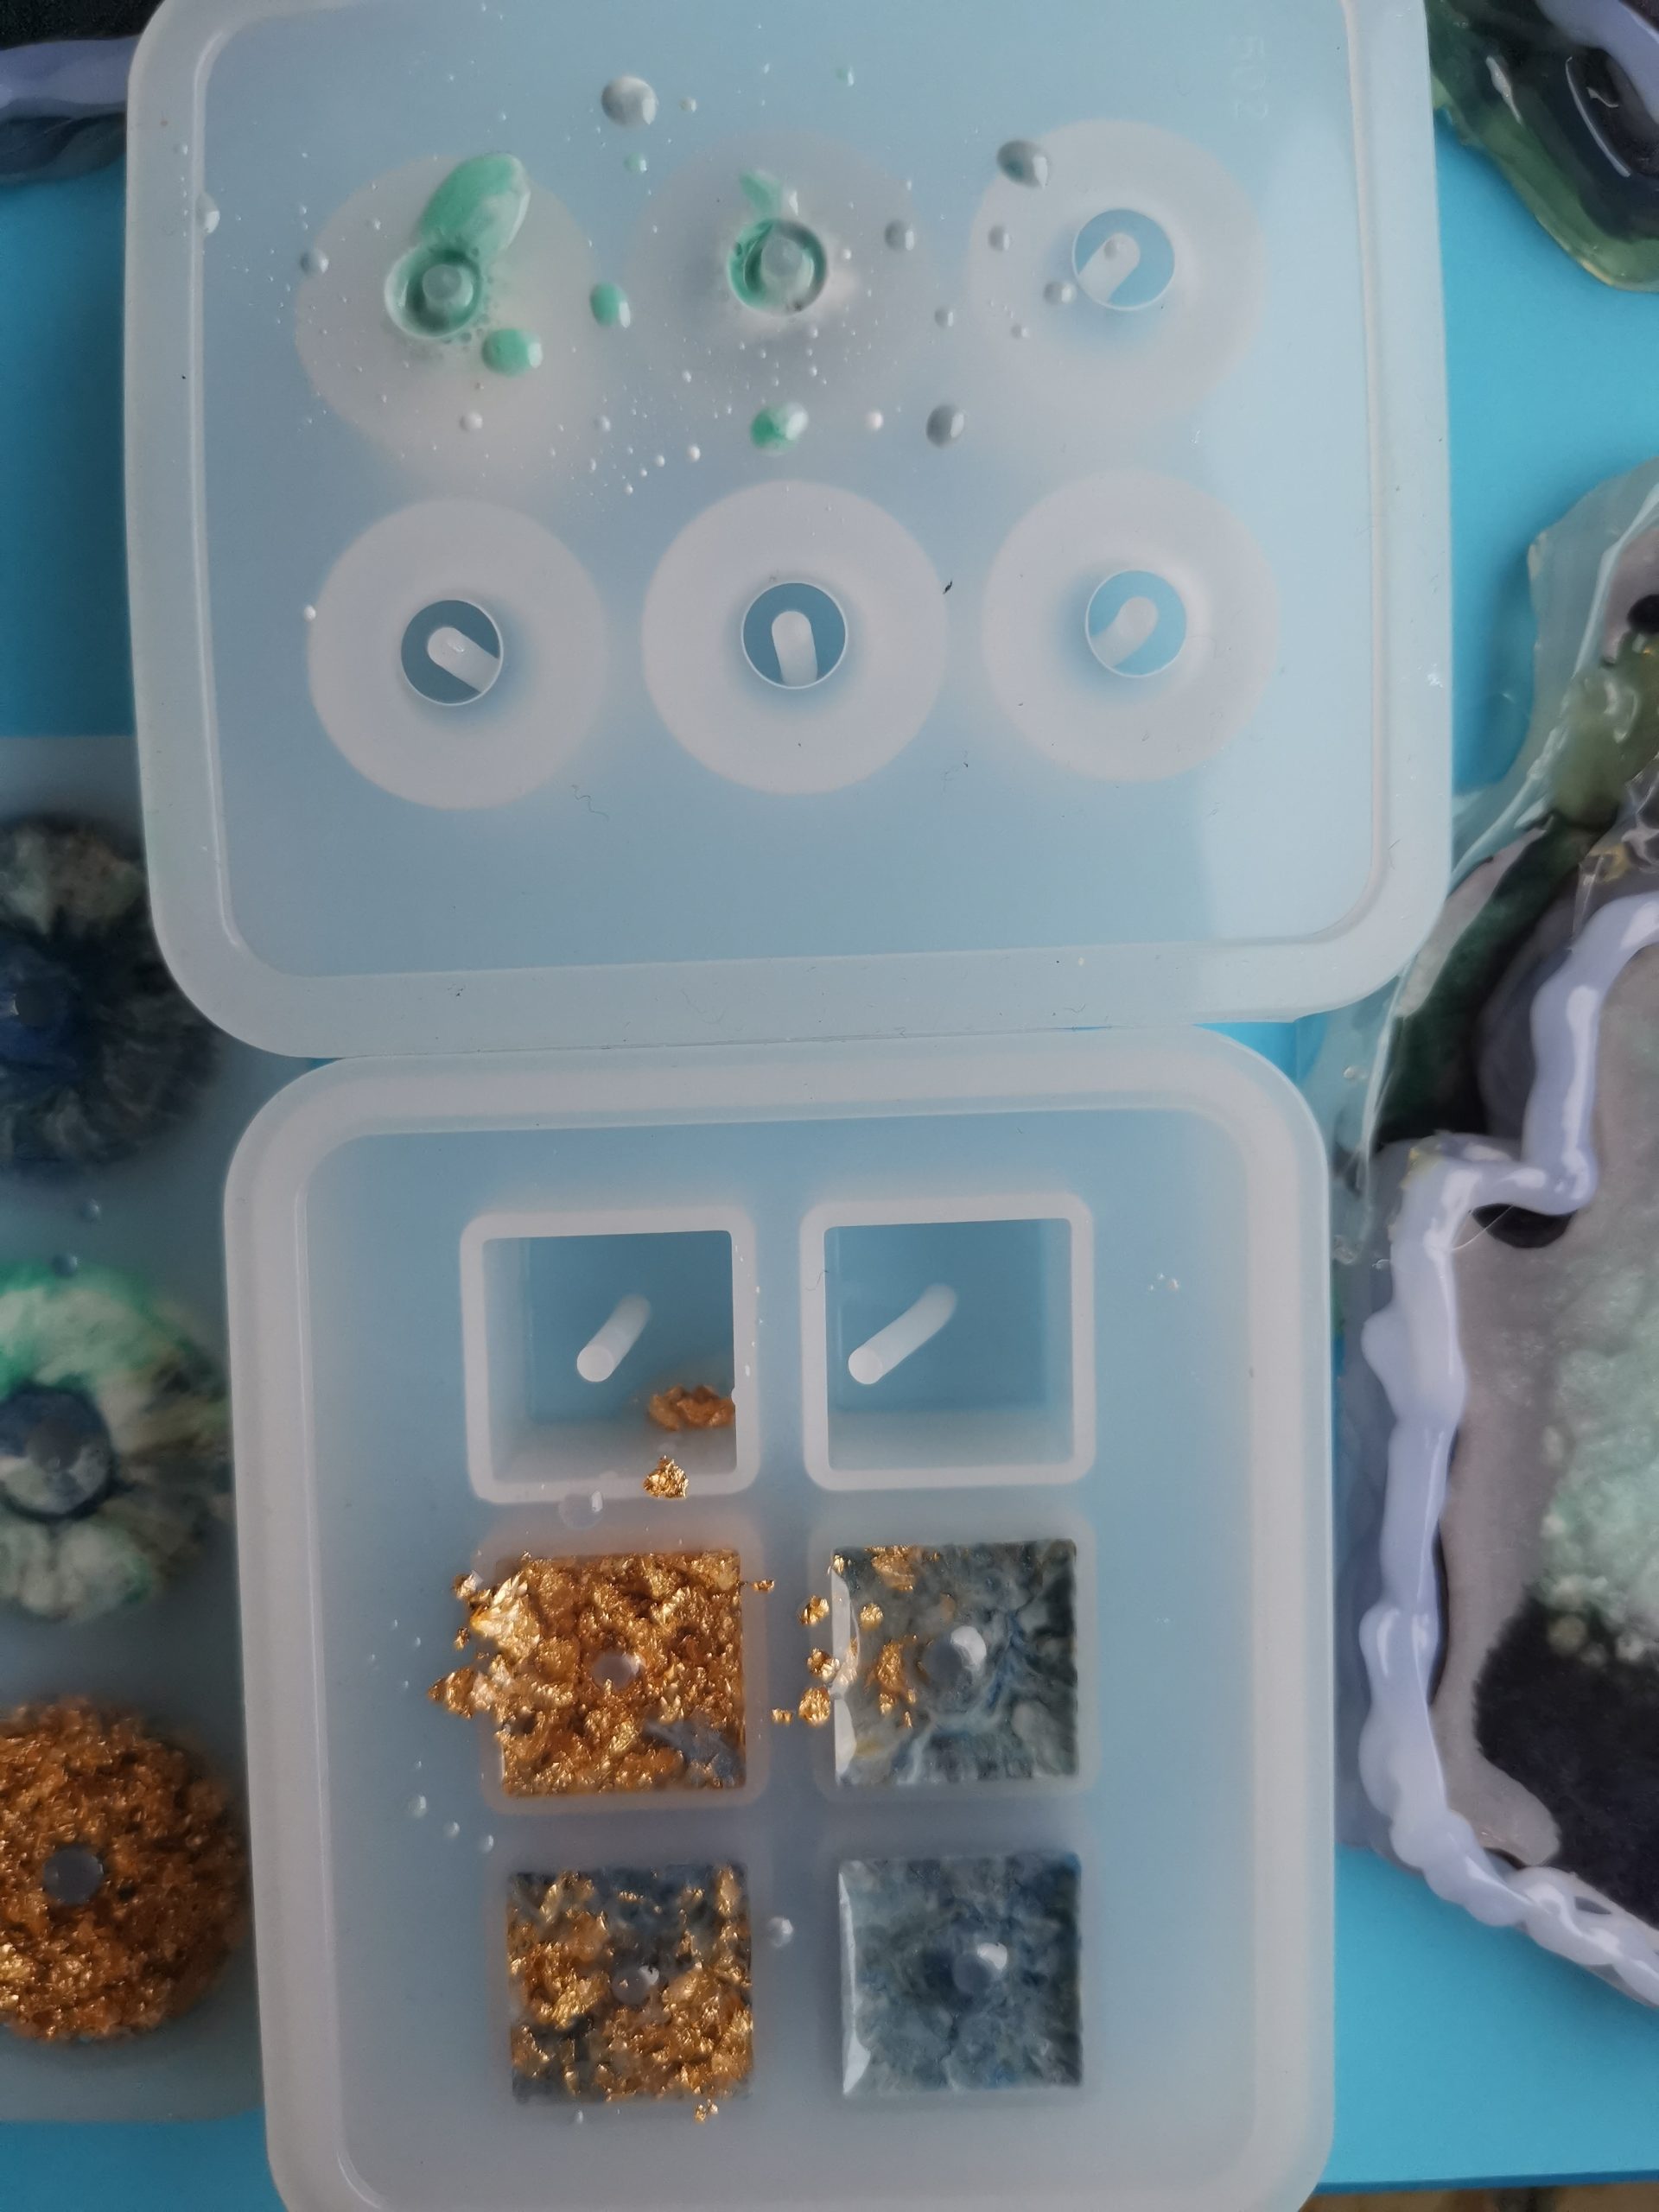
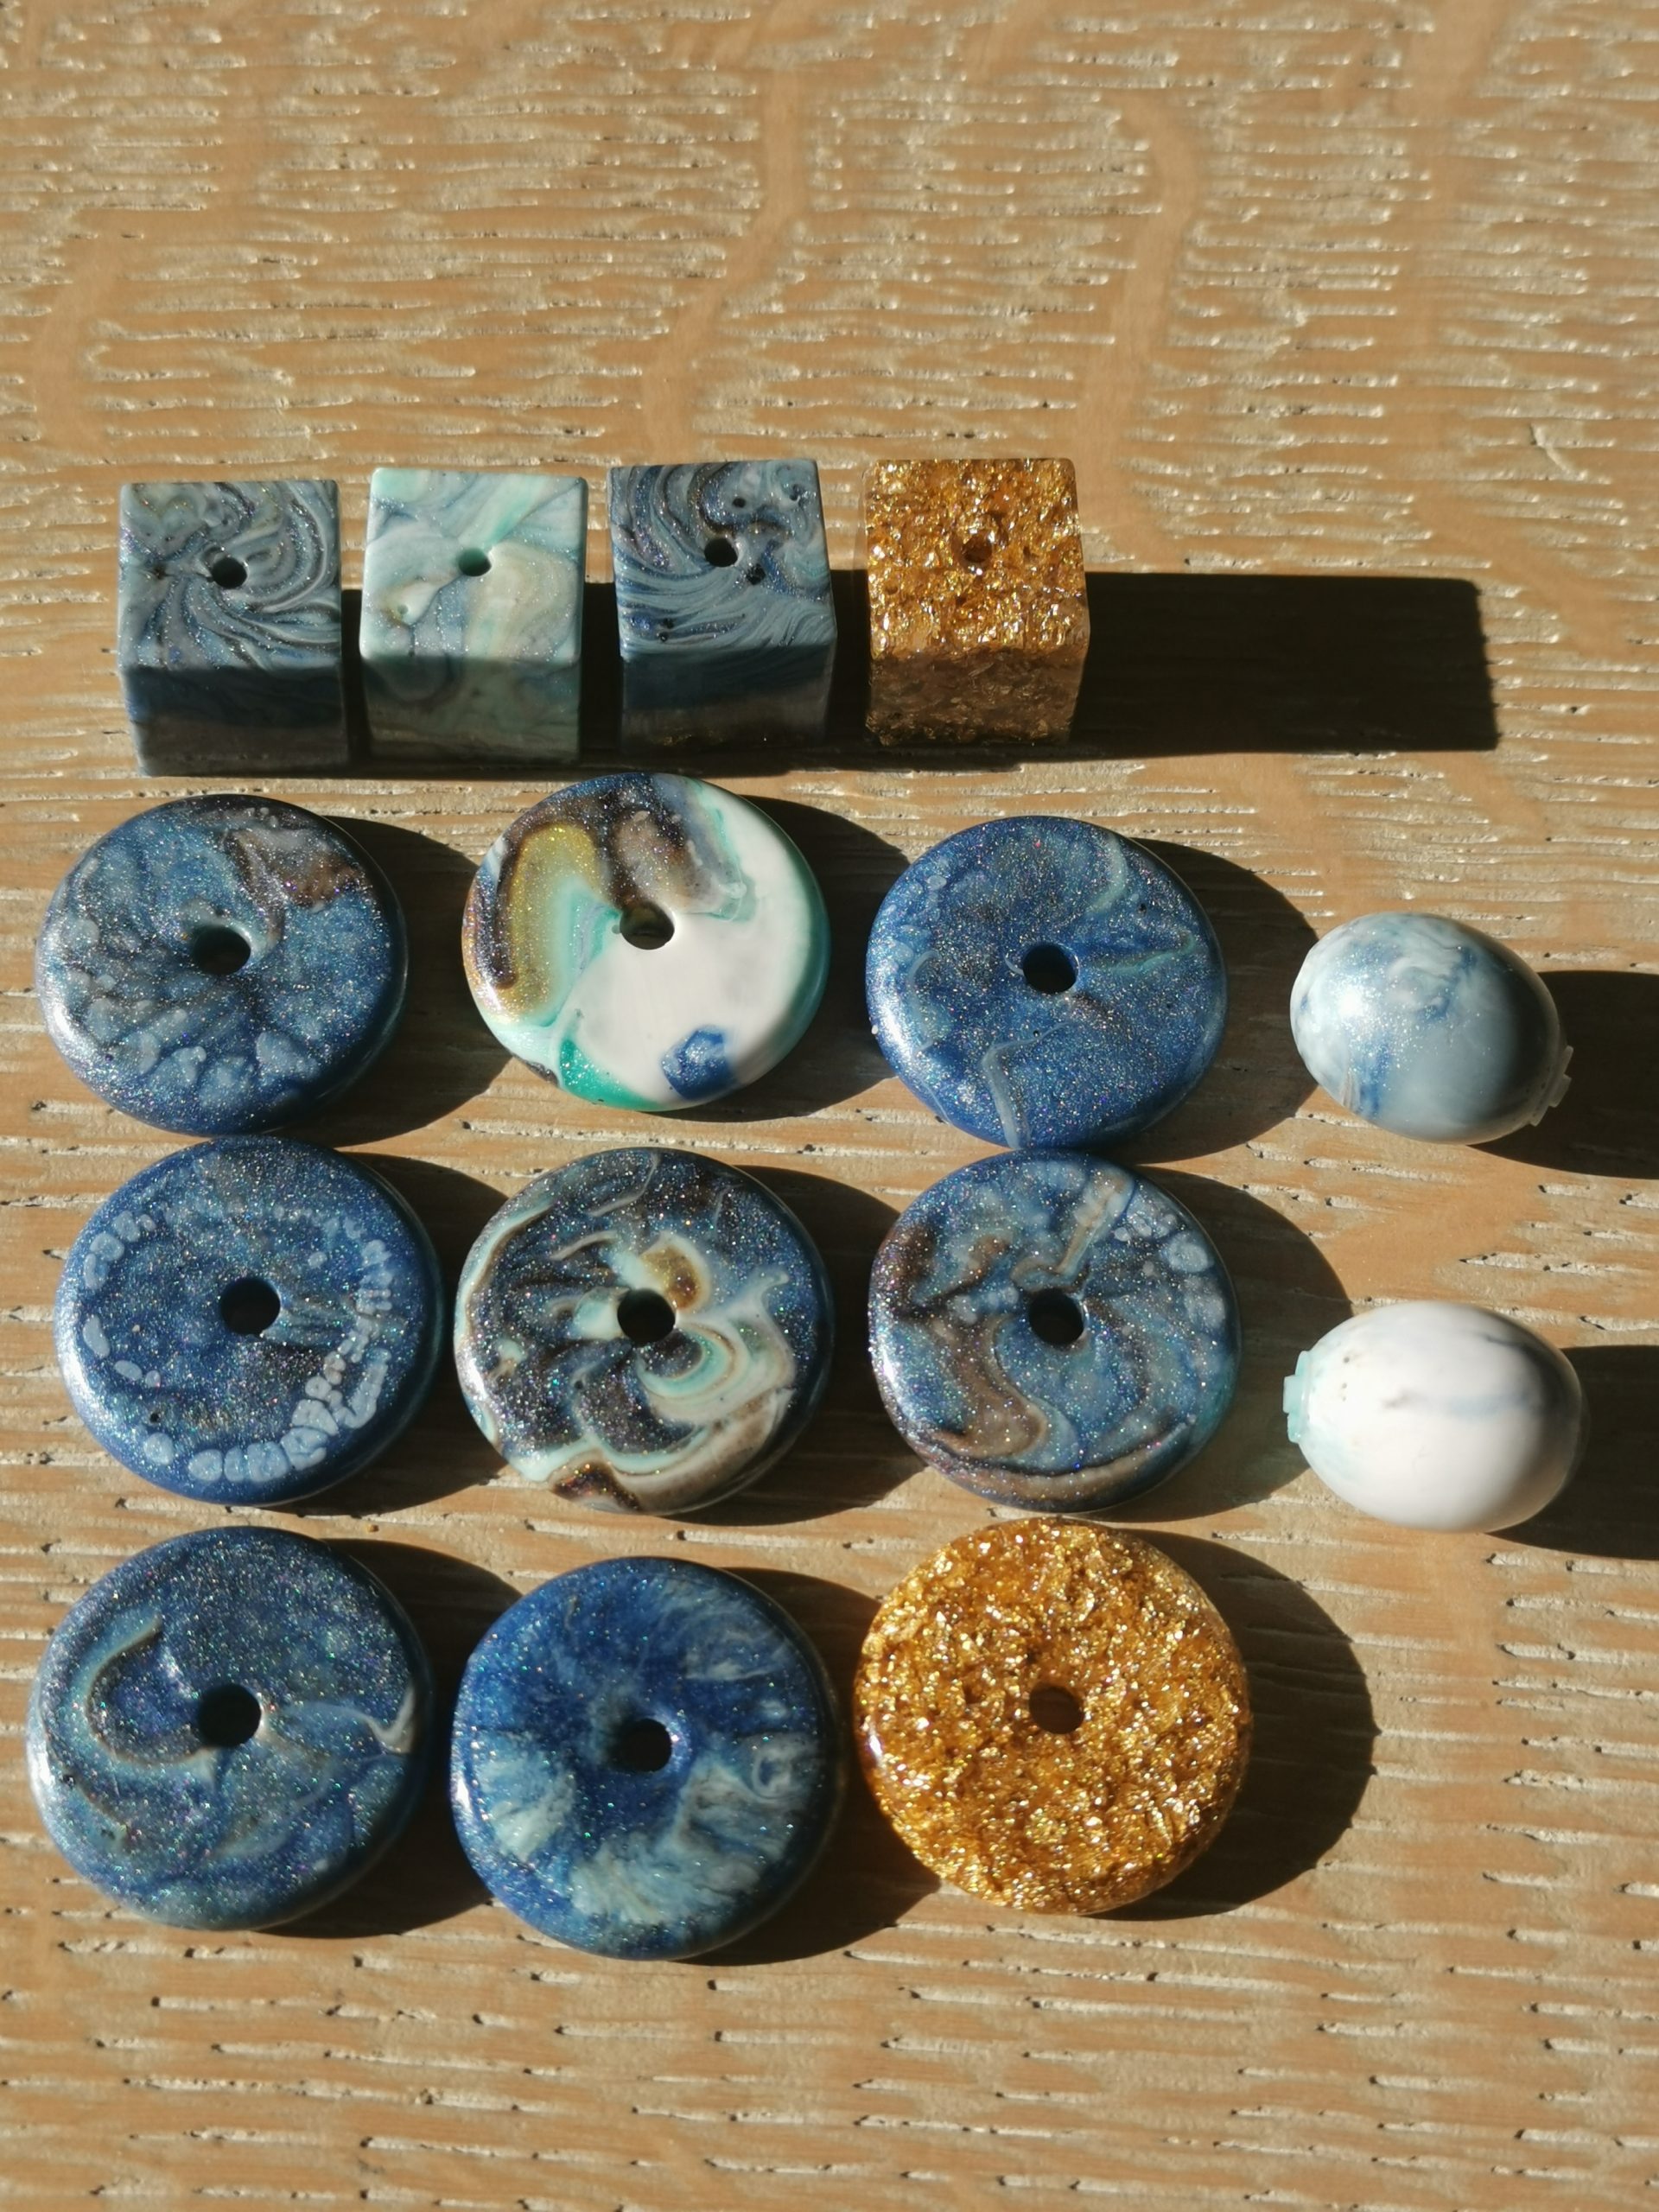
Less resin? Don’t throw anything away — casting pearls and cubes
After each casting phase, colored residues of resin remained in the cups. I never throw that away. I had small silicone molds for round beads/donuts and square beads, and each one was filled with the leftovers. The result: a nice collection of blue, teal and gold pearls that are perfect as decoration or jewelry.
Do you want to know what I did with the leftover resin? Also read From leftover resin to jewelry: six necklaces of homemade resin beads.
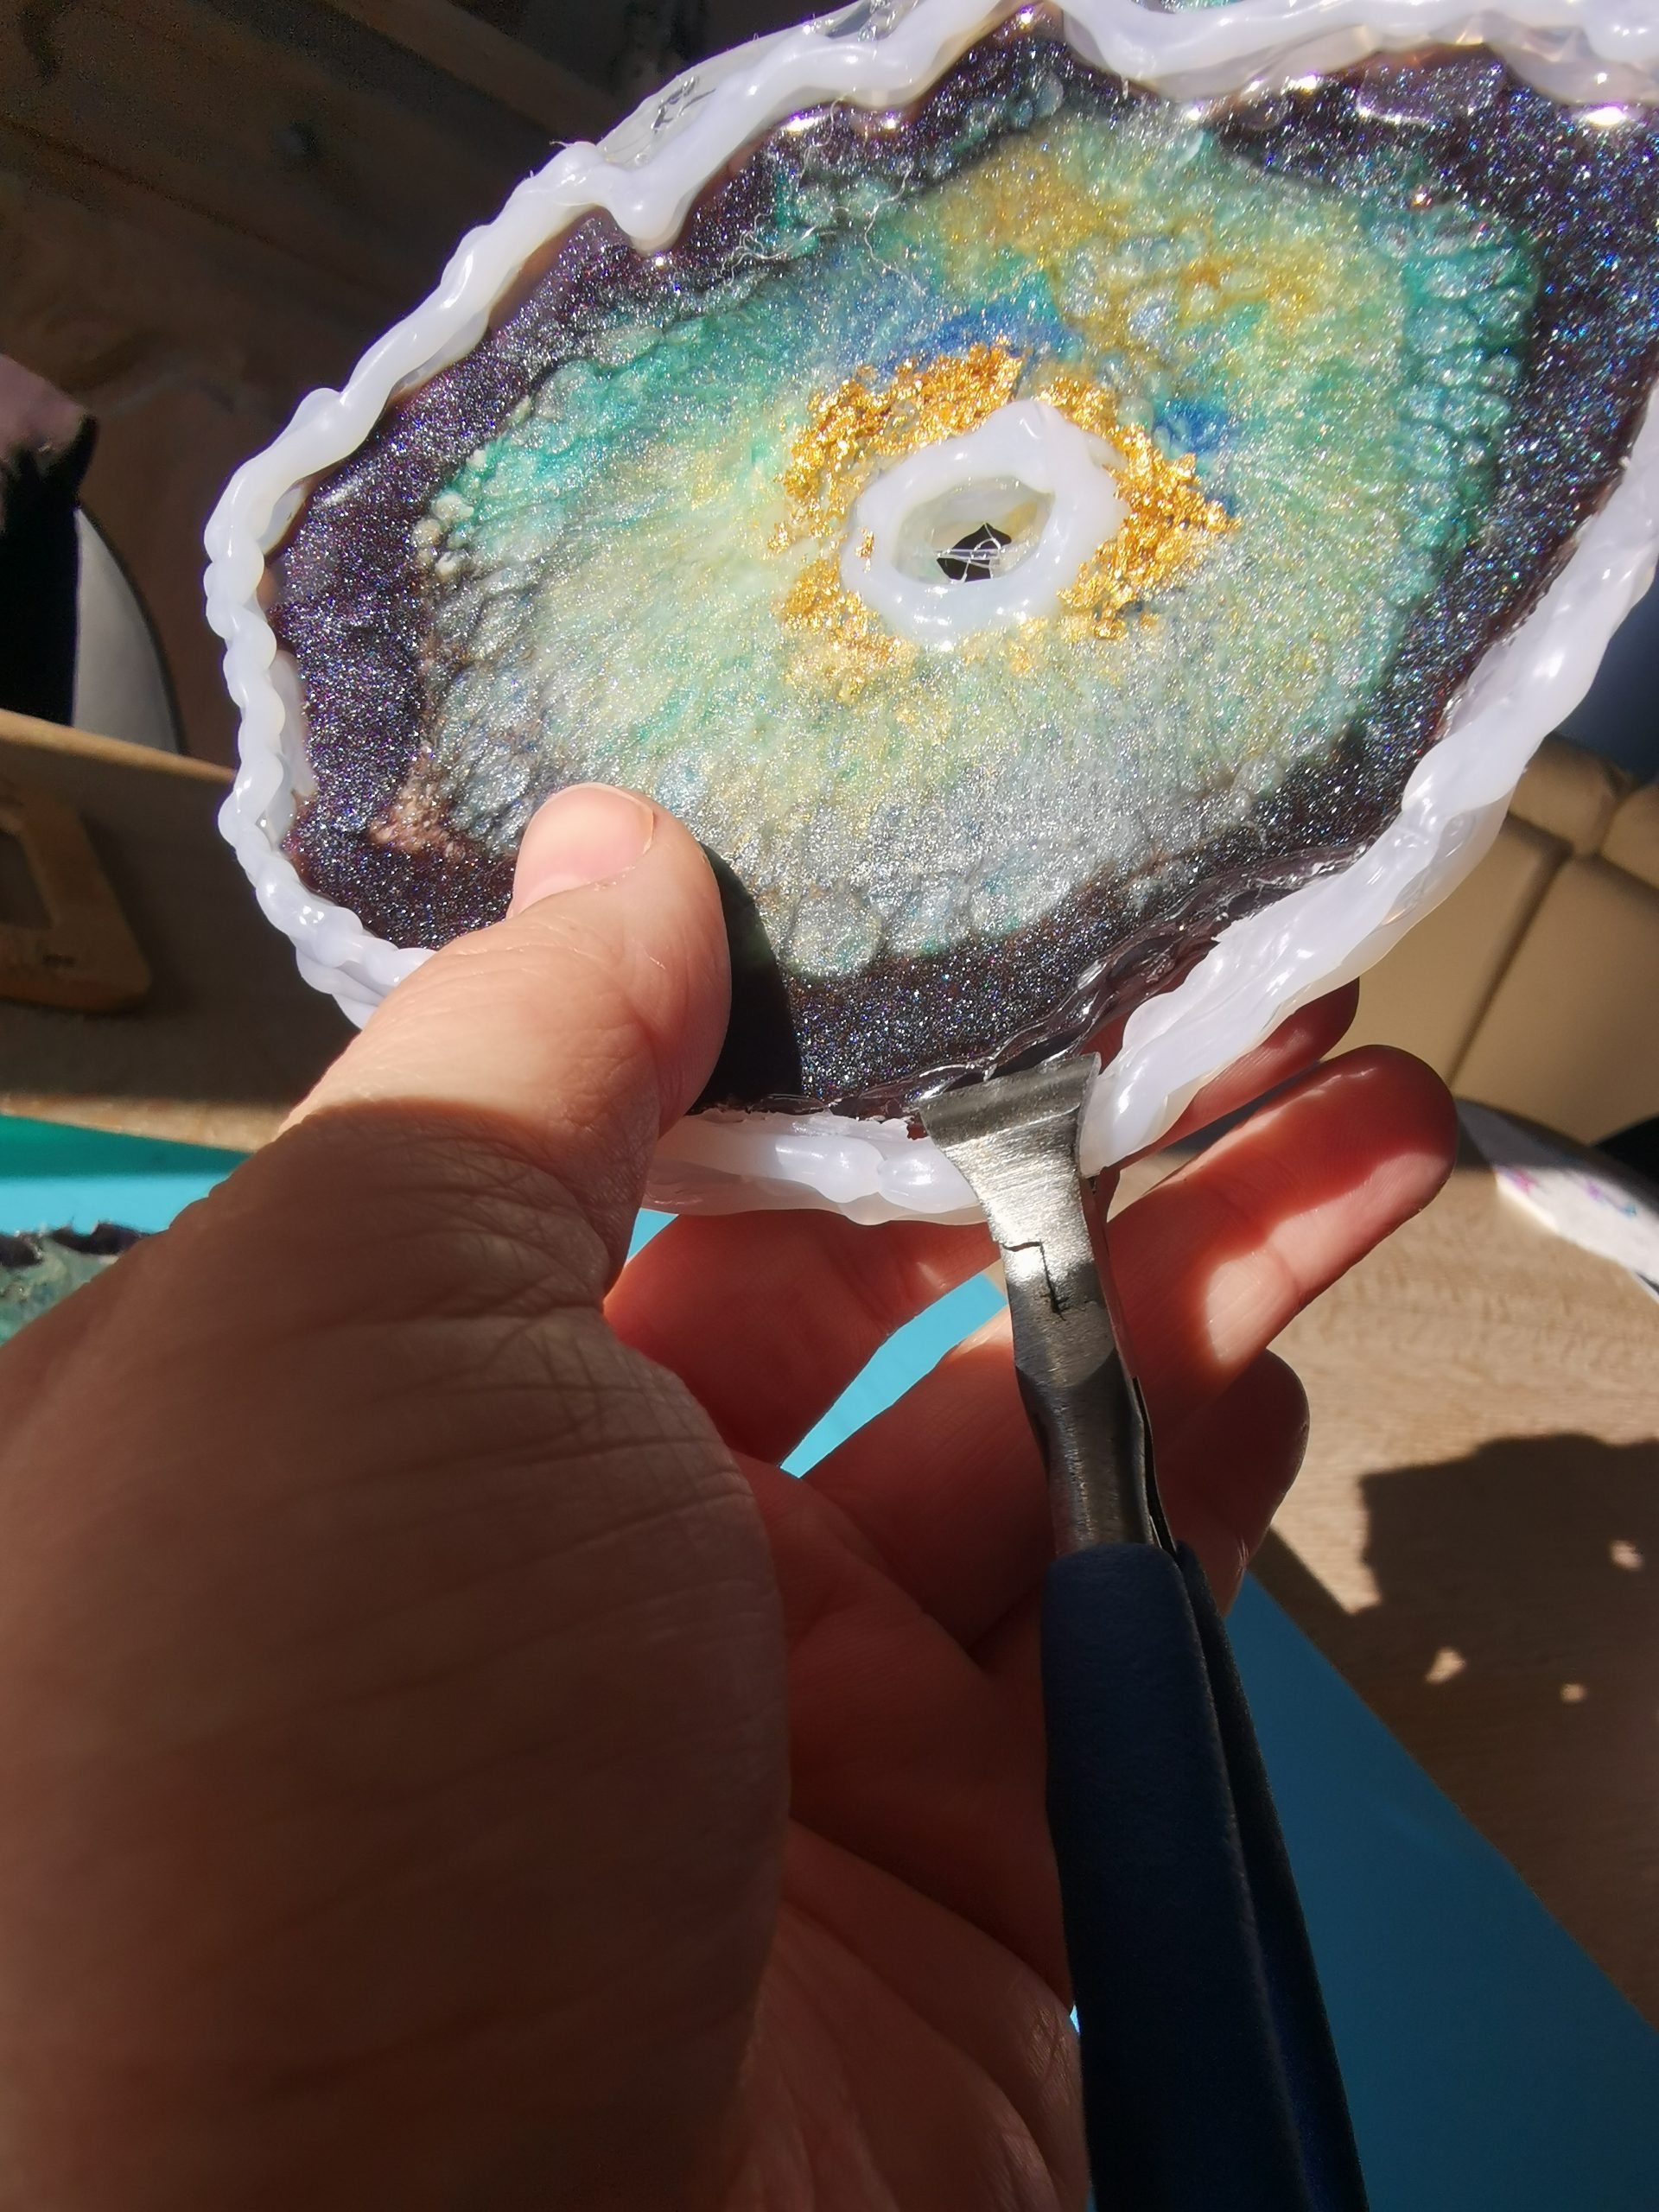
Step 7: Unmoulding — and why it completely failed for me
With a purchased silicone mold: carefully press the coaster out of the mold from below. Simple and hassle-free.
With a freeform glue gun template: this is where things started to go wrong. The theory says that the hot glue edge will break loose or bend when you try to remove the coaster from the silicone mat. But that only applies if you use the right kind of hot glue — transparent craft hot glue that remains flexible after curing.
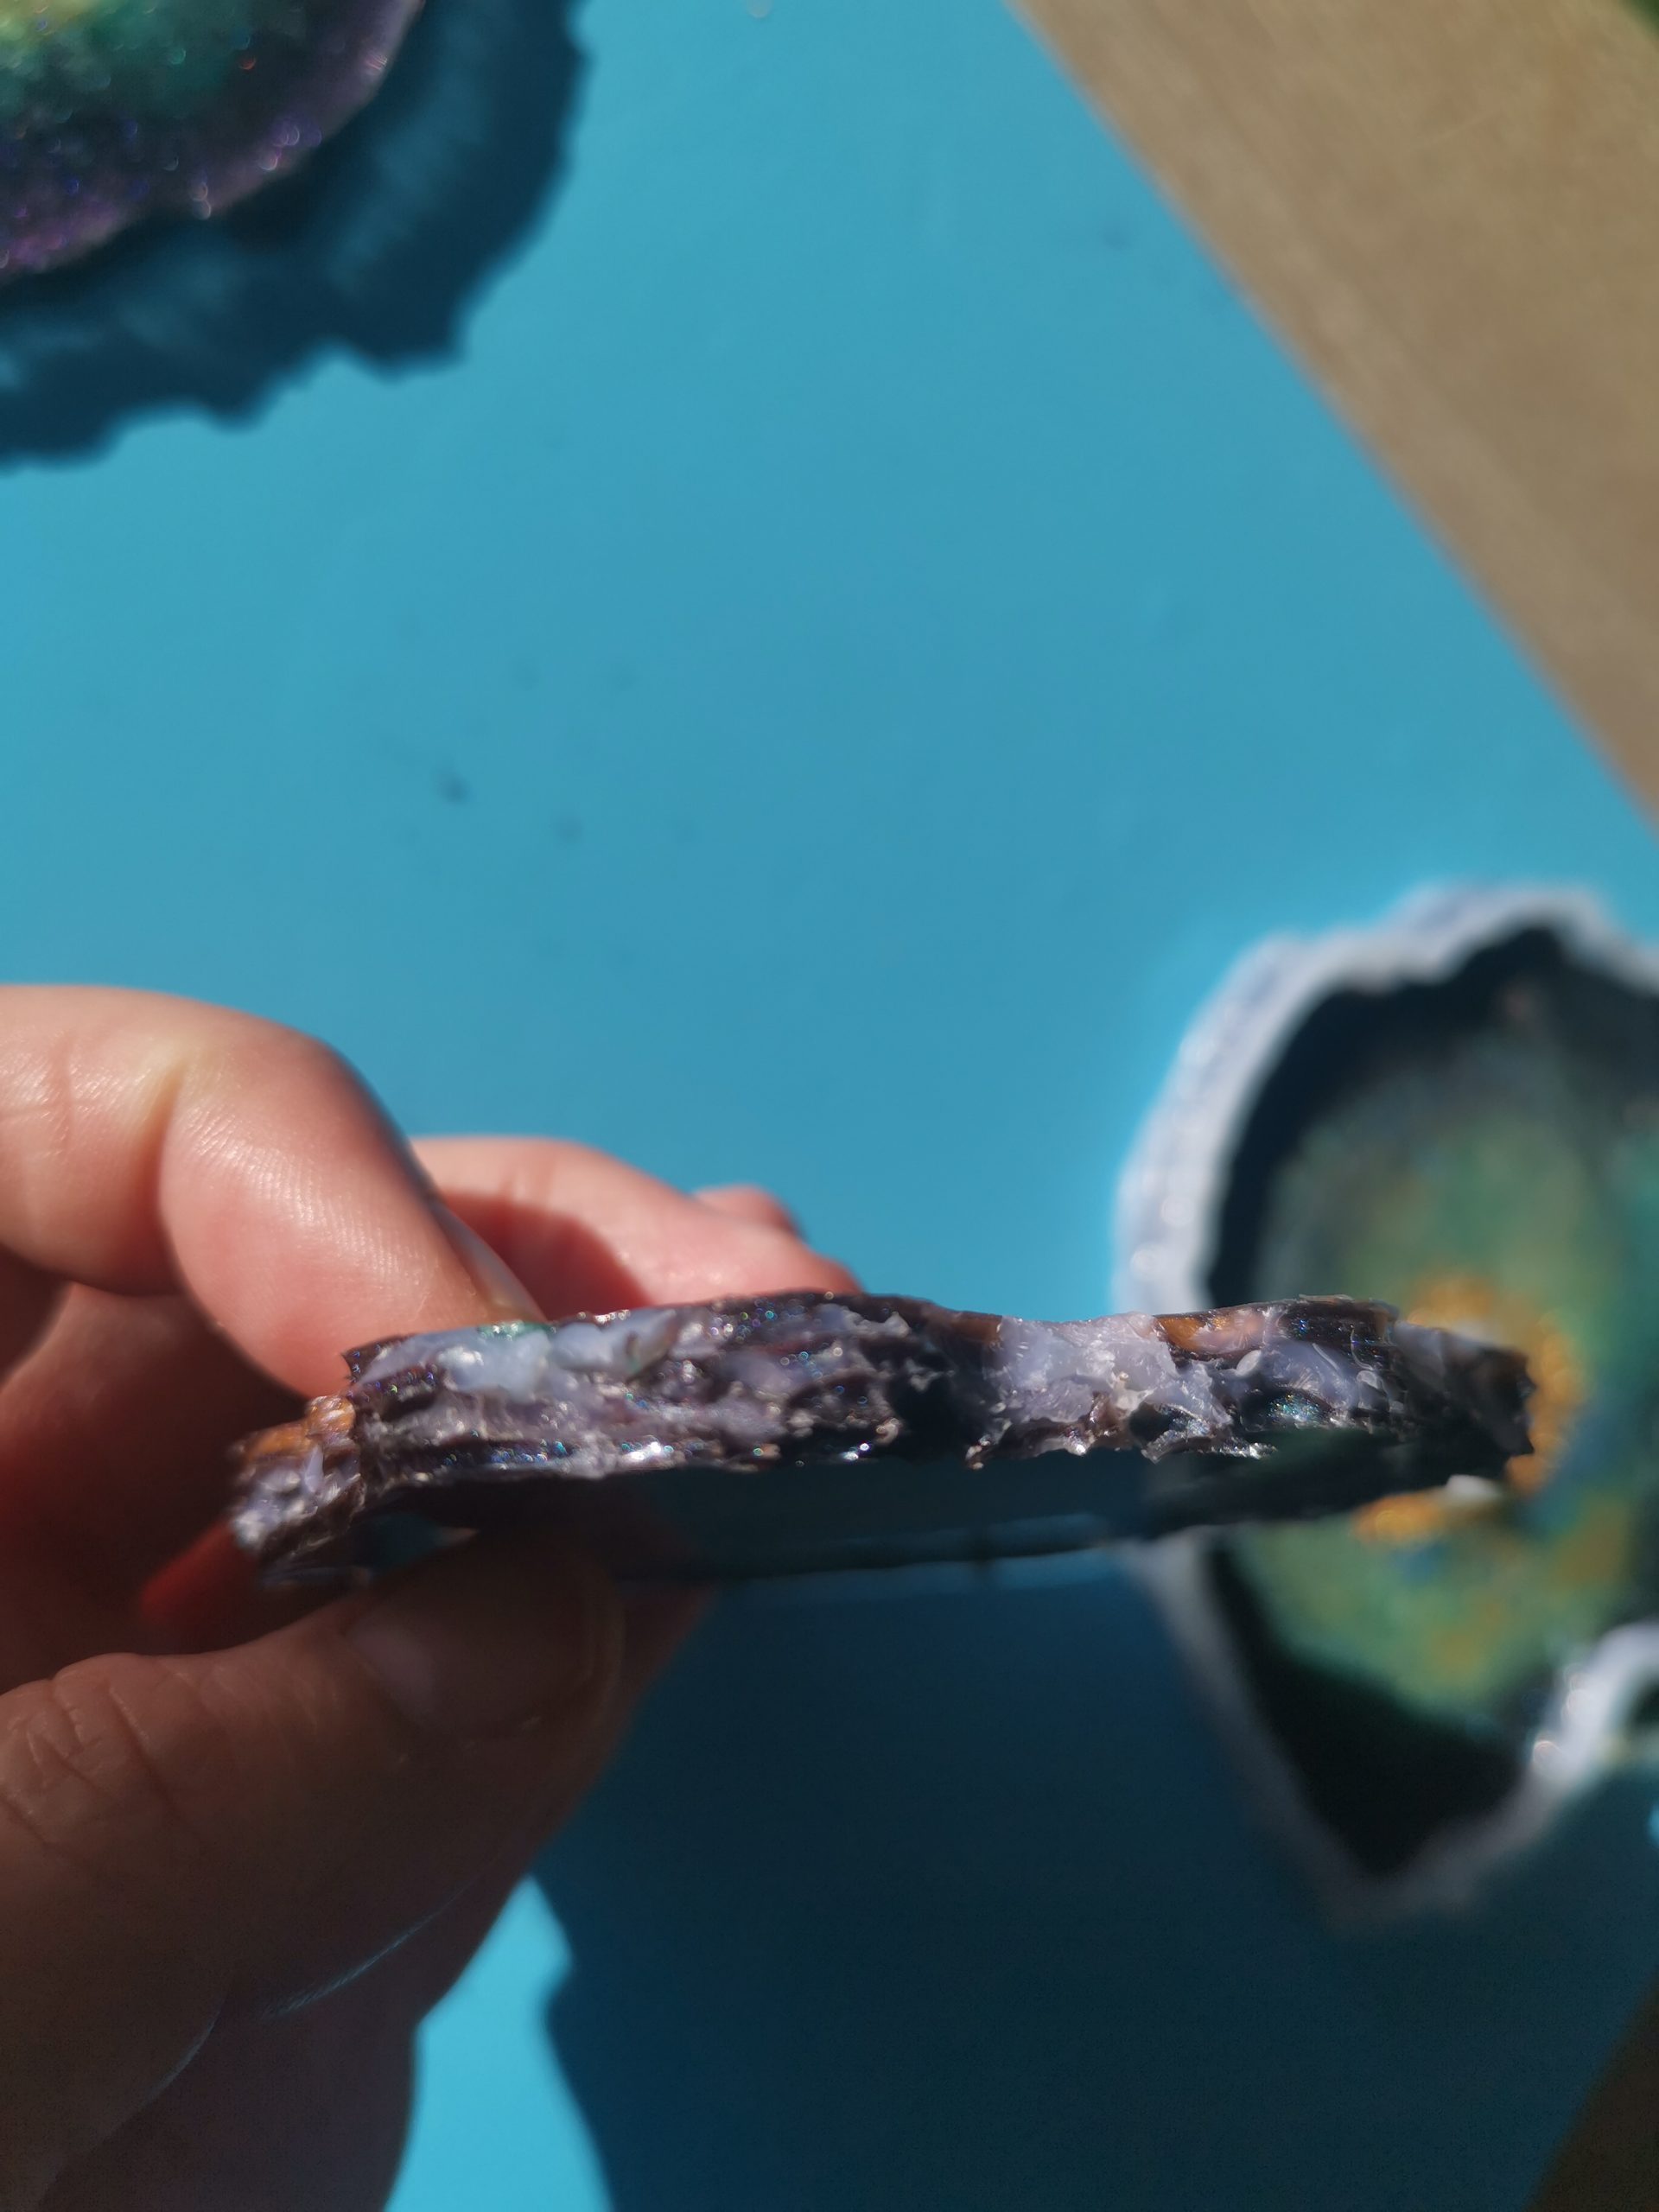
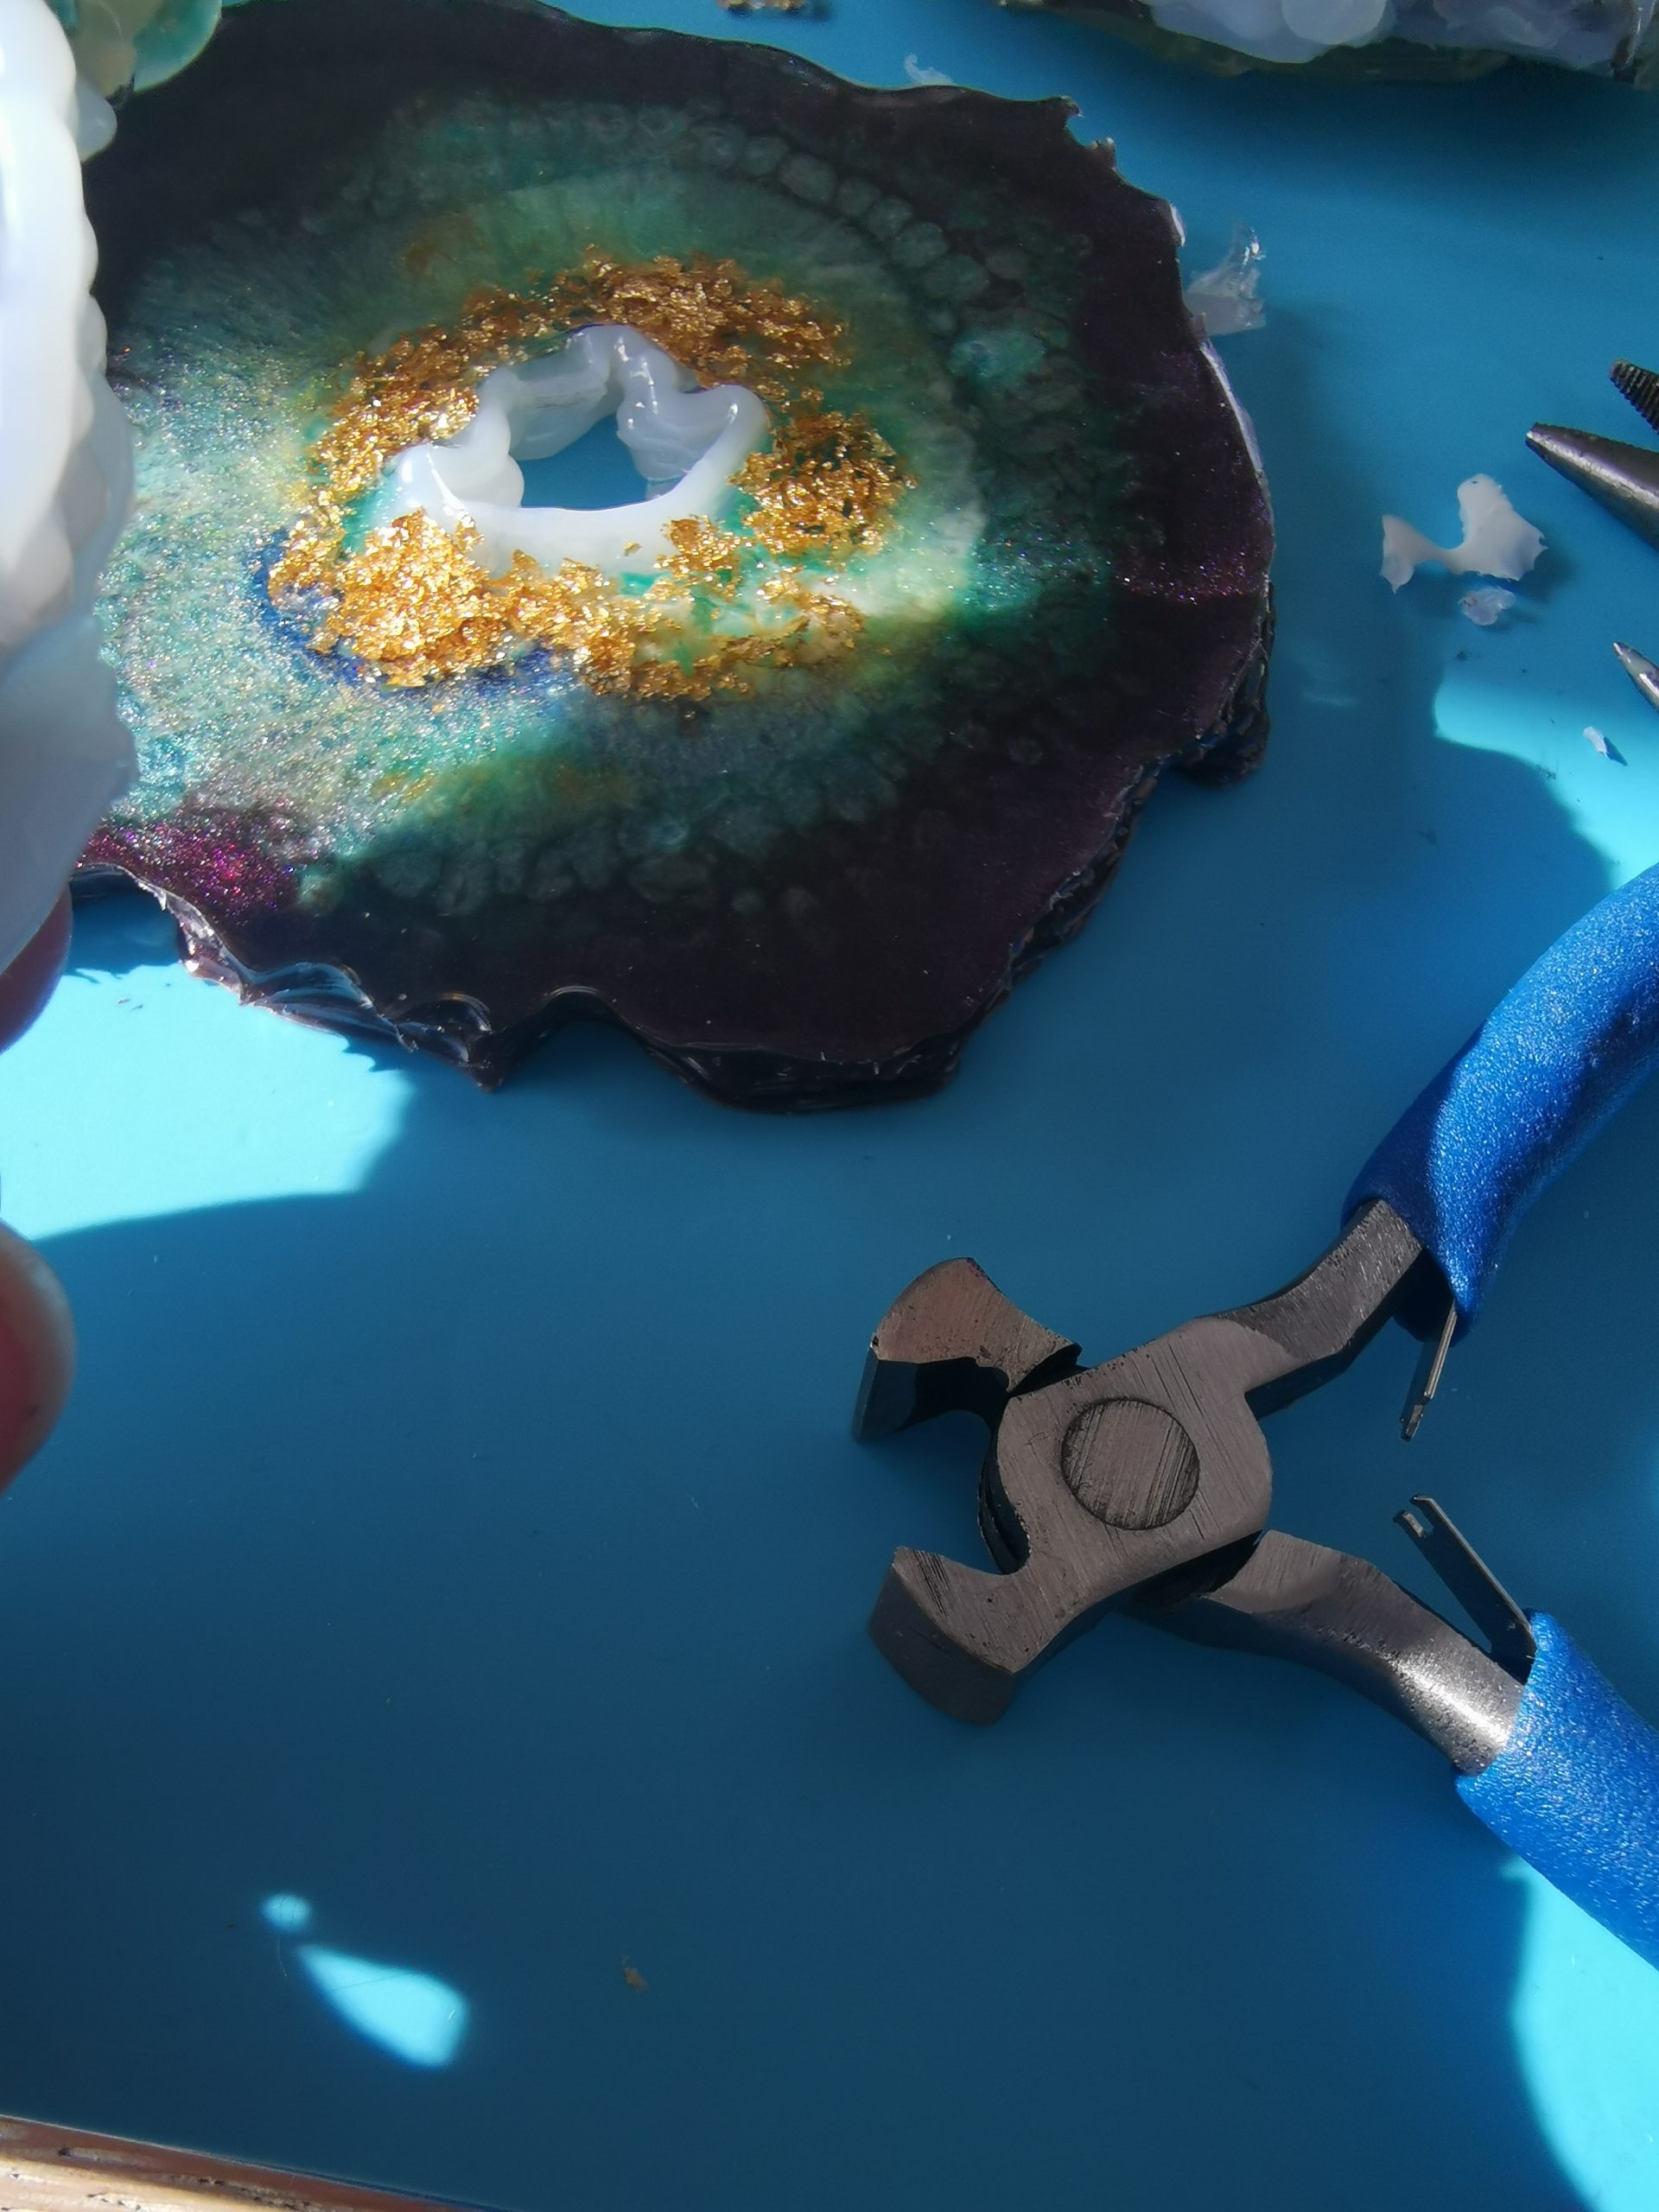
I used universal hot glue. And after the epoxy had hardened, it stuck so strongly to the resin edge that I absolutely could not get it off. Not with my hands, not with tongs (even my husband tried), not with the hairdryer. Sanding was also not an option: the sandpaper immediately became saturated by the heated glue. The edges were also extremely sharp.
I had to accept it. But look at those colors and composition — I’m still in love with them, even if the coasters aren’t usable.
Common beginner mistakes (and how to avoid them)
- Do not weigh accurately → always weigh, never estimate
- Stir too briefly → take at least 3–4 minutes
- Working at temperatures that are too low → many epoxy types cure poorly below 18°C
- Do not lay the mold flat → always use a spirit level
- Remove the coaster from the mold too early → wait for the complete curing time
- Using incorrect hot glue for freeform molds → use transparent craft hot glue (flexible after curing), not universal hot glue. This is the mistake I made — that left my coasters unfinished.
- Do not wear protection → uncured epoxy is a skin irritant; always wear gloves
Conclusion: put it in a mold — or use the right hot glue
Not everything can work out immediately, and I definitely learned something from this. The casting techniques, the colors and the compositions are beautiful — and they can certainly be used for a next attempt. But I only use the freeform hot glue method with the right glue, or even better: with cheap silicone molds that simply come off.
There will certainly be a part 2 with the same color techniques — but neatly in a mold. Hopefully I’ll see you again then!
Want to know more about epoxy?
Do you want to continue after your first coasters? Also read which epoxy resin to choose per project, which epoxy yellows the least and how to prevent amine blush.
My materials used:
- Casting epoxy 1:1 (with pumps): letsresin epoxy resin set + pumps and accessories
- Alternatively with epoxy + color starter: letsresin epoxy set + mica powder
- Mica powders (blue, teal, gold): extended set of mica powder or letsresin mica powder set
- DR resin dye paste (ocean waves): DecoRom pigment paste for ocean waves
- Chameleon powder: lets resin chameleon powder (DE) or chameleon powder (BE)
- Foil Flakes (gold leaf): Foil Flakes (BE) or Foil Flakes (DE)
- Optional for many bubbles: letsresin Resin Bubble Remover (DE) or letsresin Resin Bubble Remover (BE)
Affiliate Disclaimer: Some links are affiliate links. If you purchase through such a link, I may receive a small commission at no additional cost to you.