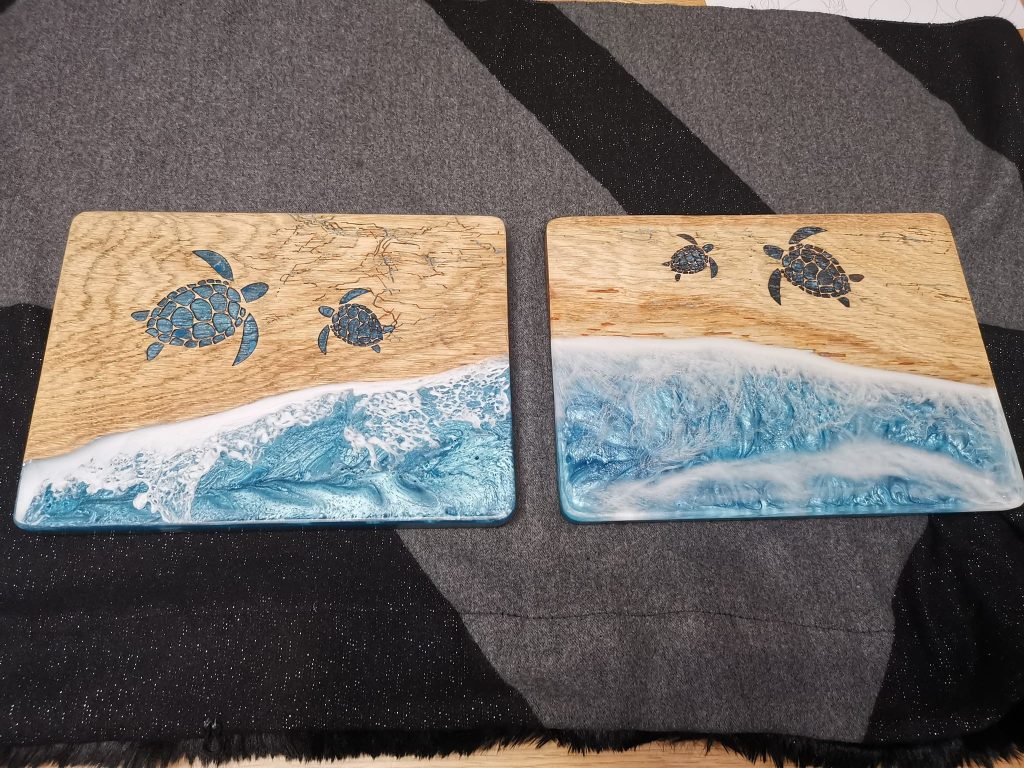
Make an epoxy ocean motif serving board – step-by-step
For these serving boards, I worked with reclaimed wood, laser engraving and multiple epoxy layers to build the ocean motif. Everything was done in phases: preparing, engraving, pouring, sanding, pouring again and finishing.
Below I explain how I did it, so you know what to do and what to watch out for if you want to make this yourself.
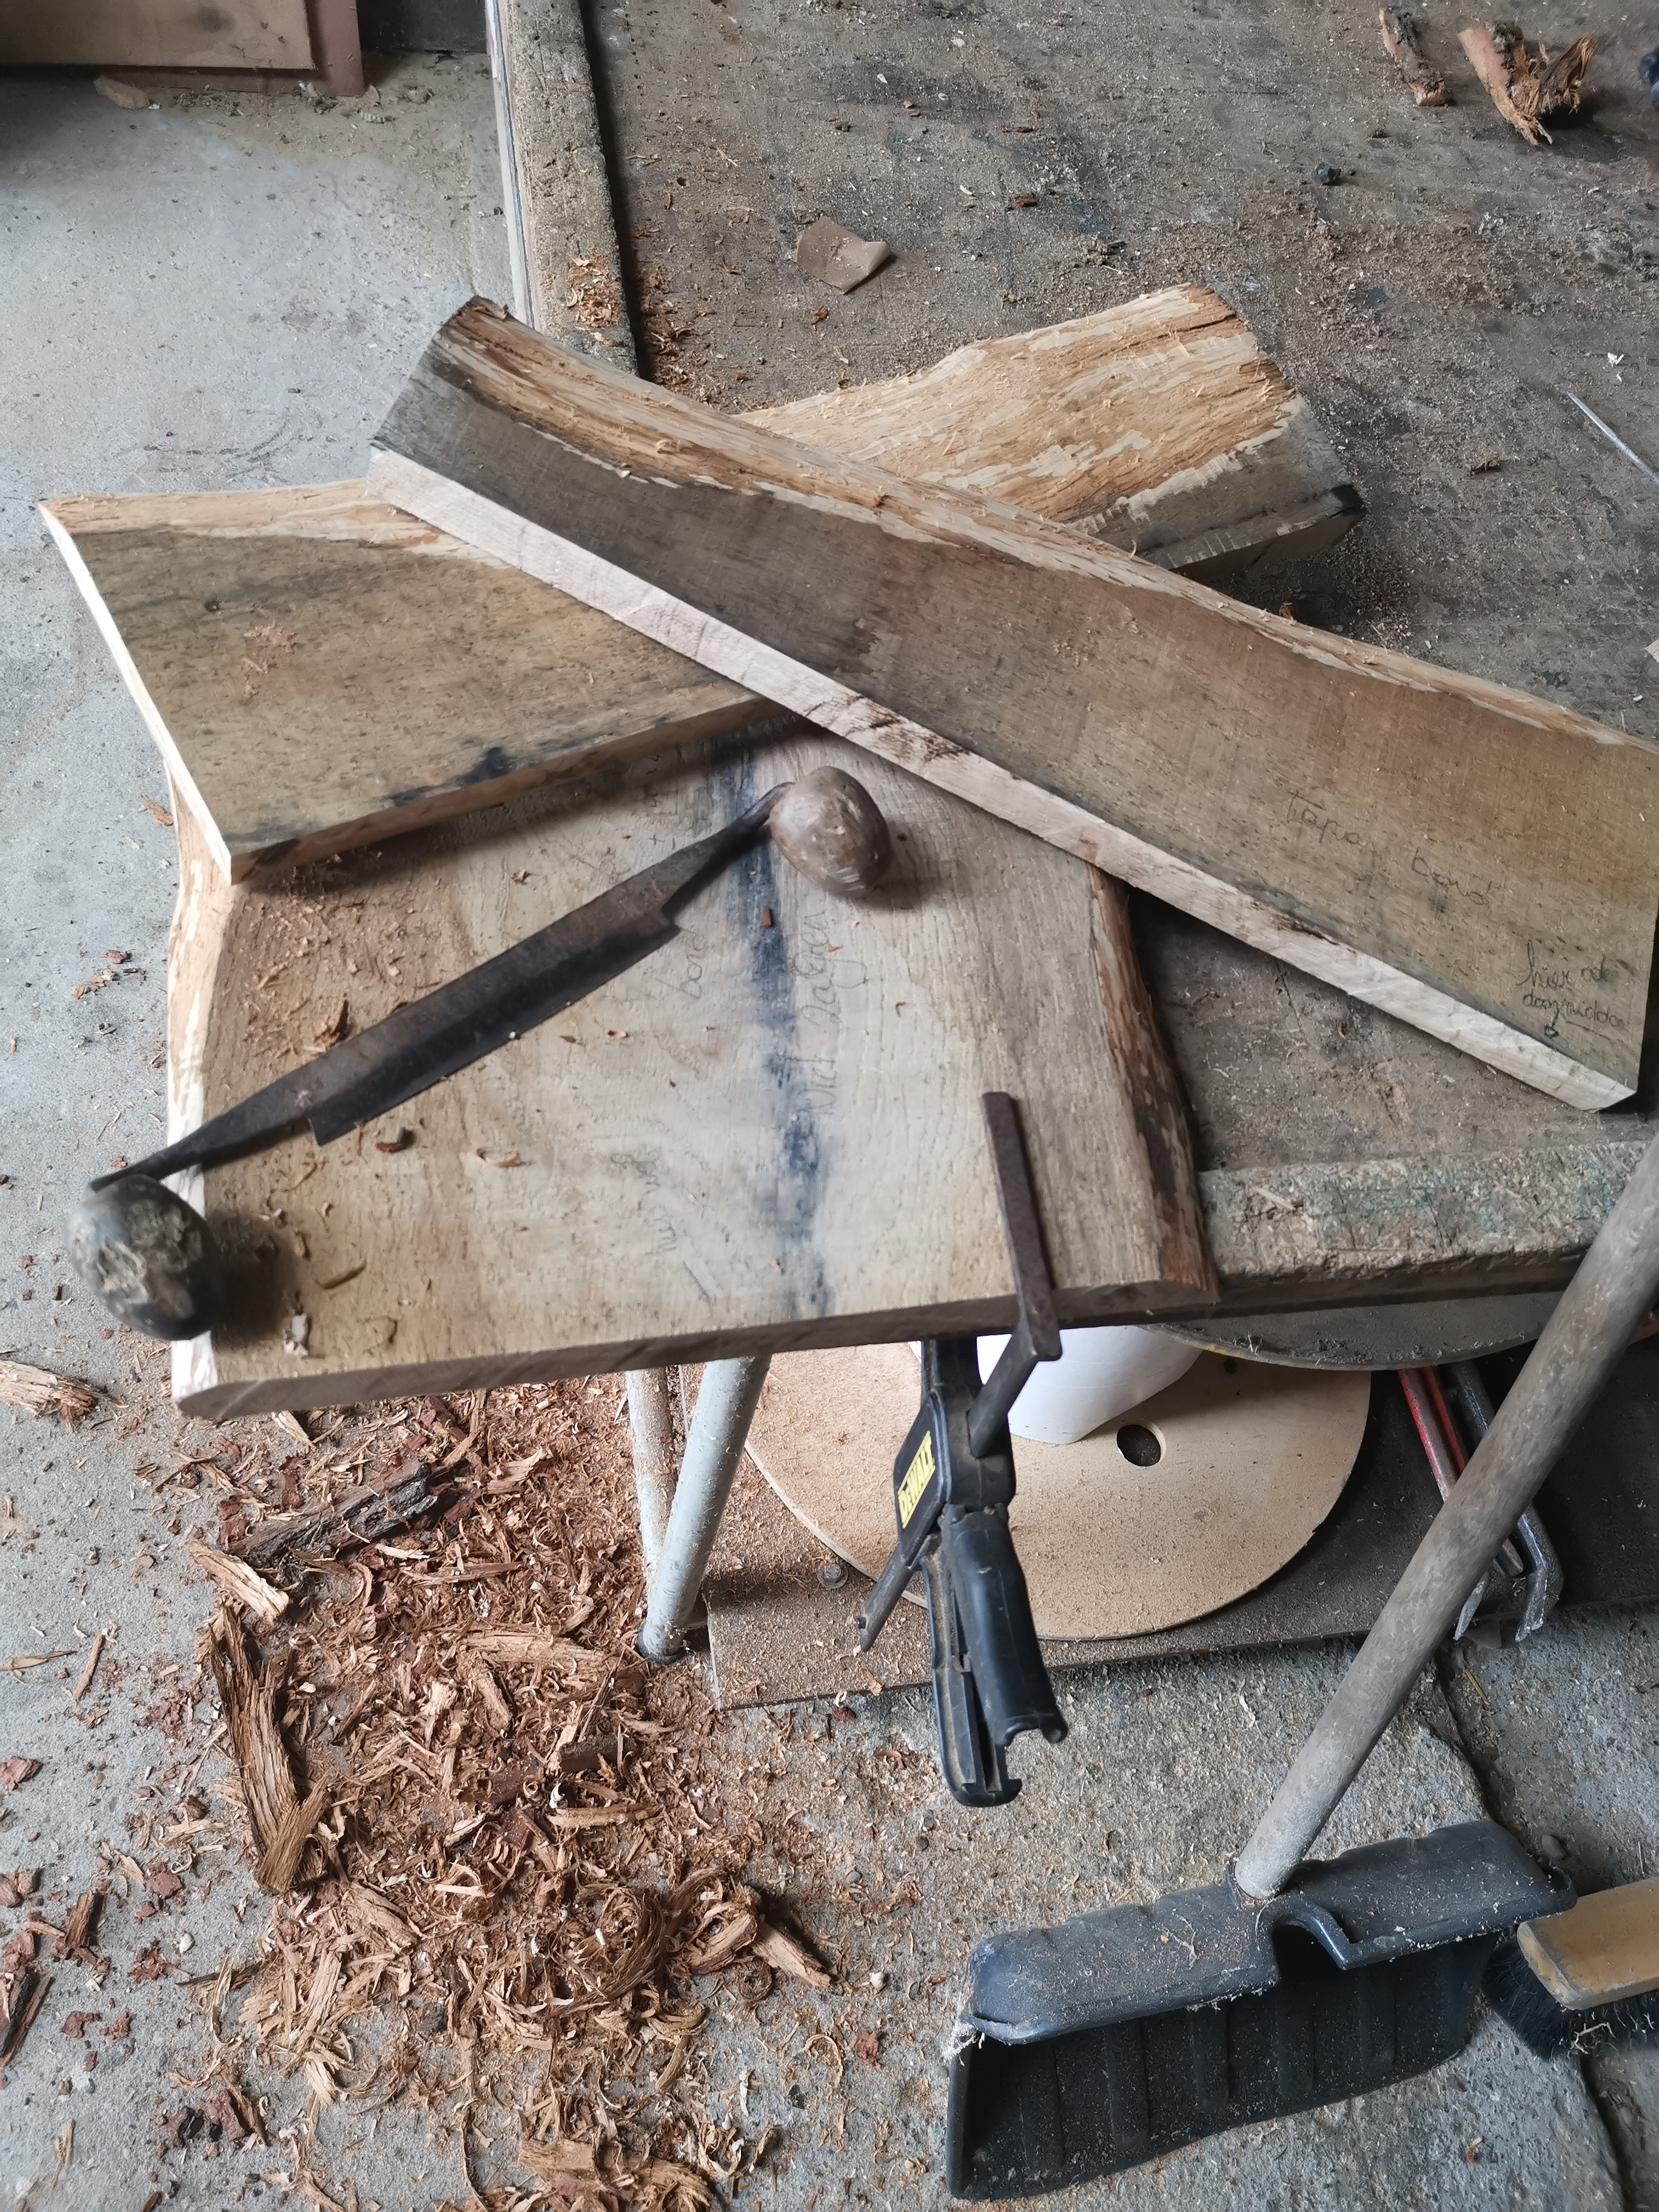
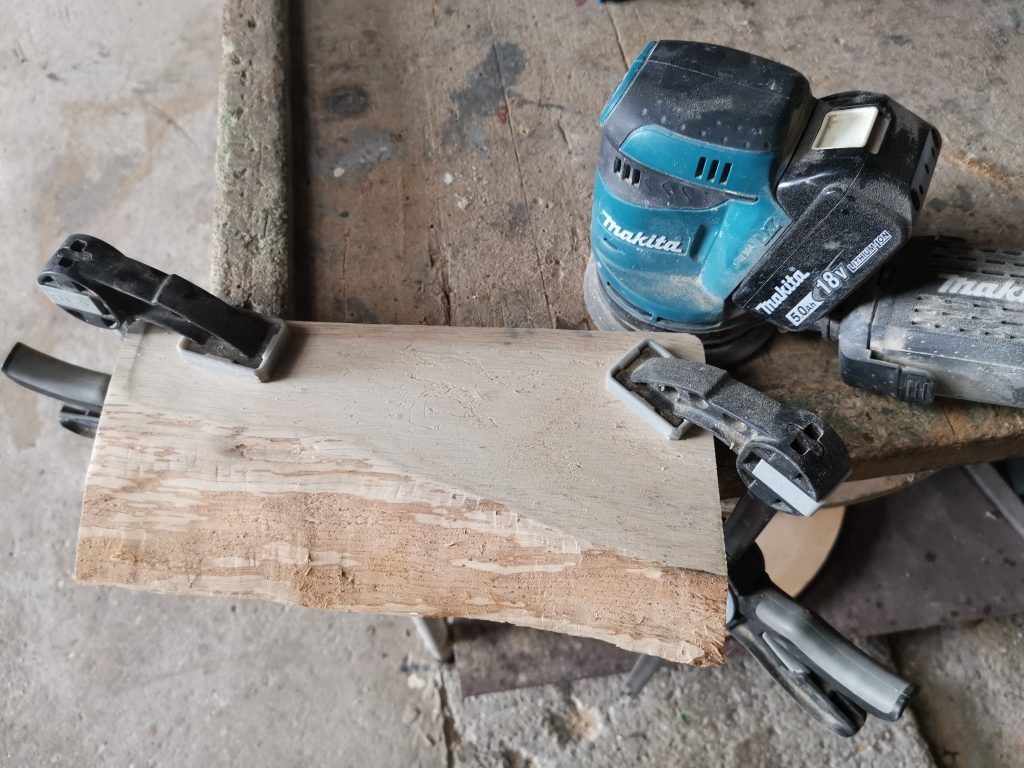
1. Prepare the wood
I started with rough wood.
First I removed the bark. Then I sanded everything up to grit 360. I did not plane it, I only sanded it.
I kept the natural shape of the wood. This preserved the character of the wood.
Important in this phase:
- Remove loose fibers completely
- Leave no dust in cracks or grain (compressed air is very useful here)
- Wood must be dry
I did not treat the underside of the boards, I only sanded it.
The epoxy was later poured directly onto the wood, so a clean surface is important.
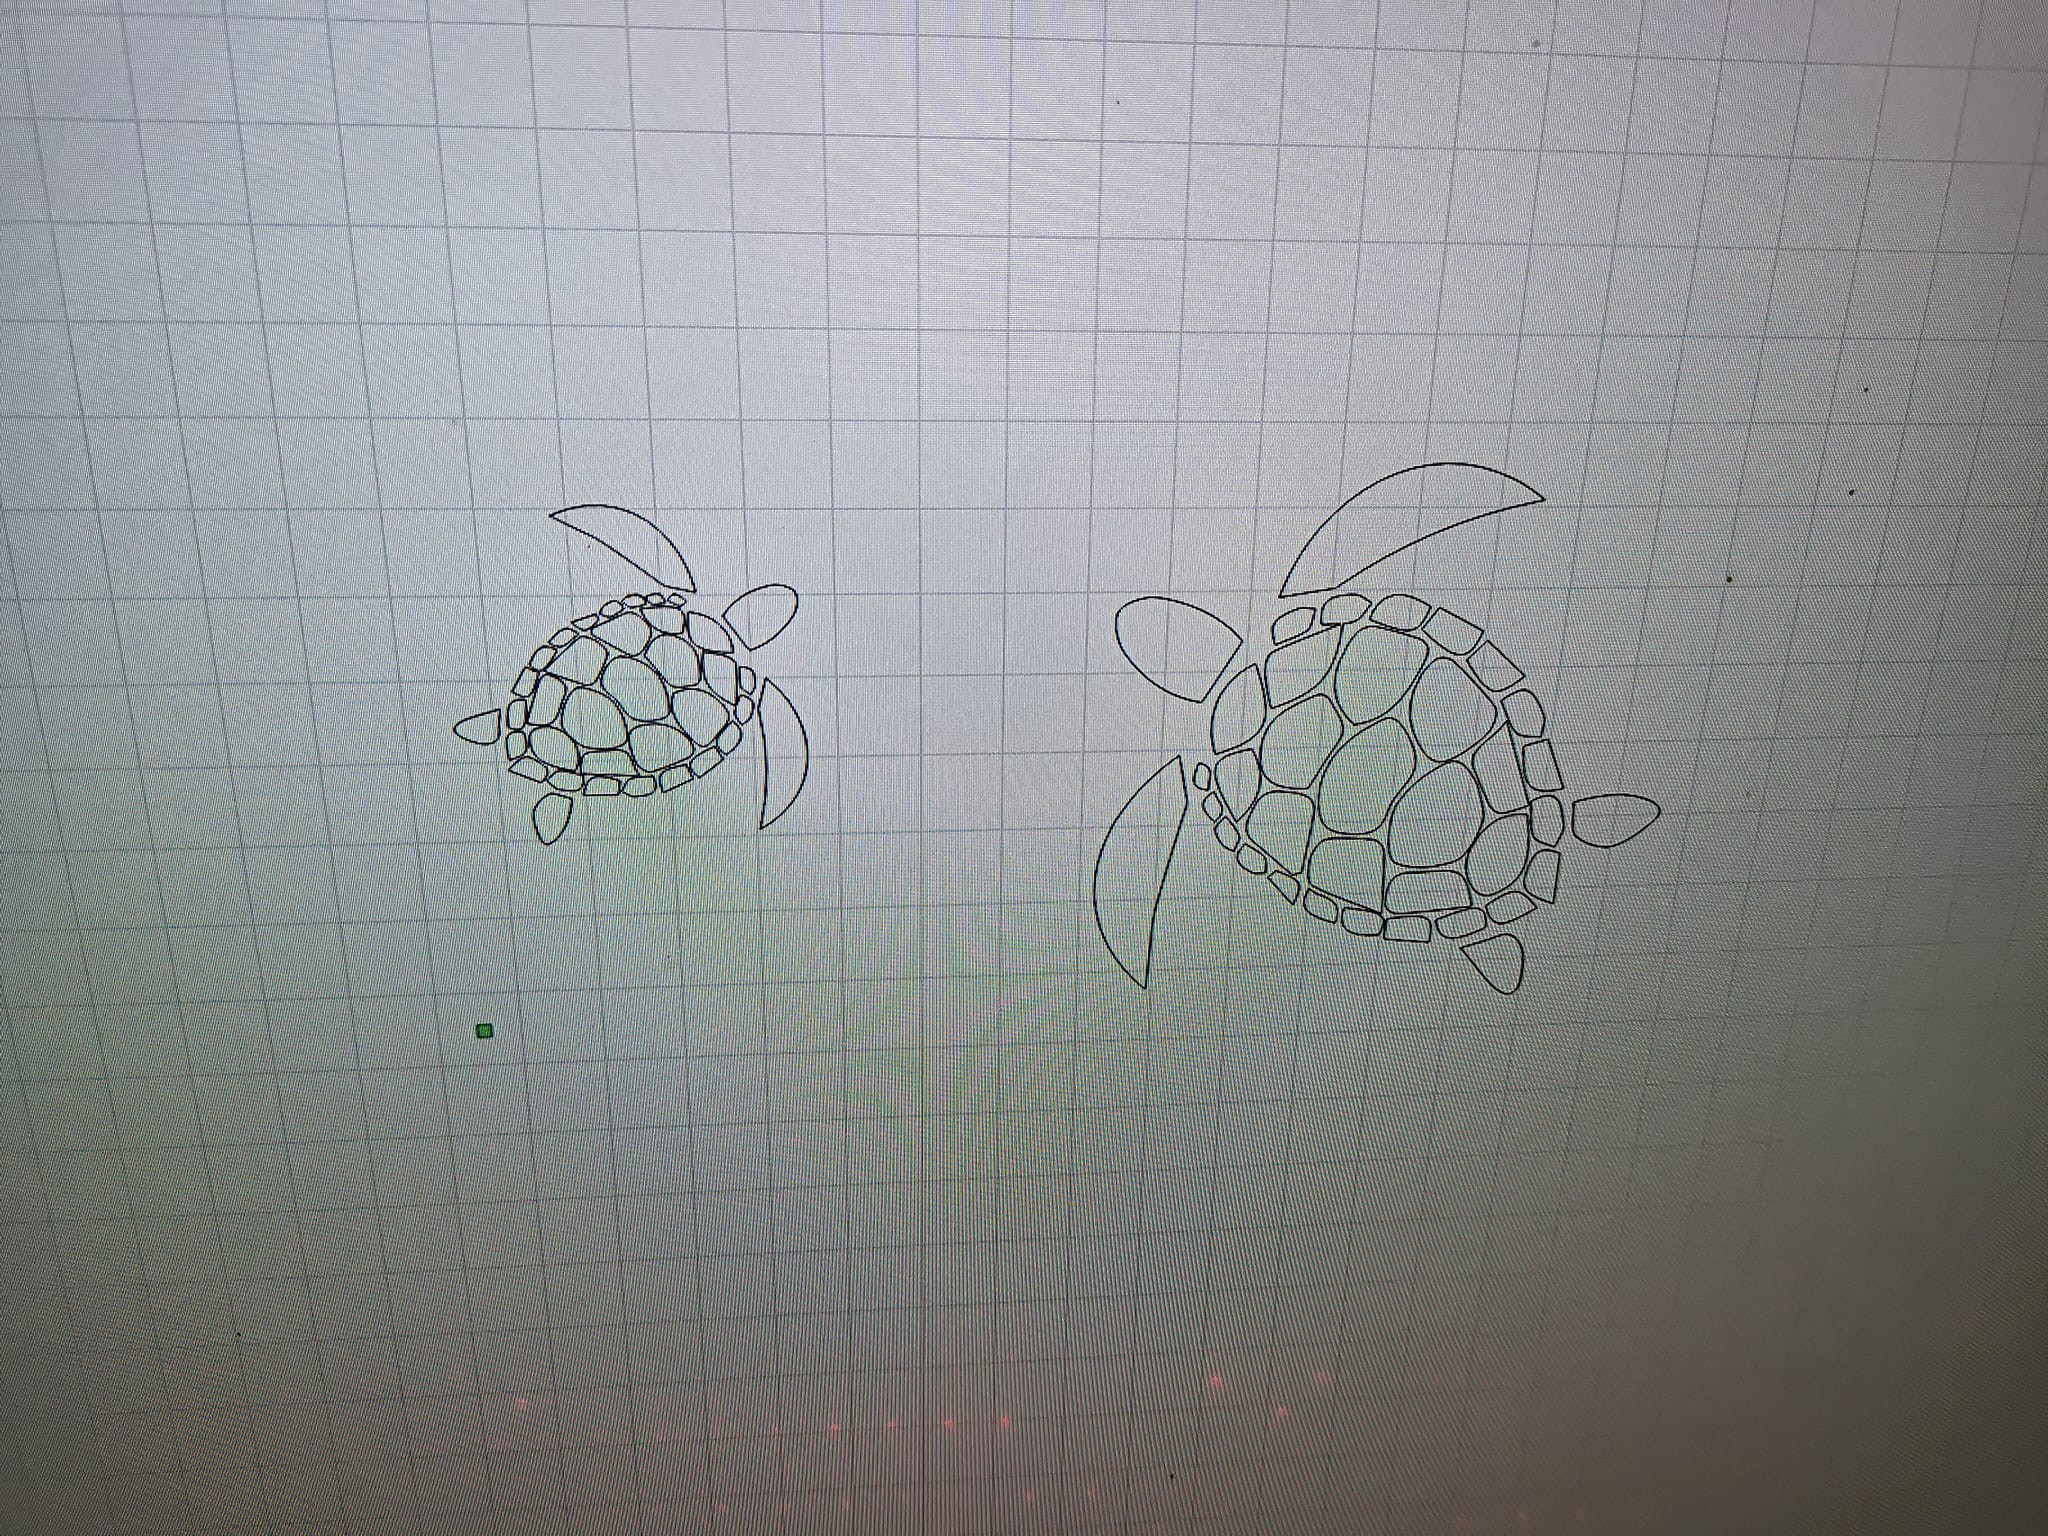
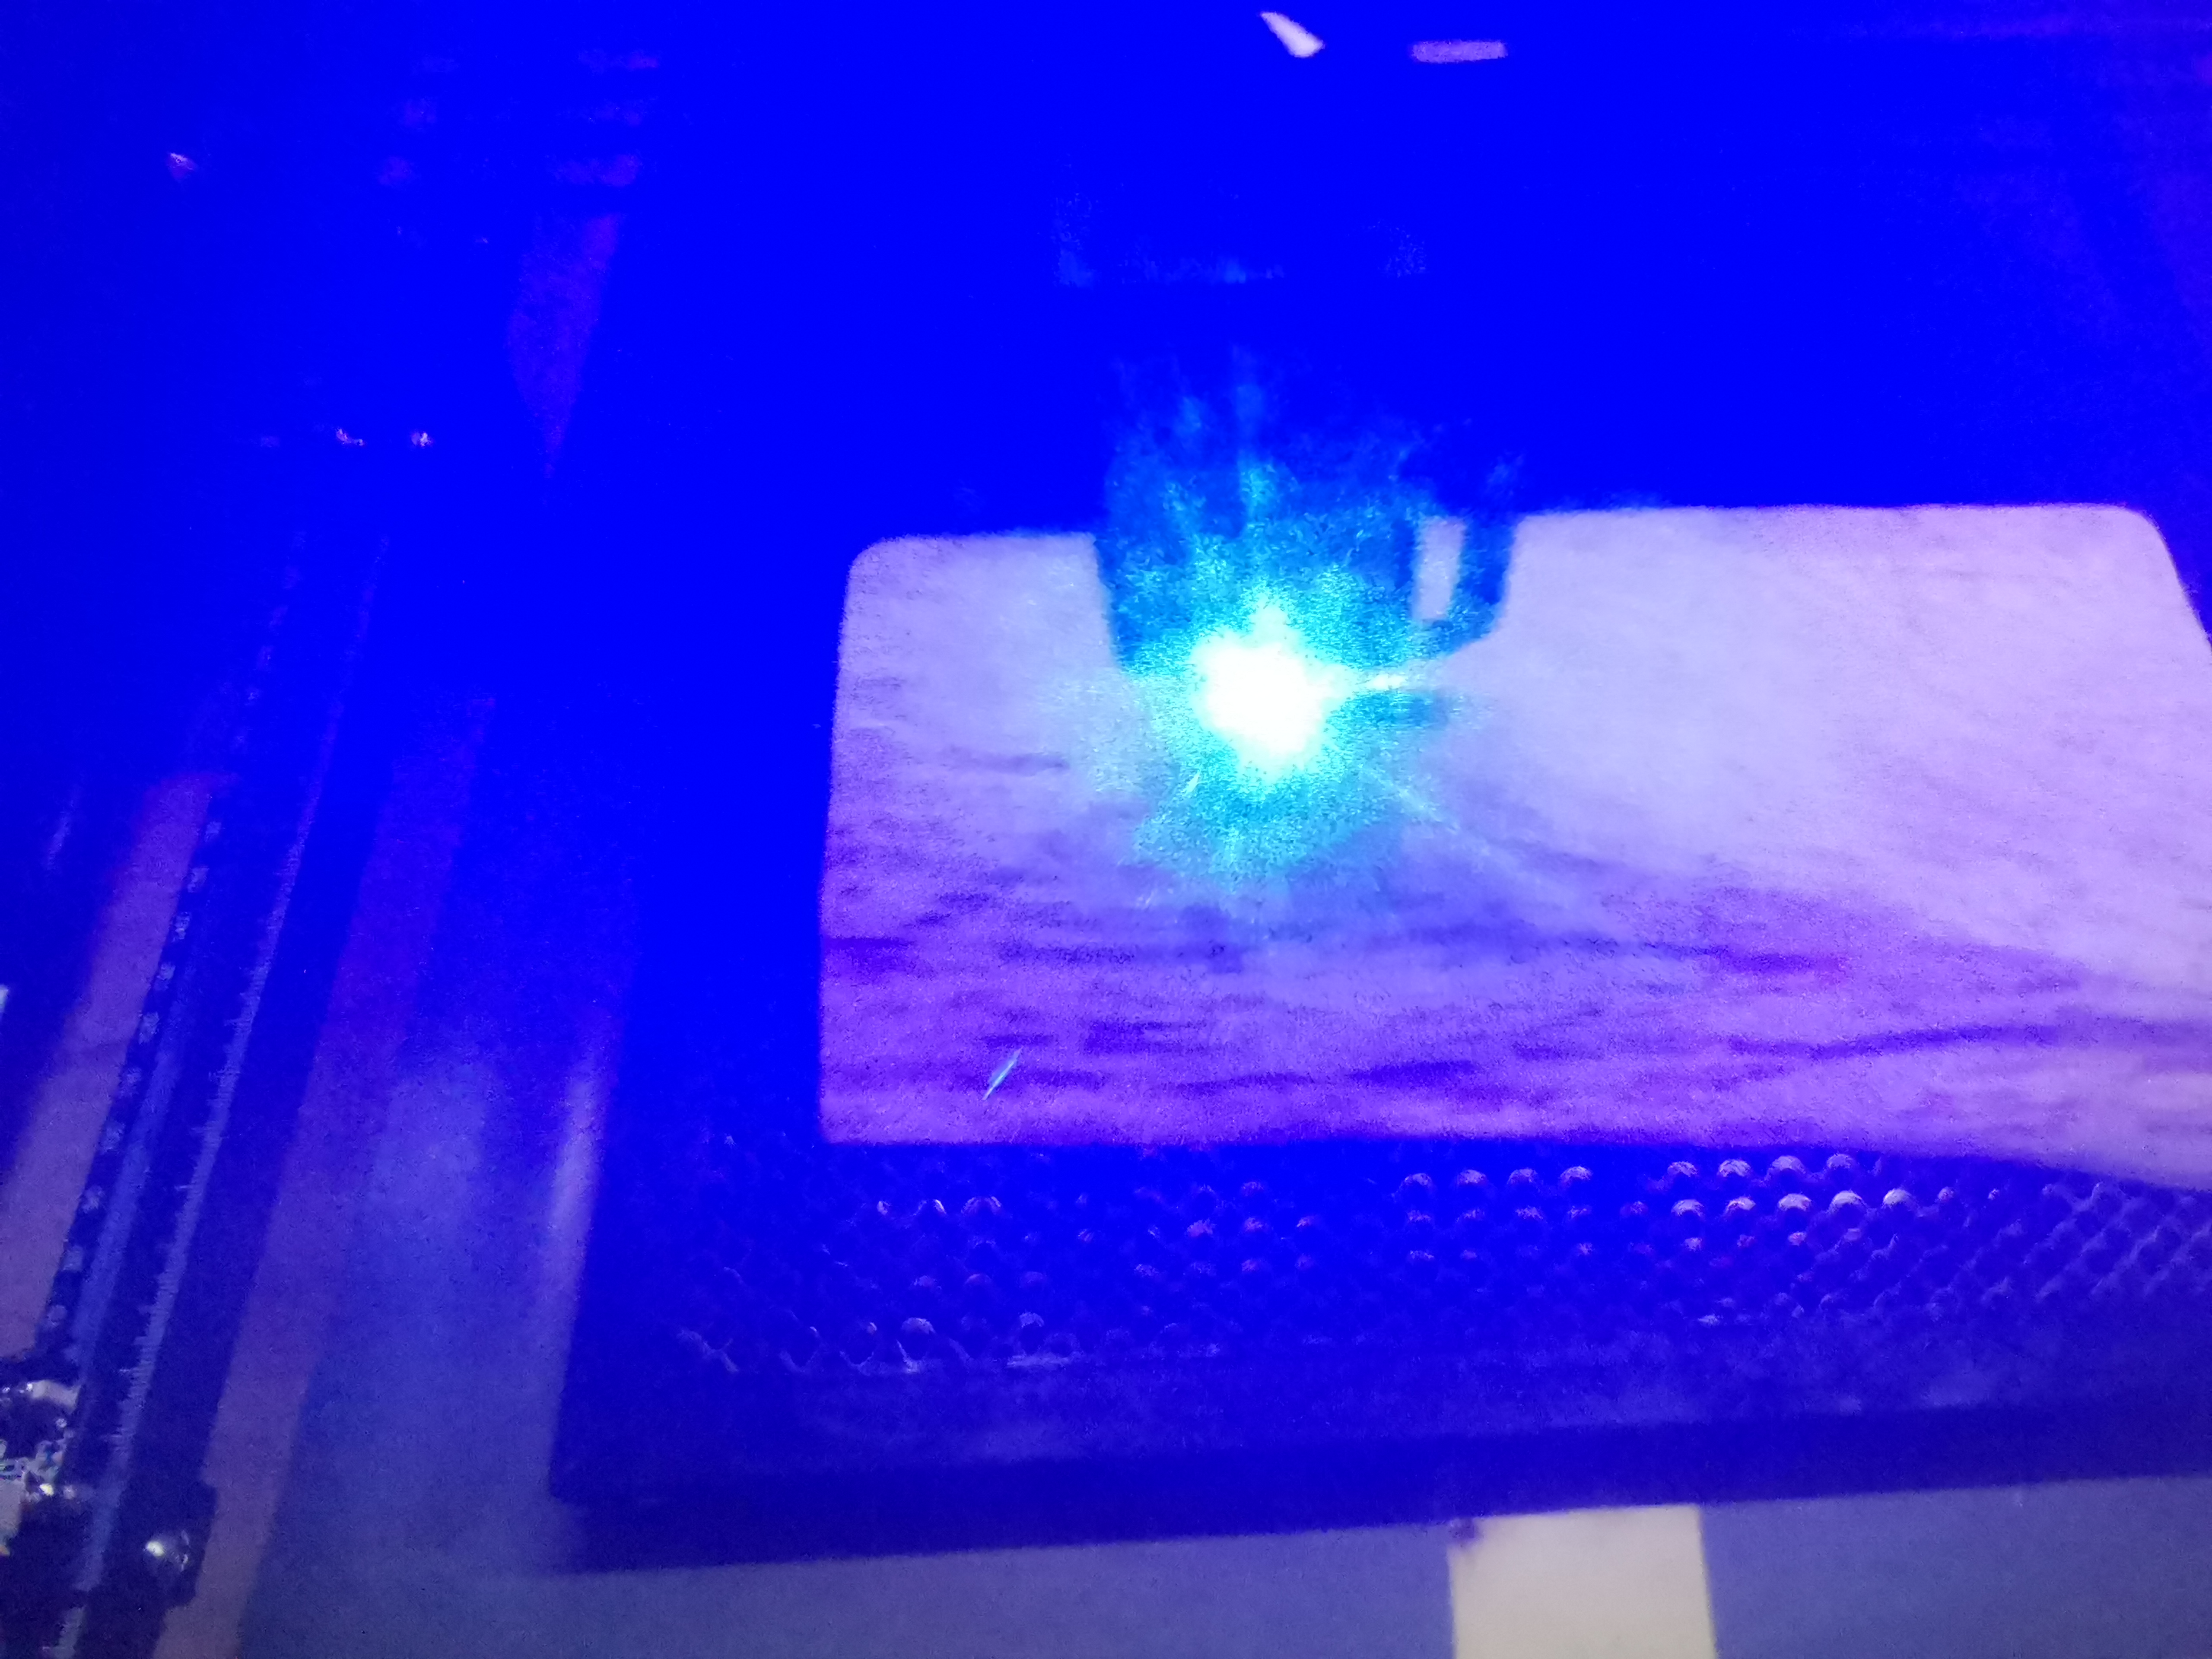
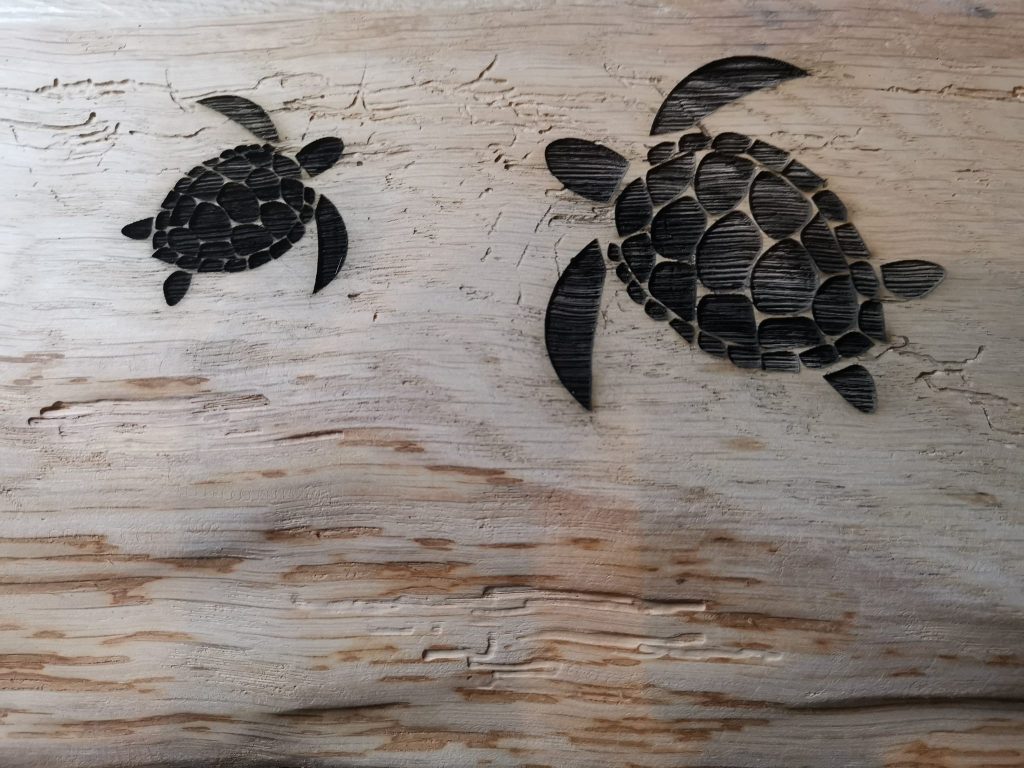
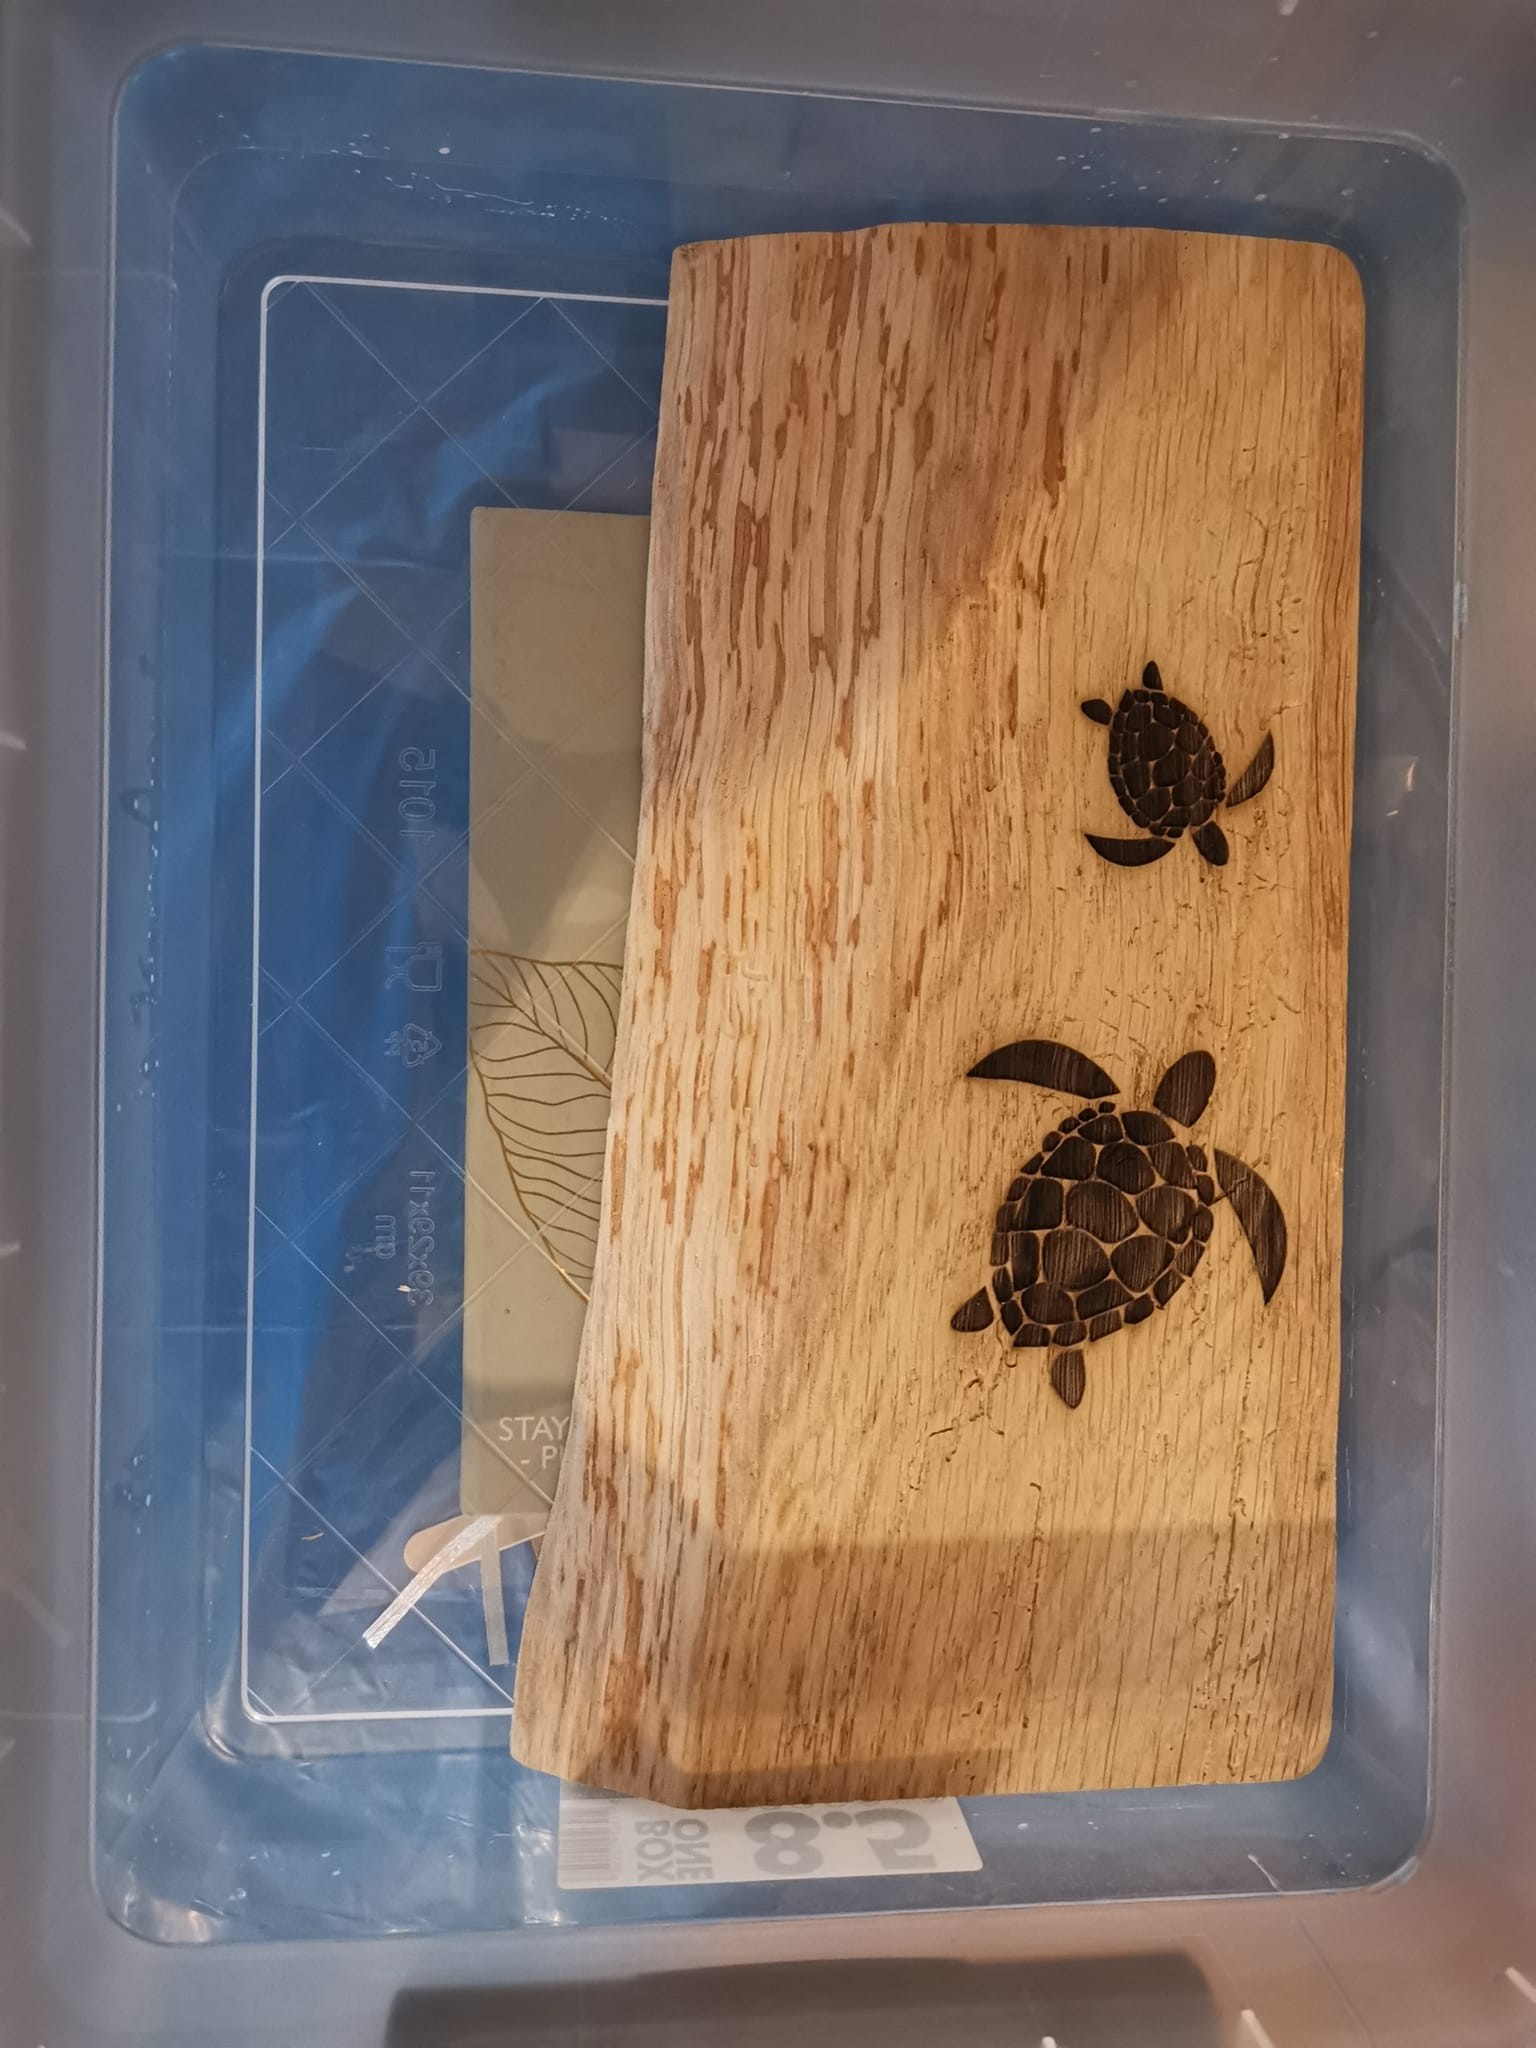
2. Laser engraving before pouring
I first laser-engraved the turtles with my Sculpfun S30 Pro Max. I designed the composition in LightBurn.
You first need the engraved figure, only then can you fill it with epoxy.
After laser engraving, I thoroughly removed dust and degreased everything so no dust gets into the epoxy and to avoid adhesion issues.
3. Prevent amine blush during winter months
To reduce the risk of amine blush, I deliberately worked in a controlled environment. My workspace is the coldest room in our house, so I had to create a kind of microclimate for pouring.
Epoxy:
- Mr Boat deep pour for the pouring layers
- letsresin as coating
Everything cured in a propagator/grow box with:
- silica gel (orange) against moisture
- temperature control
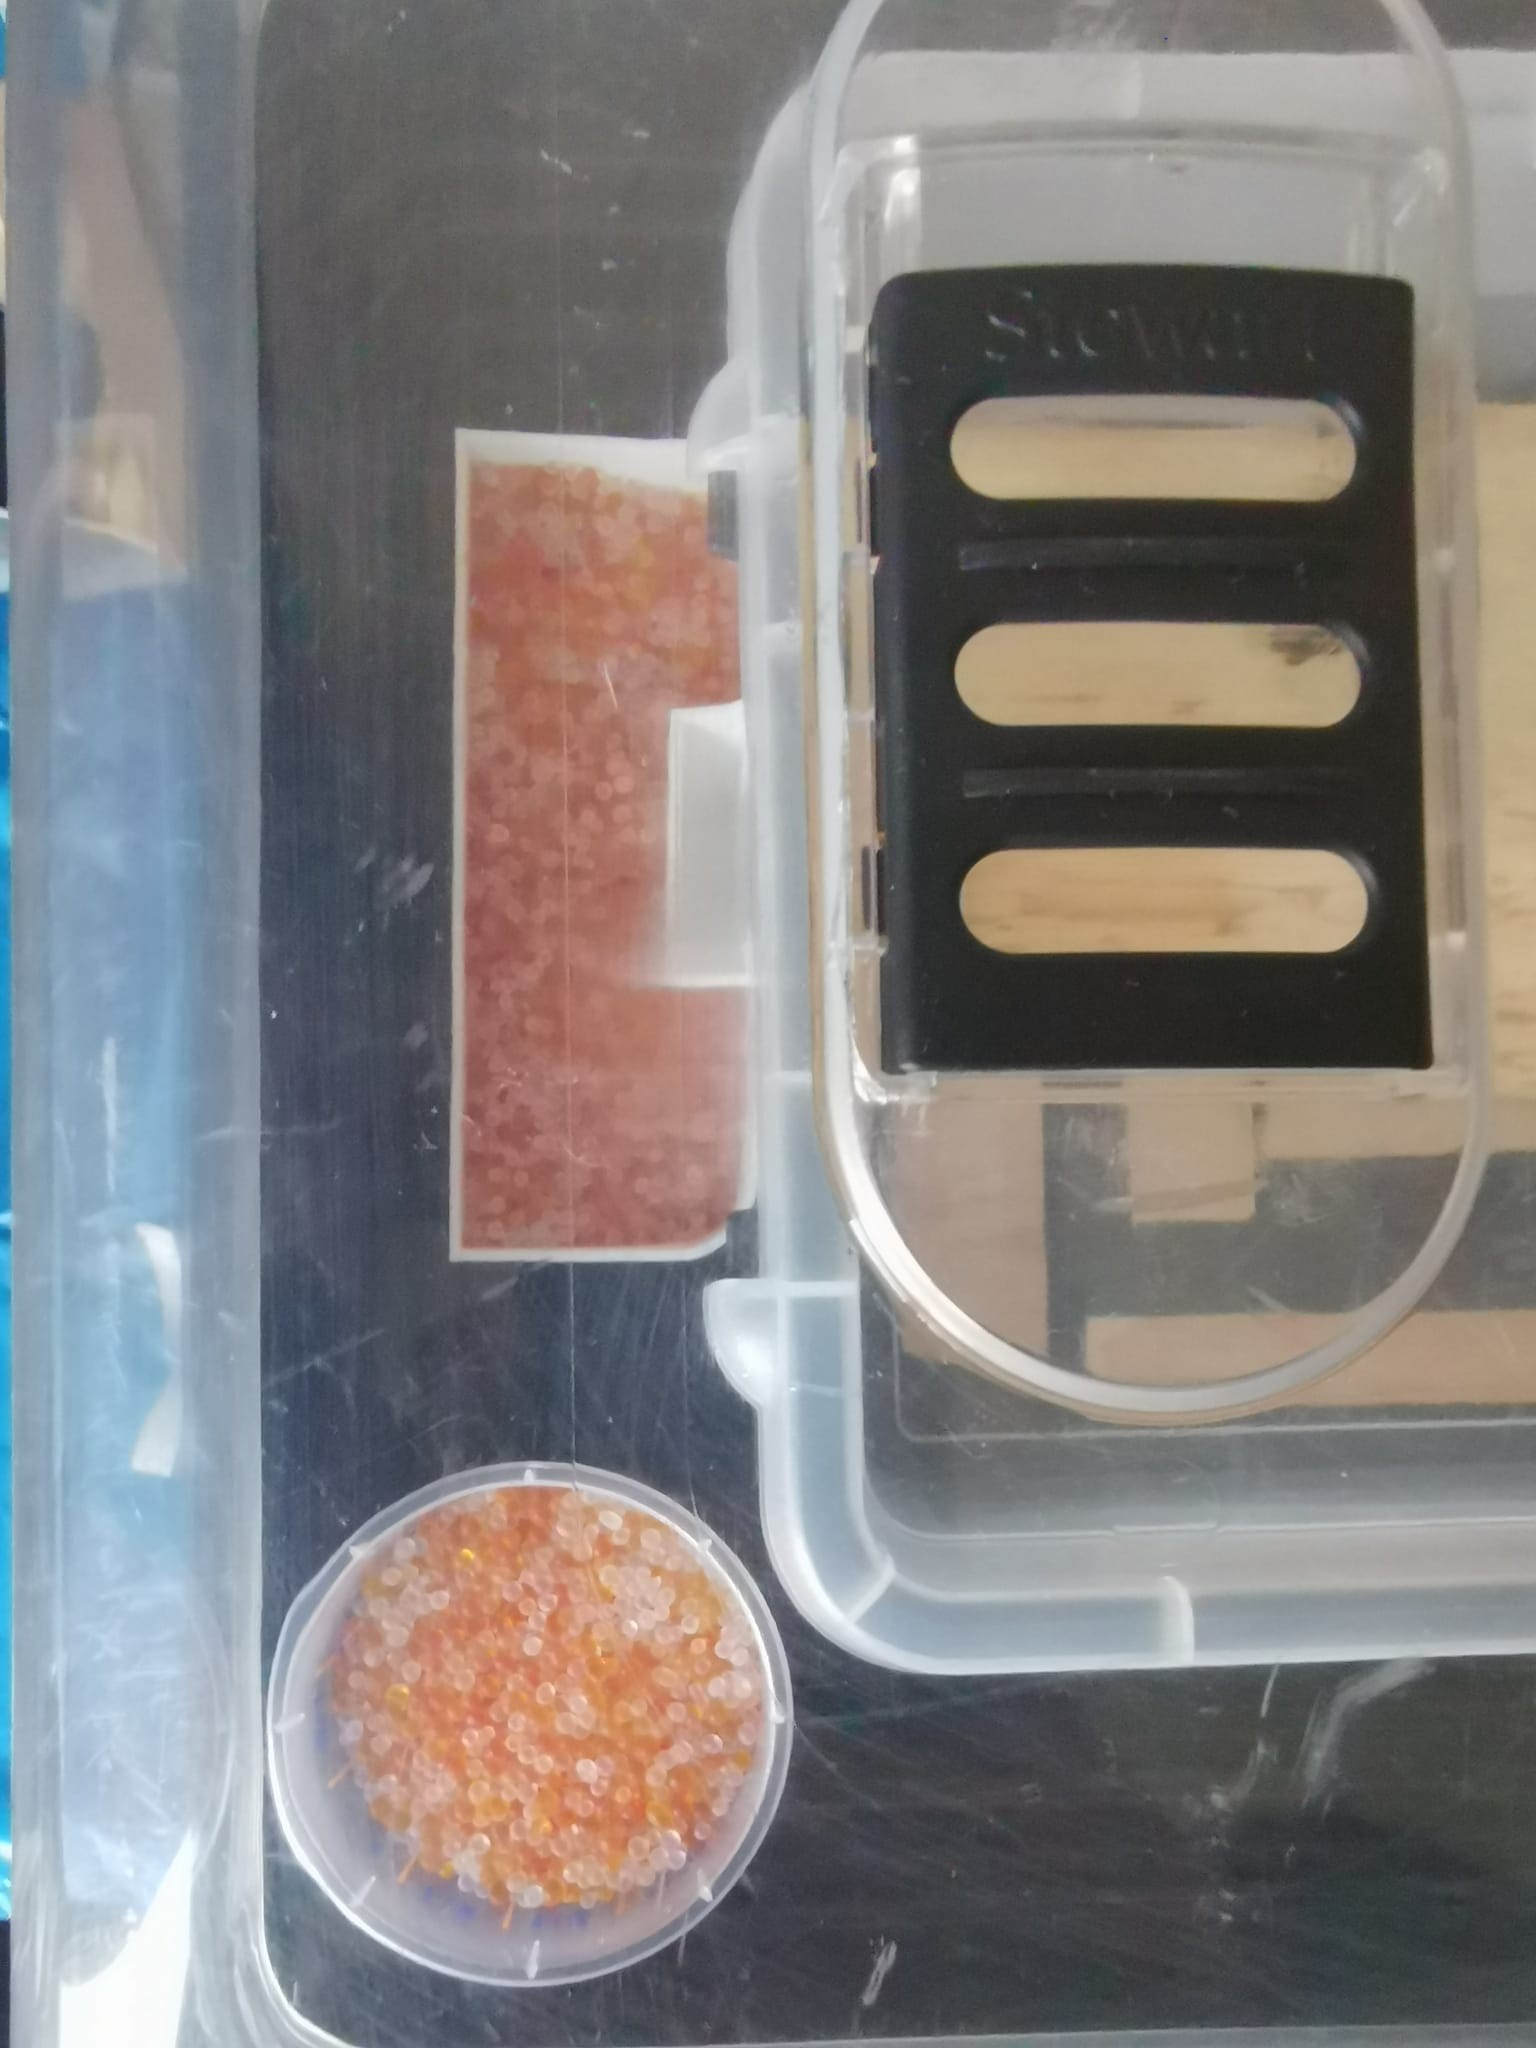
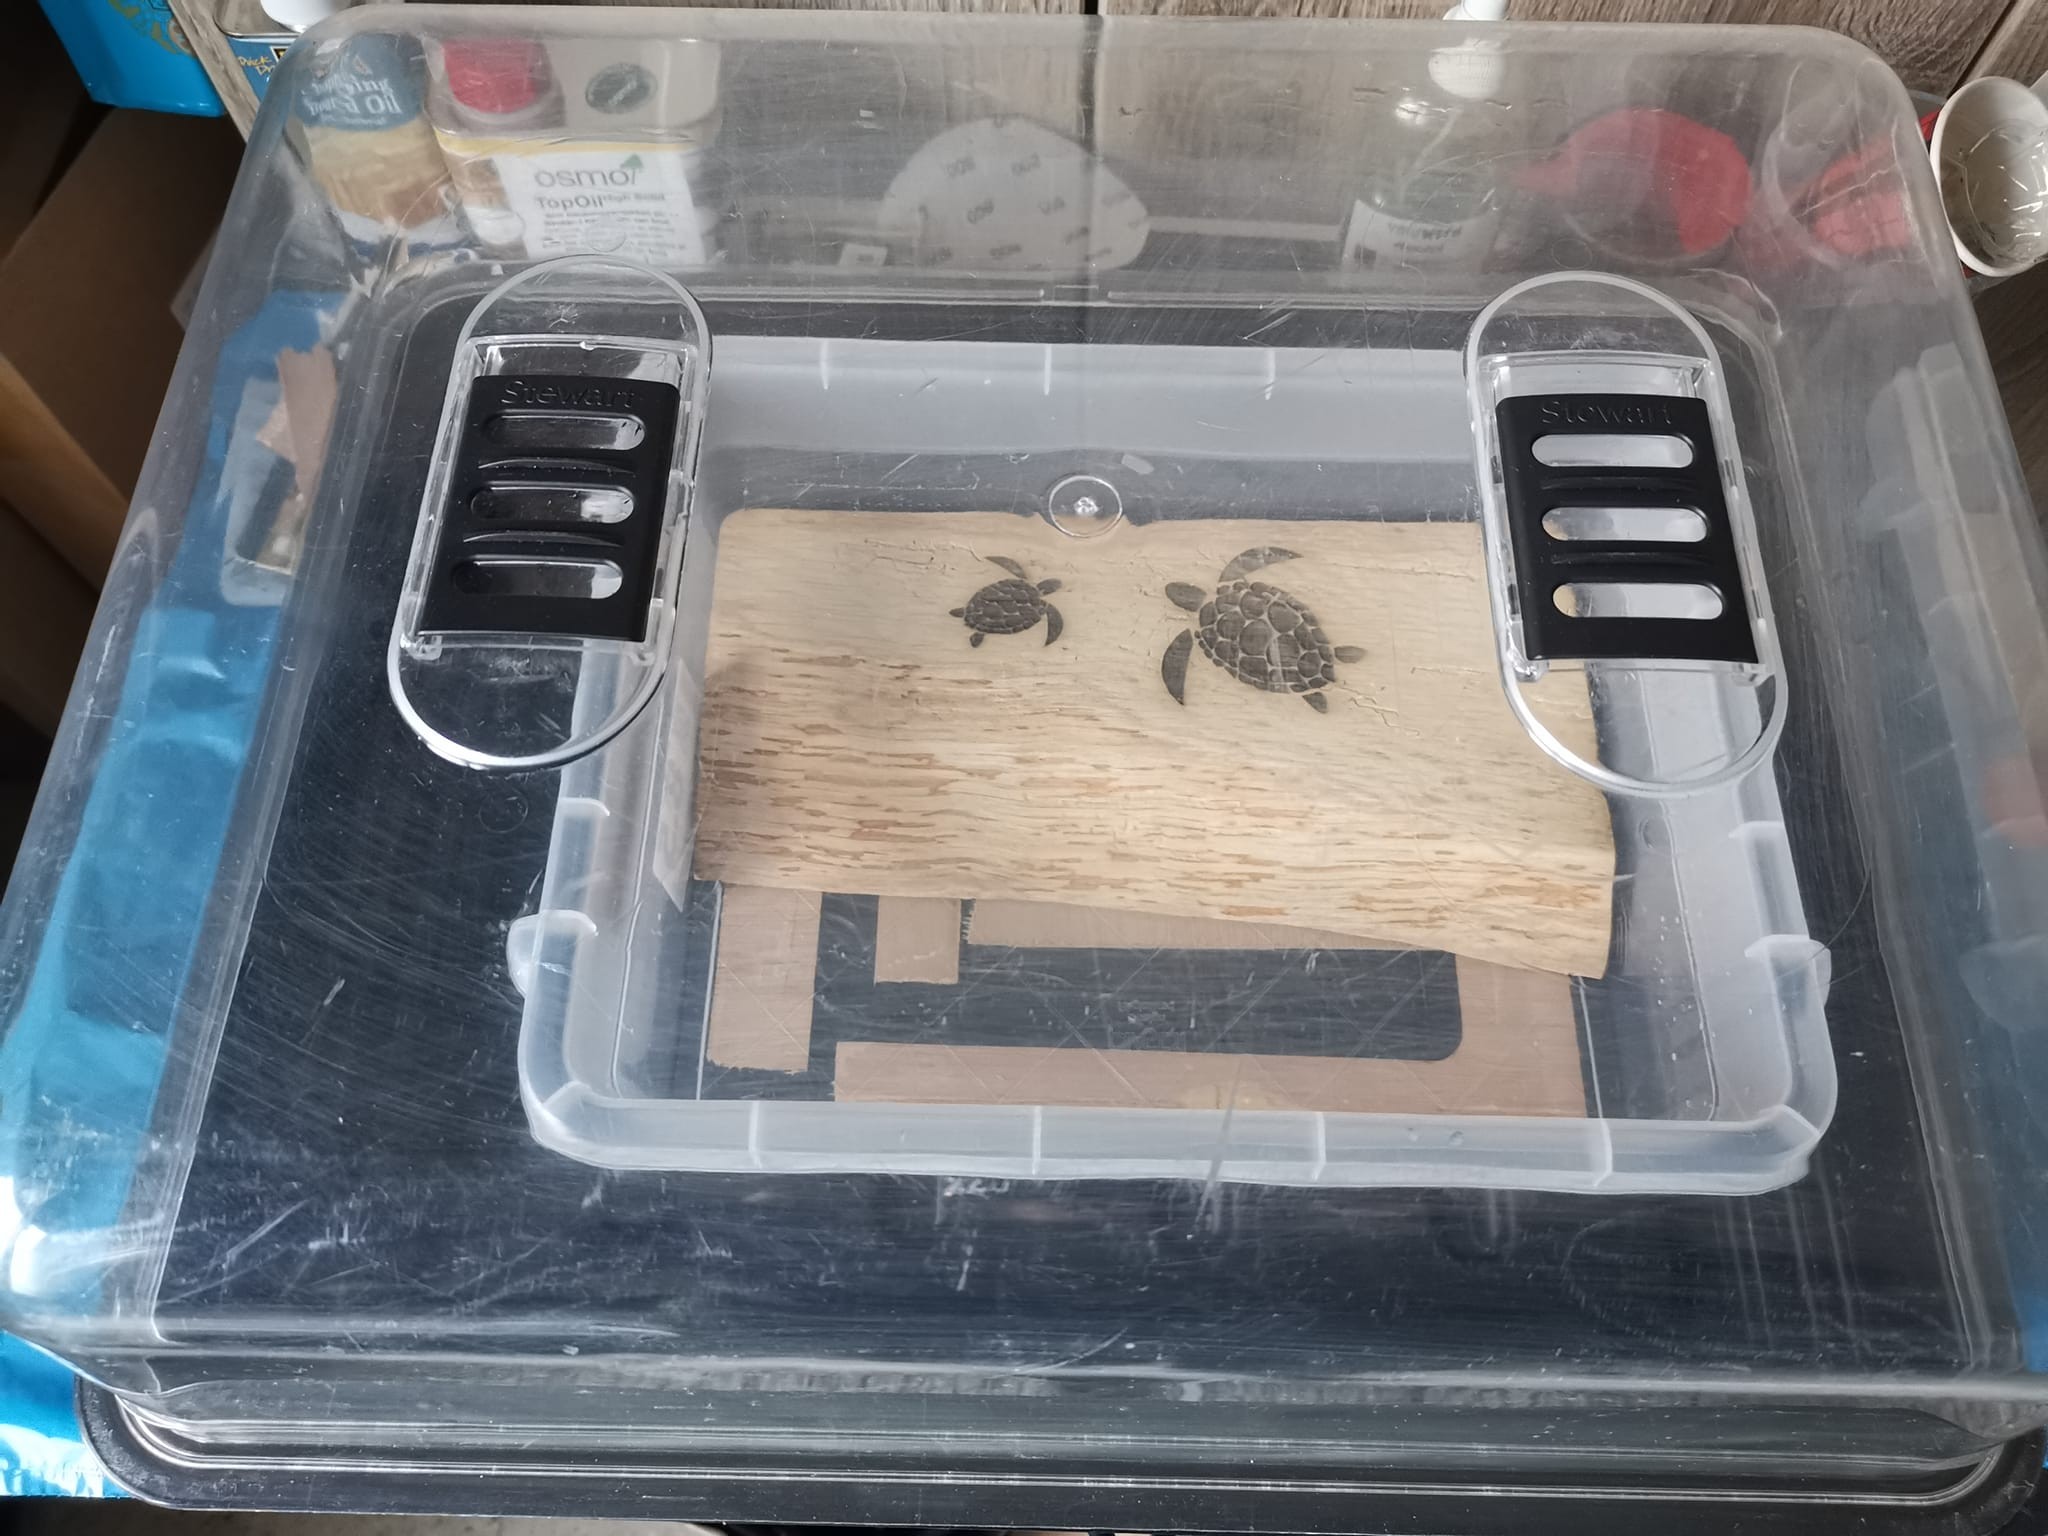
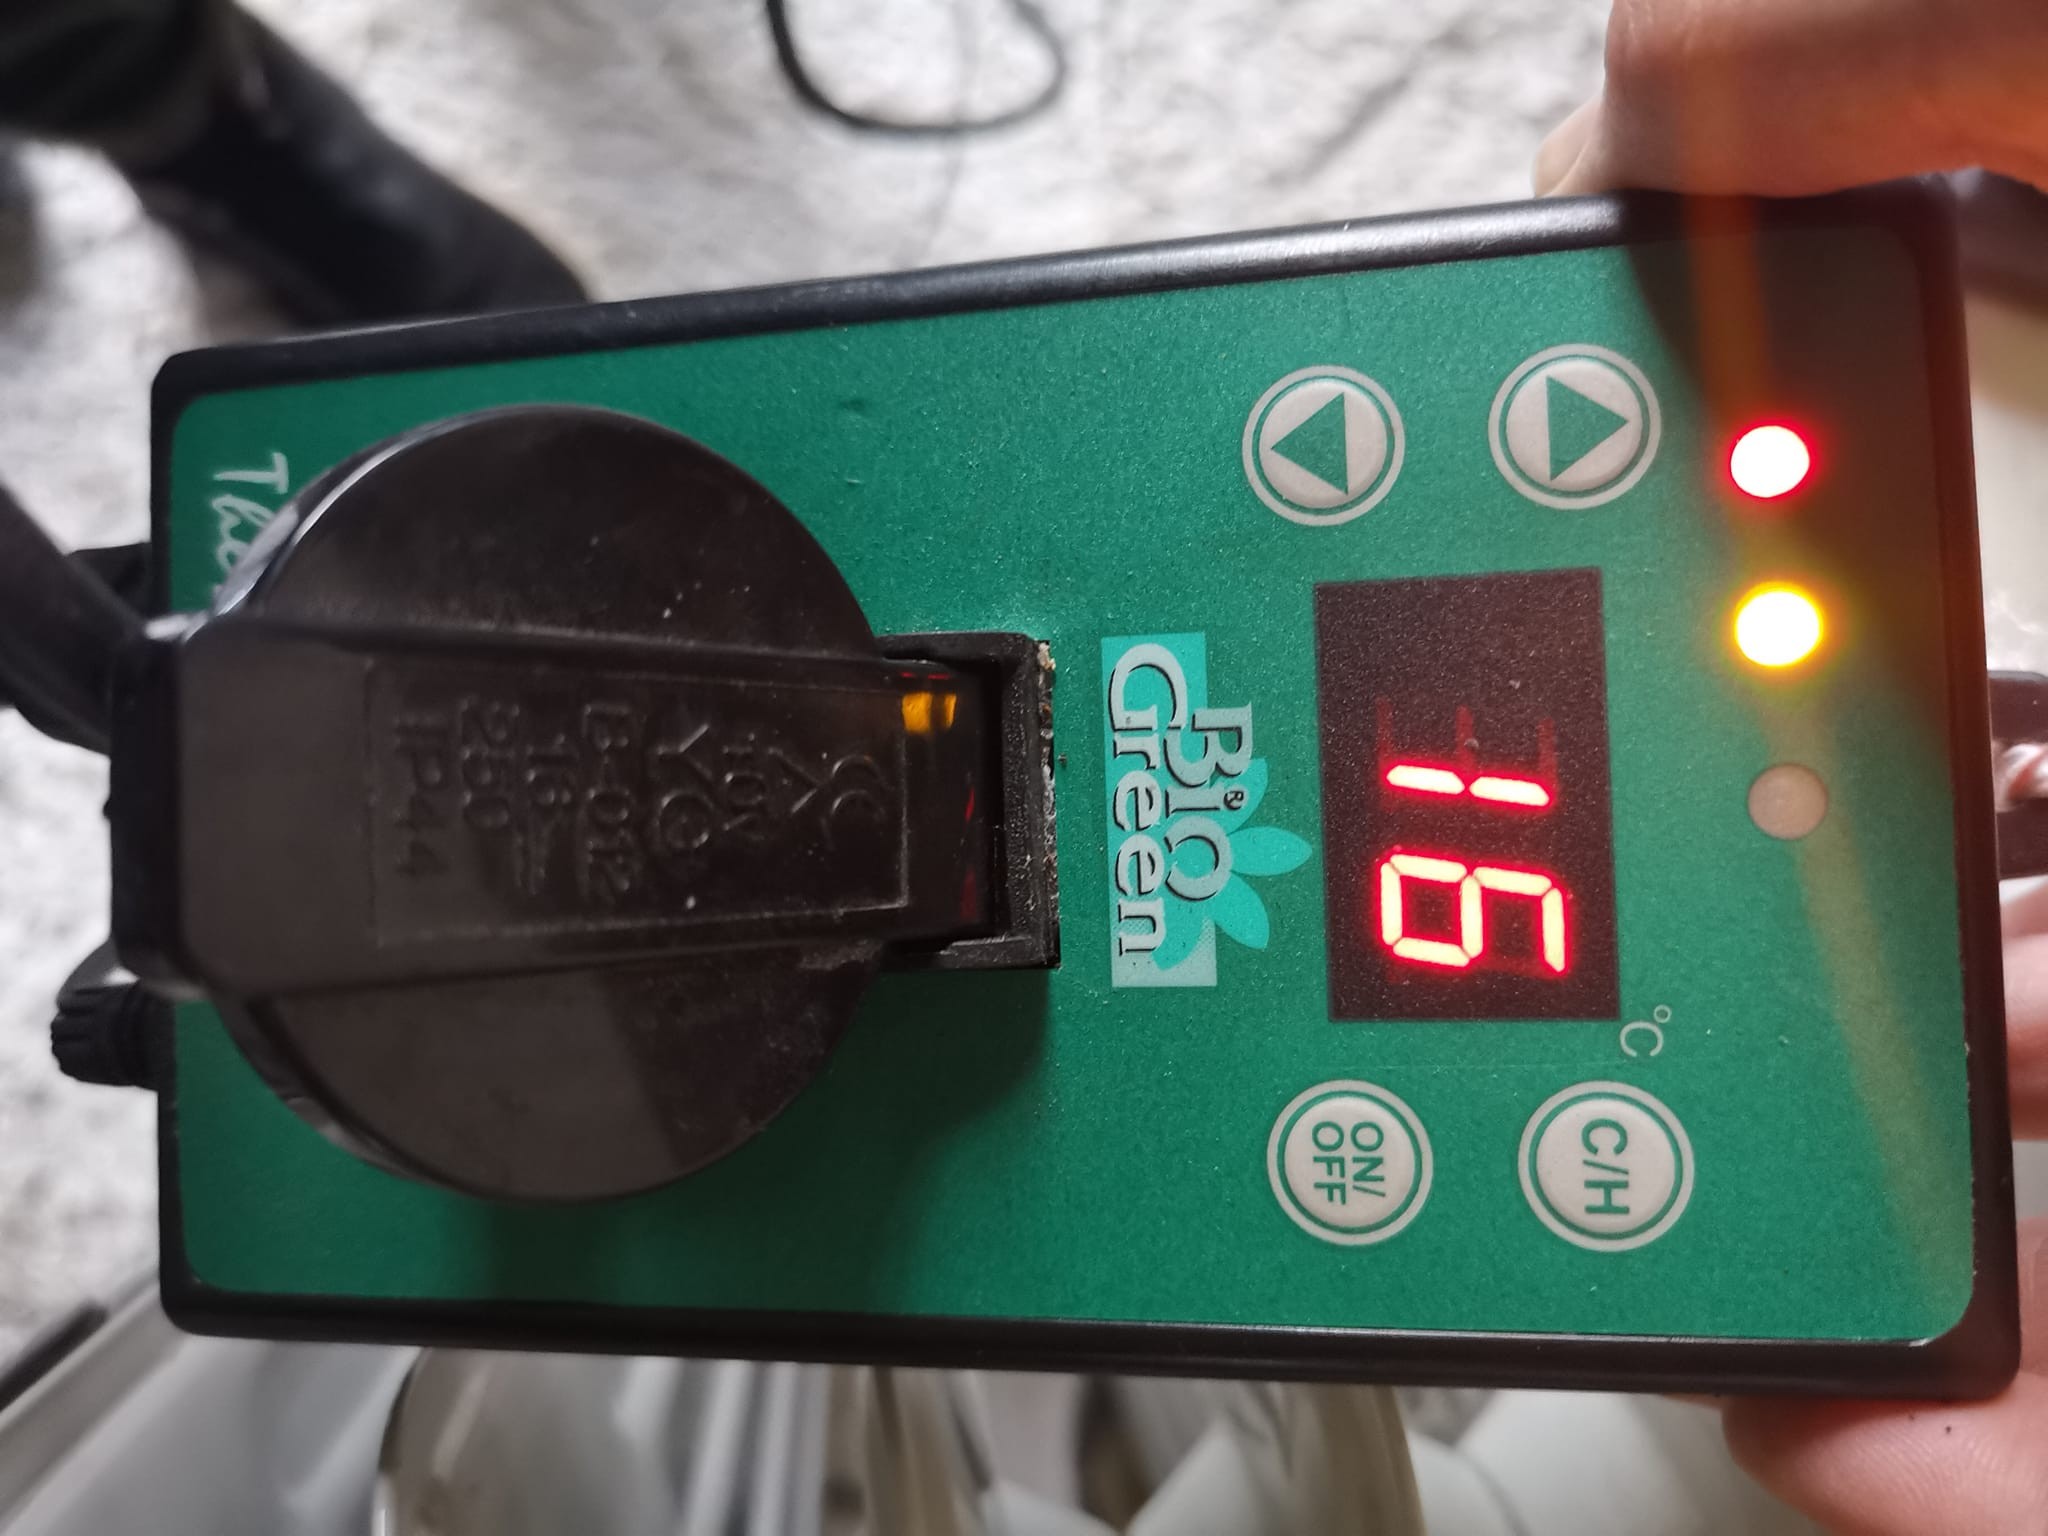
By keeping temperature and humidity stable, I had less risk of amine blush.
You can read more in my separate post: How to prevent amine blush.
4. First pouring phase – turtles and sea
For this part of the project, I used Mr Boat epoxy 70.
The board was in a plastic box that served as a mold. The epoxy was poured directly onto the wood so it could bond to it.
Because this was deep-pour epoxy, I could pour deeper here to get enough depth in the ocean motif.
In this phase I:
- mica (2 colors: blue and turquoise) mixed to color the turtles and build the sea

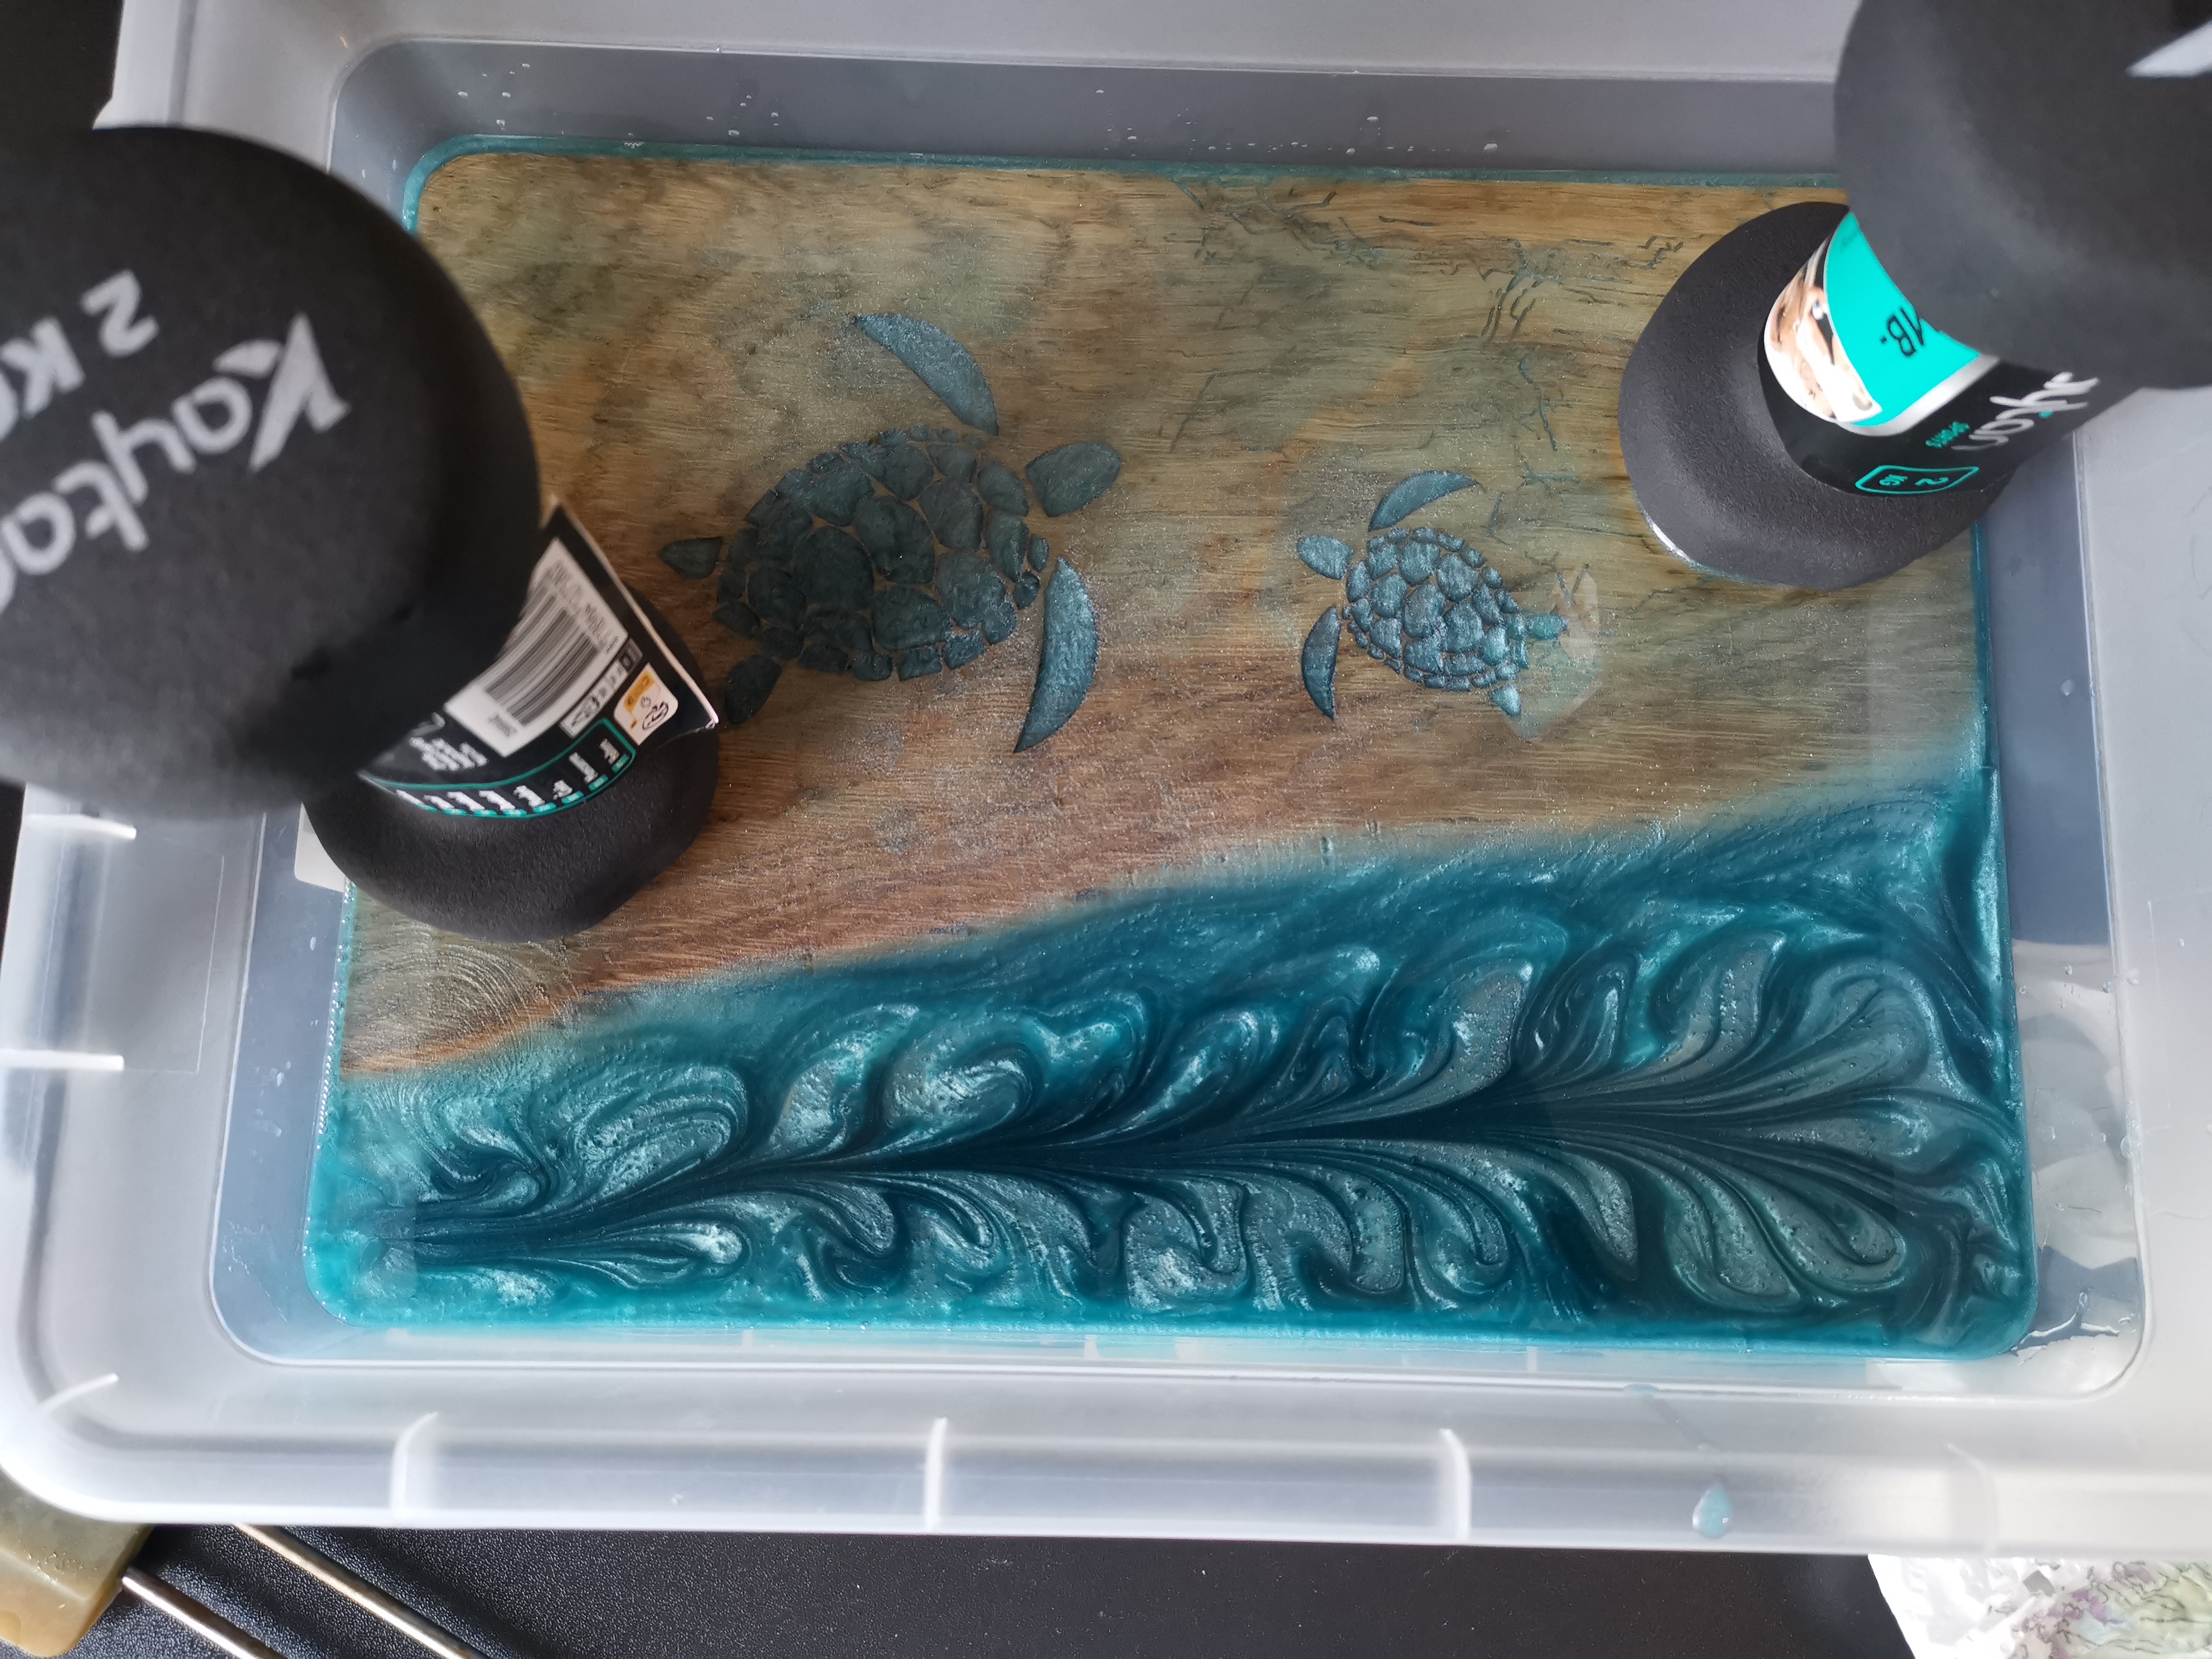
Important when using deep pour:
- Make sure your mold is level
- Respect the maximum pour thickness of the epoxy
- Mix correctly according to ratio
- Allow enough curing time before continuing
During this pouring phase, one of the boards had a flash cure. As a result, my mold deformed due to the heat generated. I will explain this in more detail in another post.
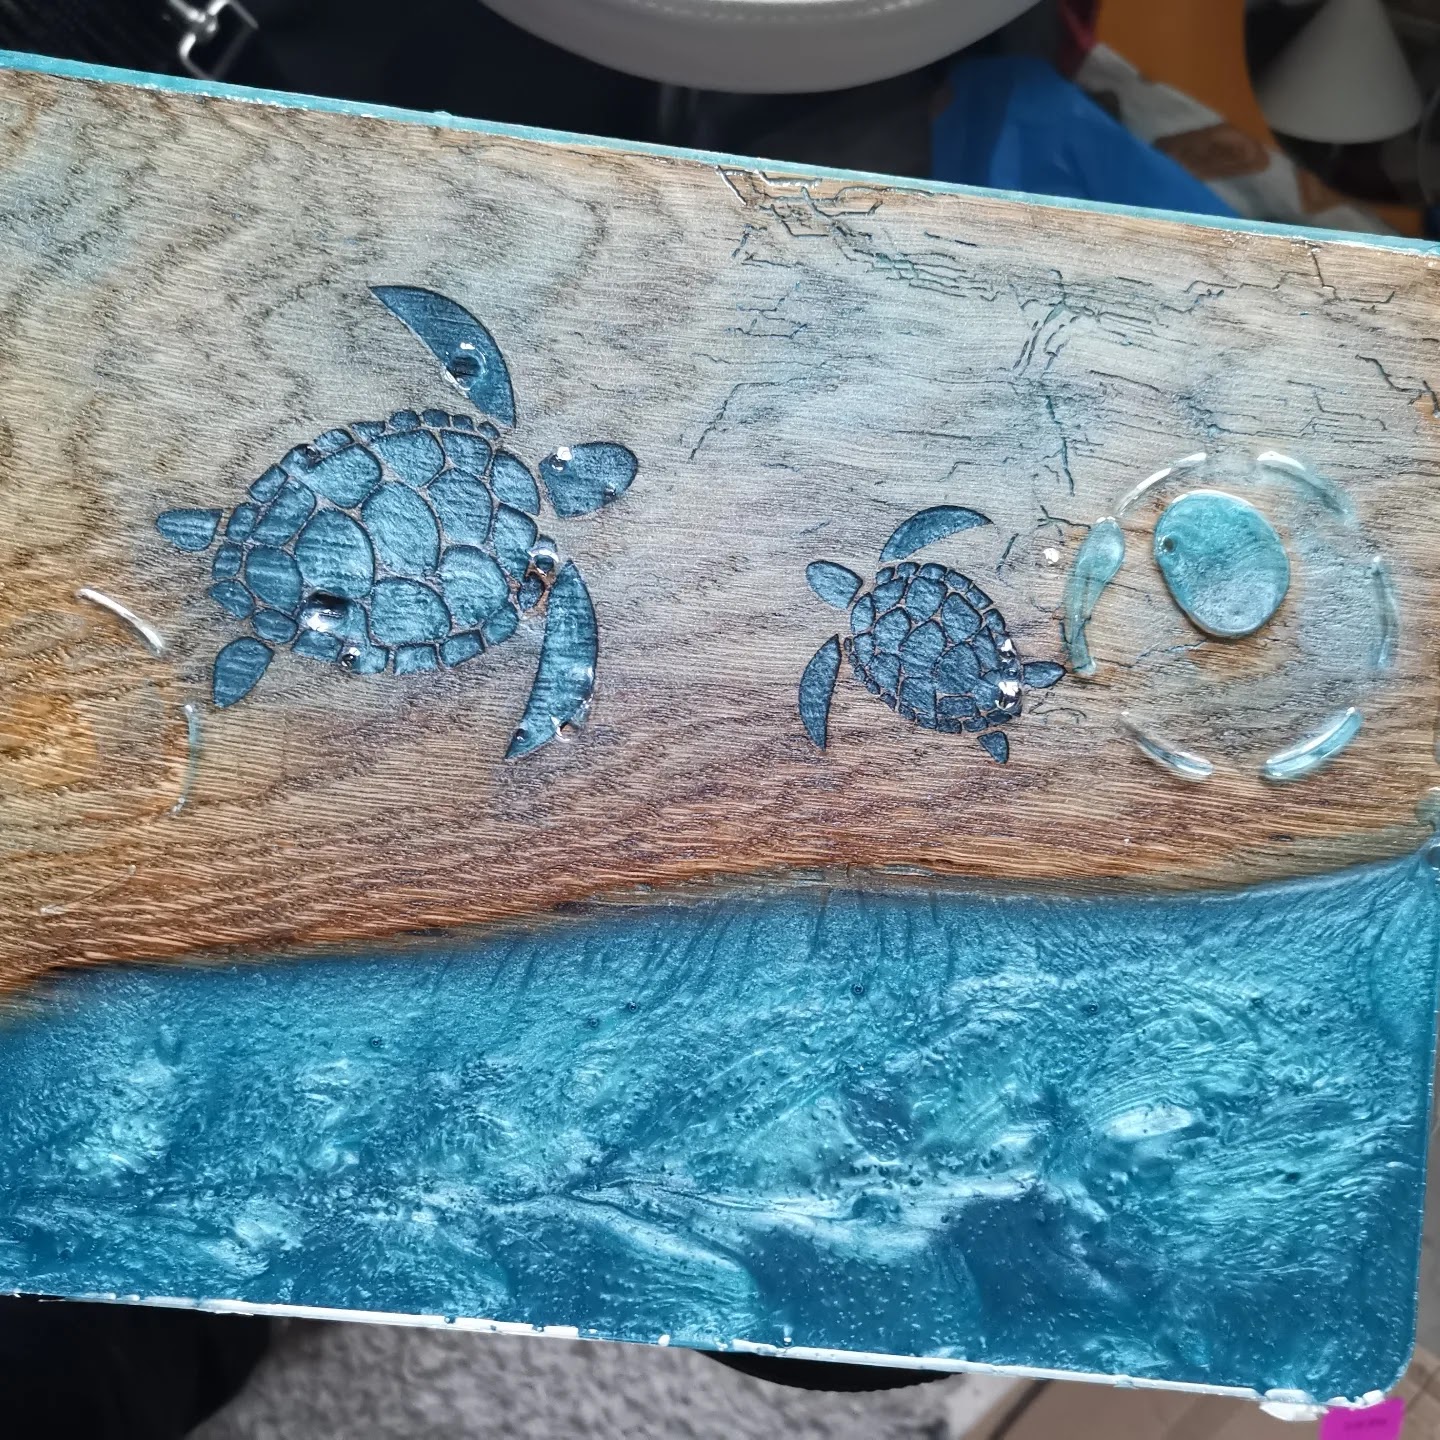
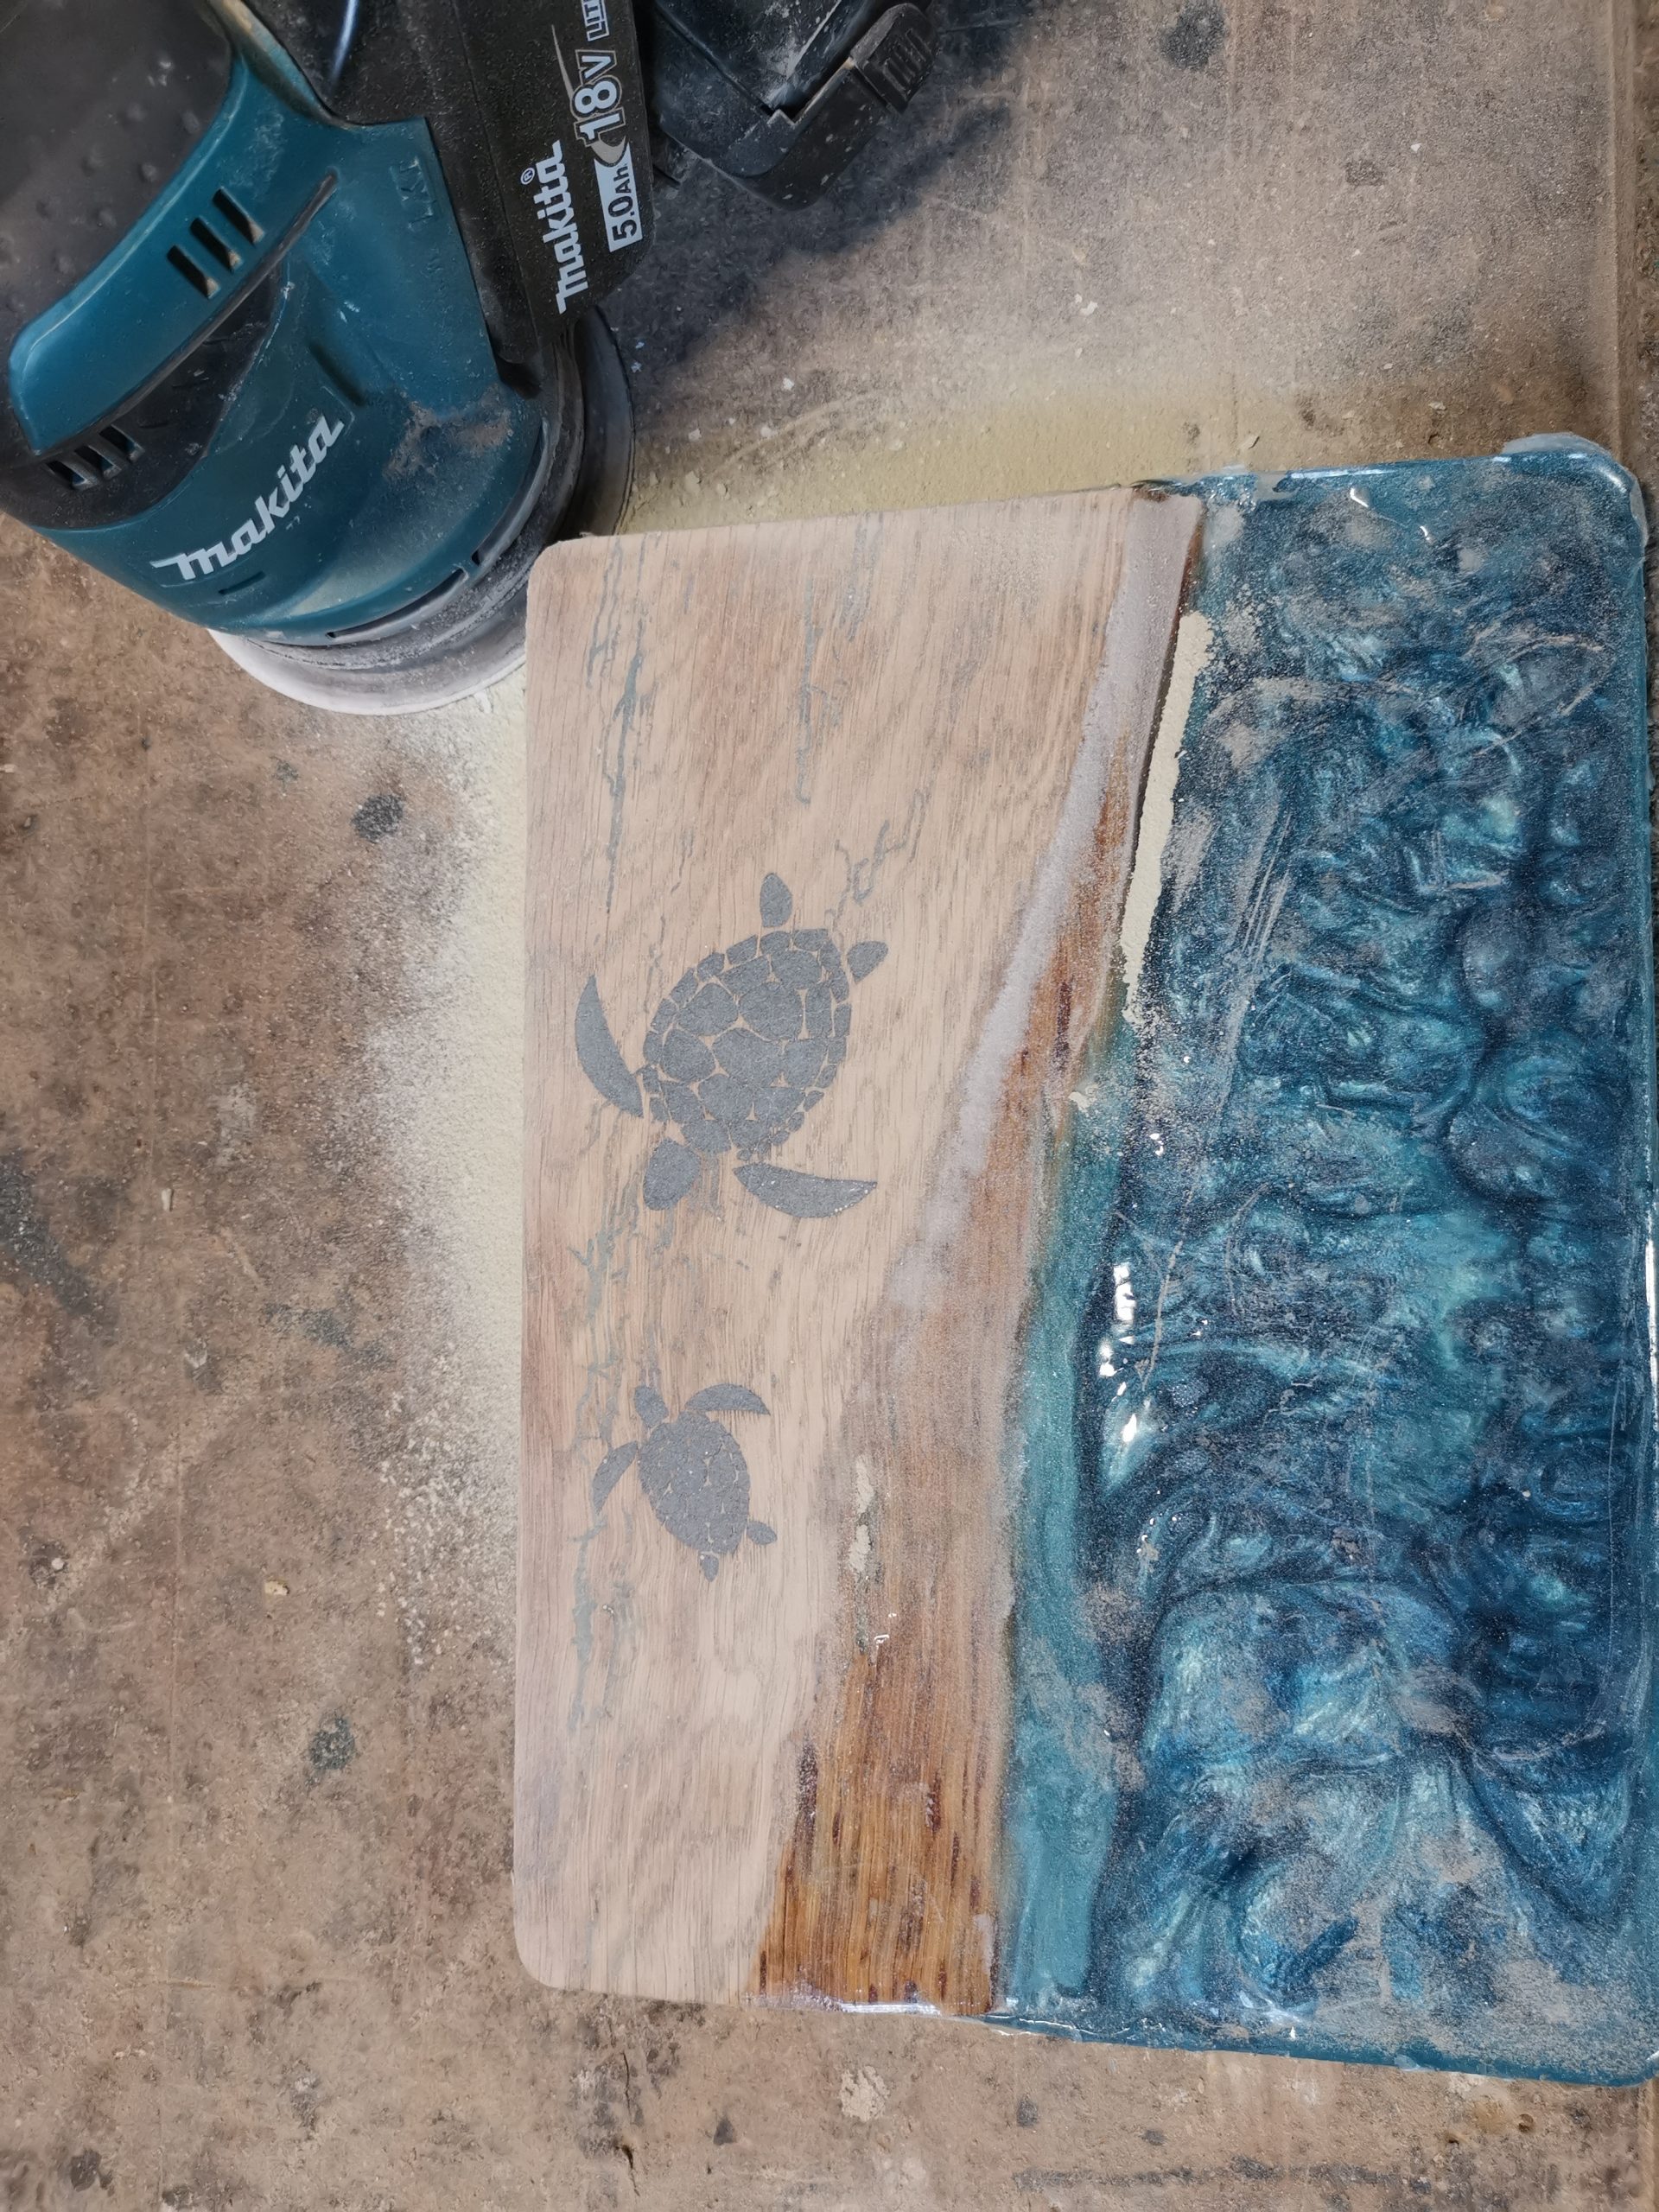
5. Demolding and intermediate corrections
After curing, I demolded it.
After that I:
- Sanded away excess epoxy
- Corrected imperfections
- Filled small holes again (in the next step while pouring the waves)
Before pouring again, the surface must be clean and suitable for adhesion.
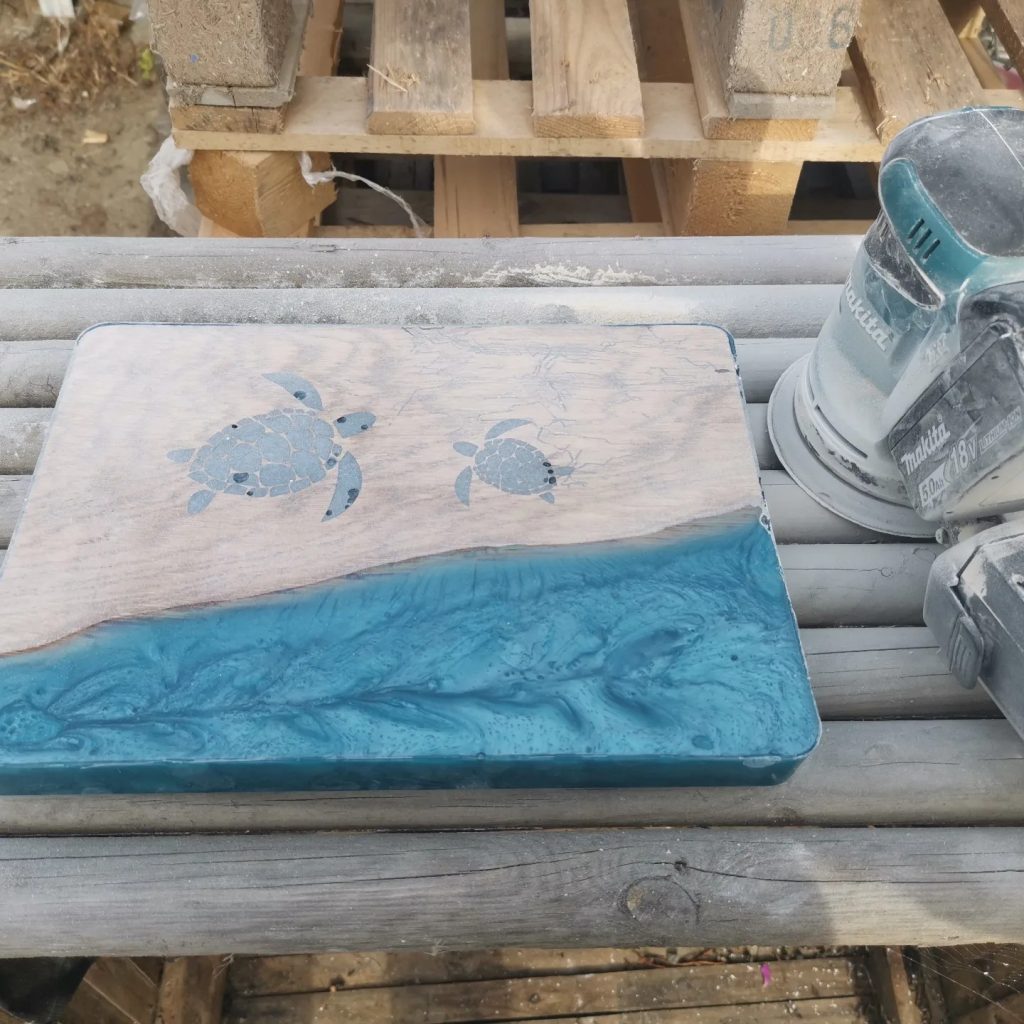
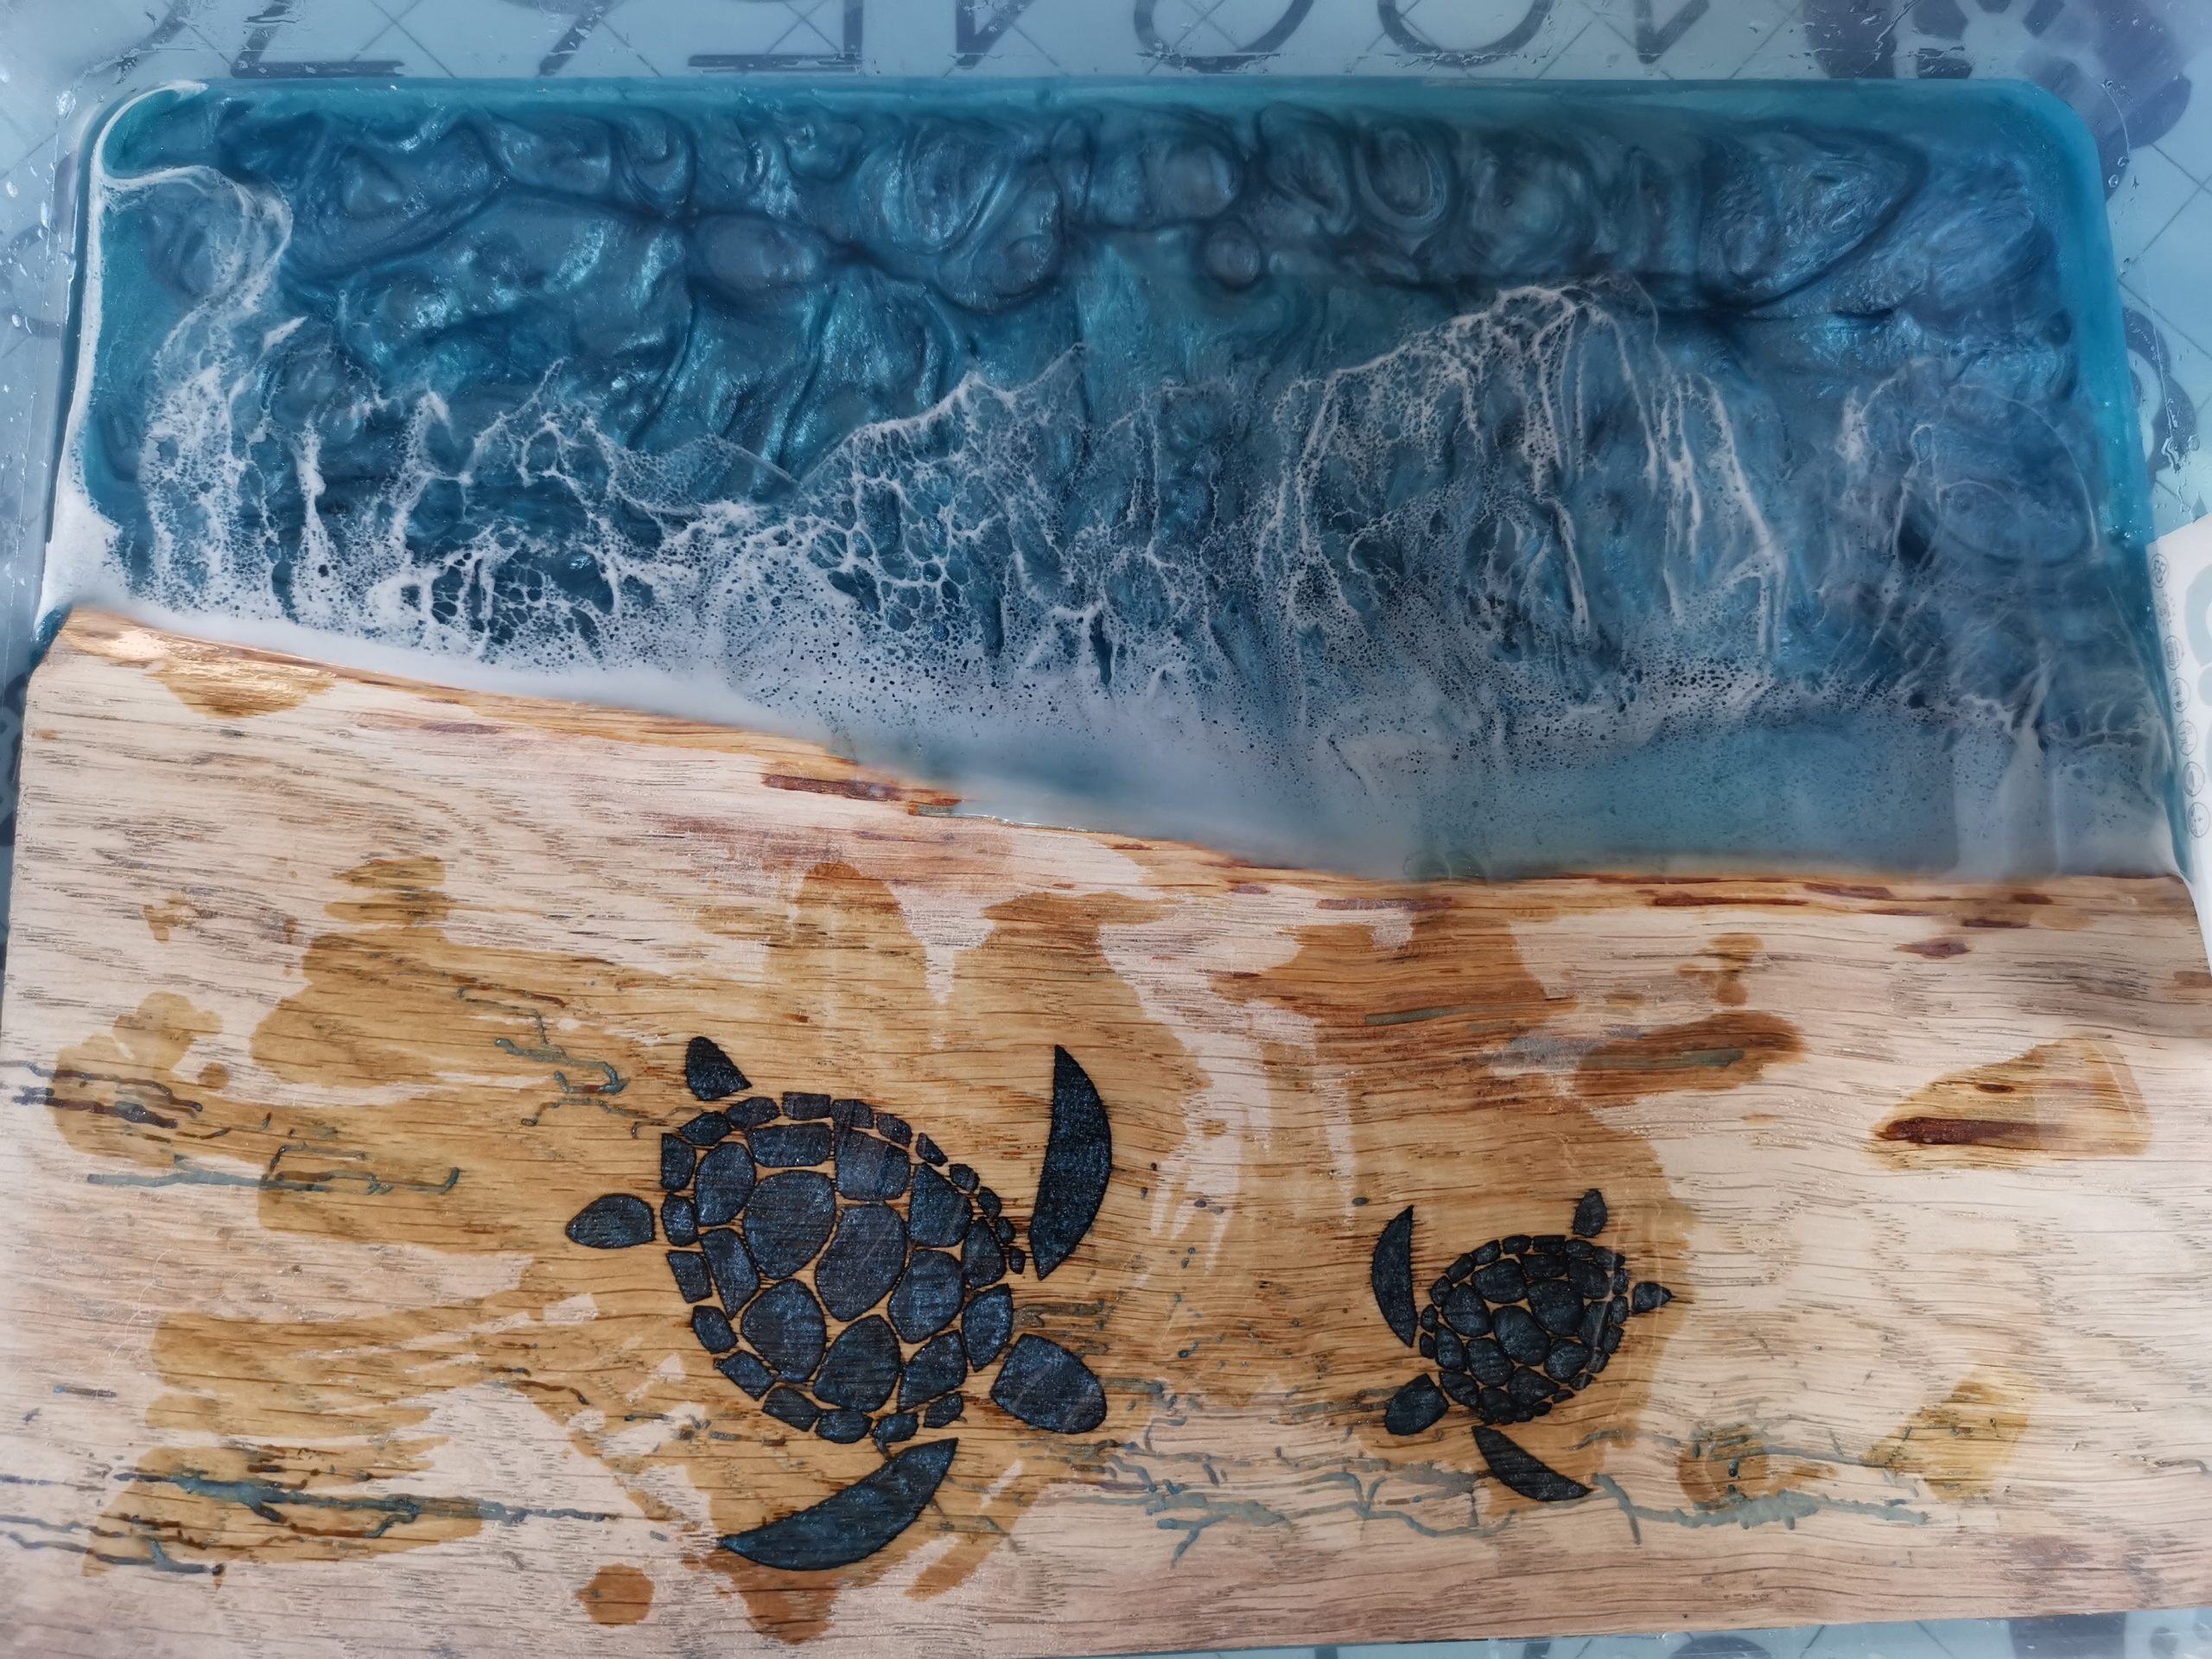
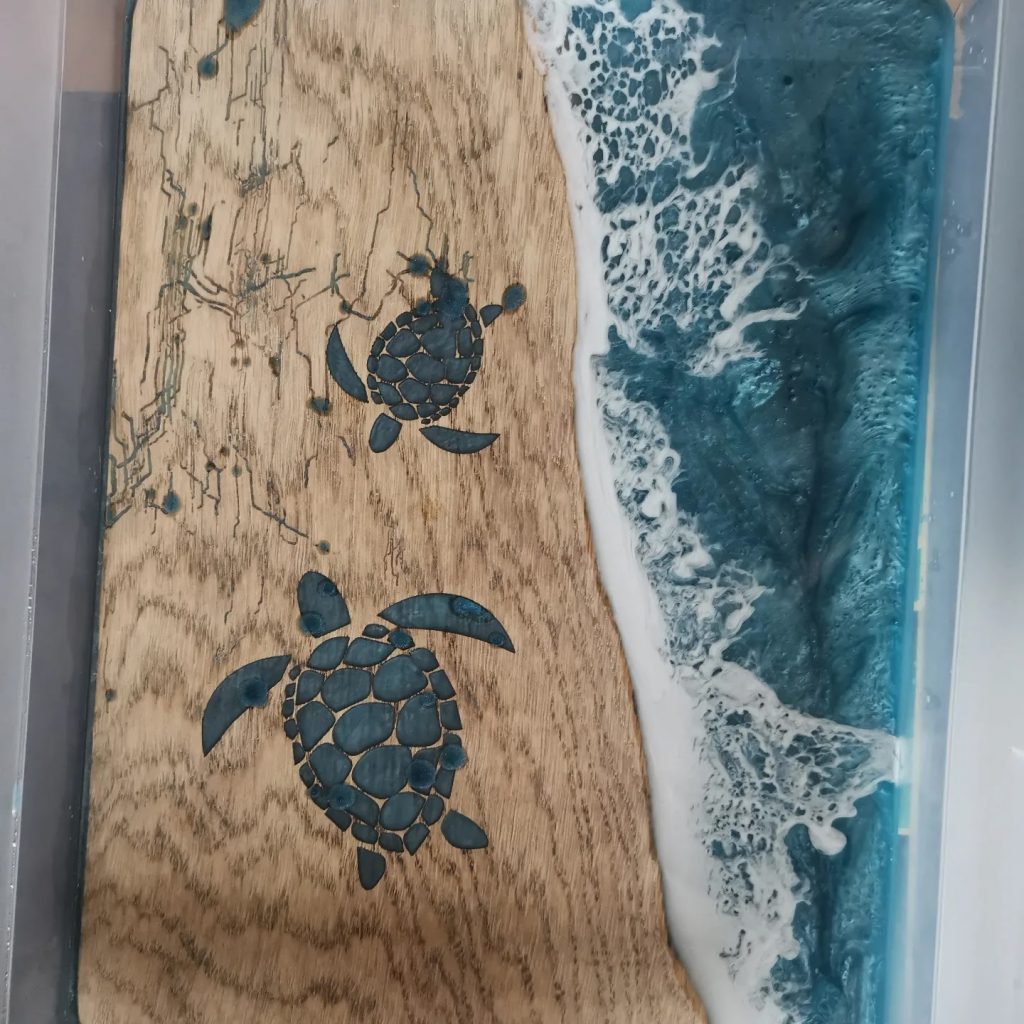
6. Build the waves
For the waves, I first poured a very thin clear epoxy layer over the already cured sea. That thin layer prevents the white epoxy from grabbing the surface immediately.
Then I applied the white epoxy and blew it out with a heat gun. Because of that thin base layer, the white resin glides better over the existing epoxy and gives a more natural wave transition.
To promote cell formation, I lightly misted some alcohol over the surface. This helps create more structure and movement in the white edge.
After blowing it out, I let everything fully cure again before pouring the next finishing layer.
7. Finishing
After the wave layer was partially cured, not fully but still tacky, I poured the topcoat with Let’s resin epoxy.
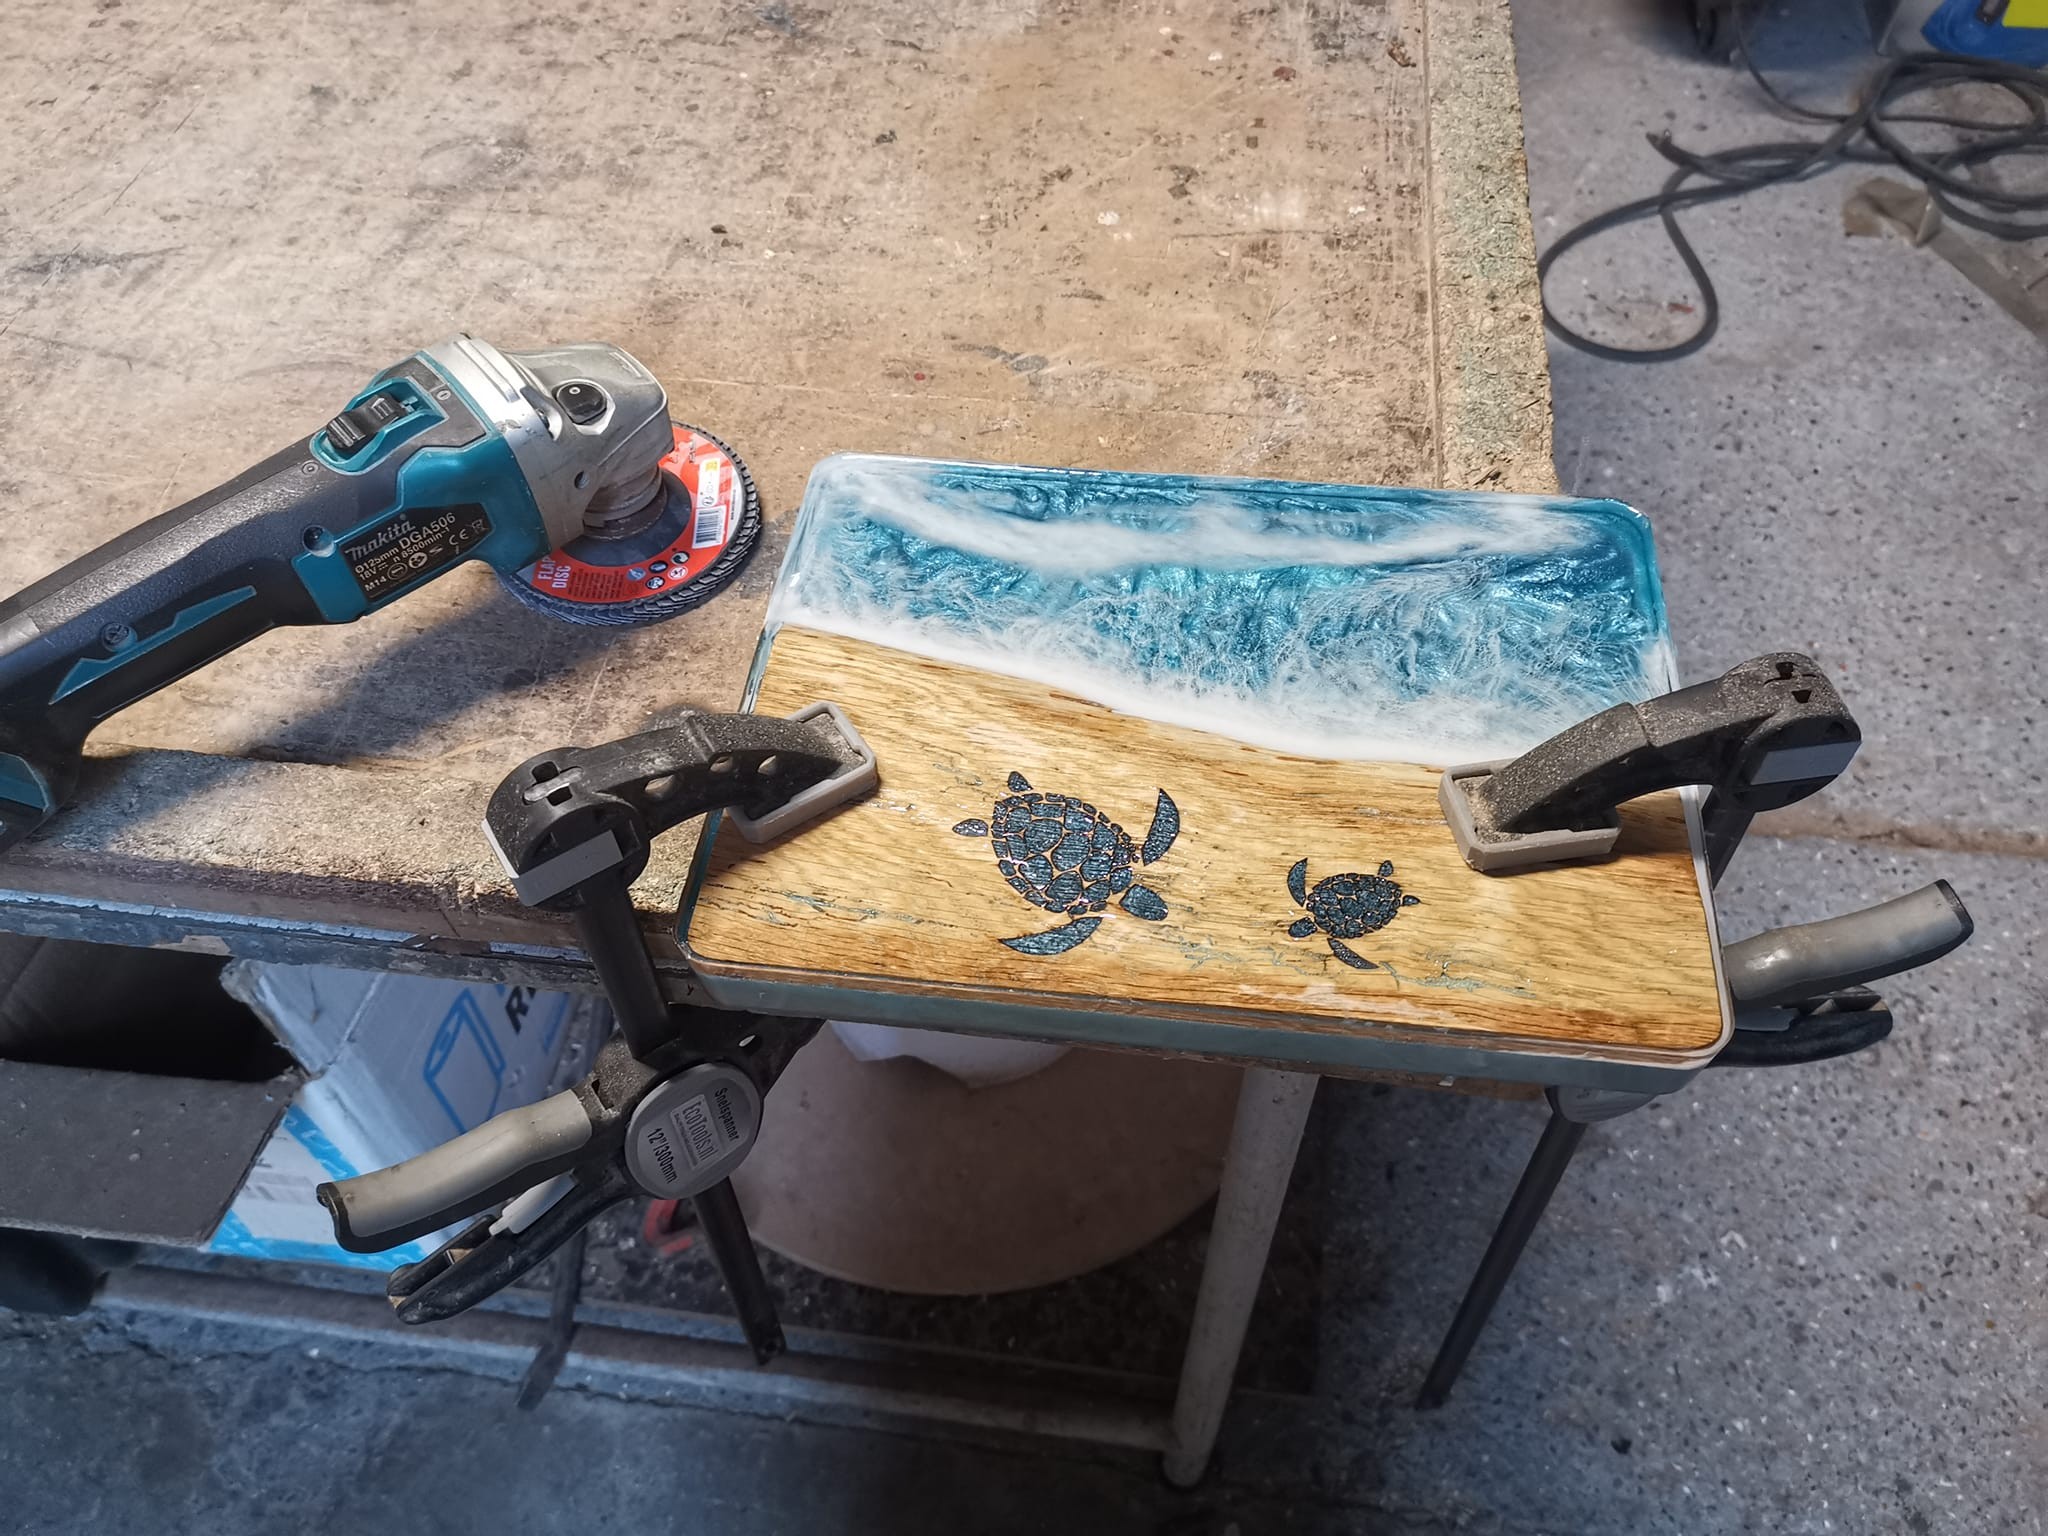
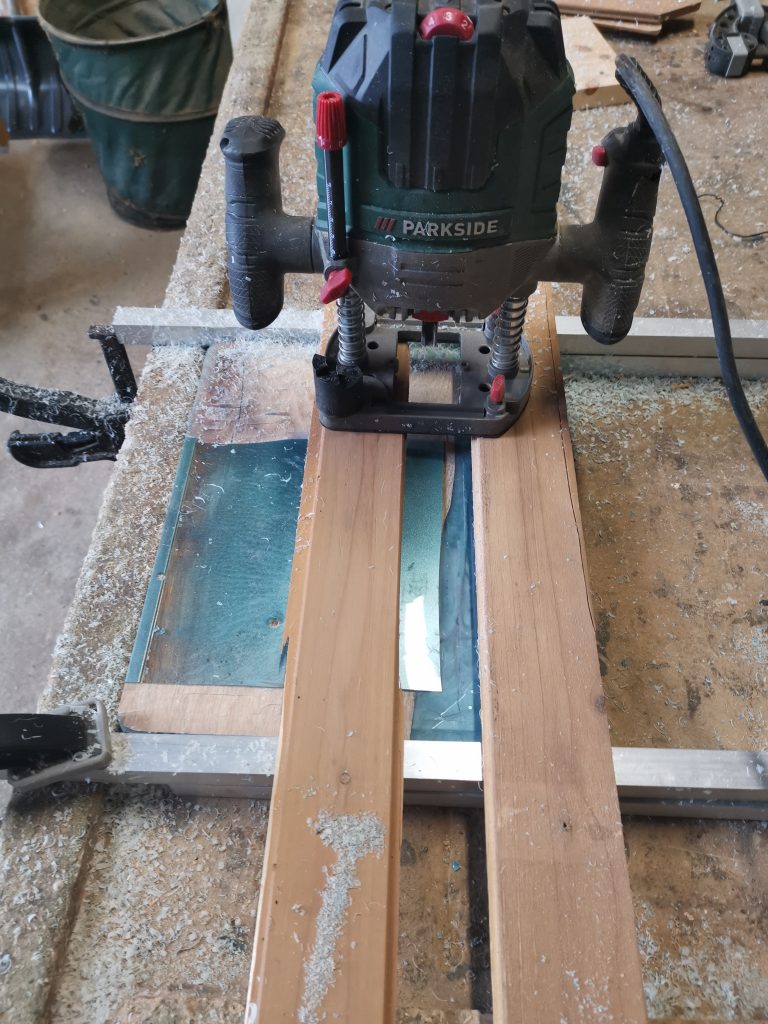
After full curing, I sanded away the sharp edges and excess epoxy from pouring with an angle grinder so the board got a clean rounded shape.
Then I routed off excess epoxy from the underside with a router. Not always easy when you do not have guides.
After routing and grinding (with a sanding disc), I re-sanded the back and sides of the serving boards from grit 60 to grit 380.
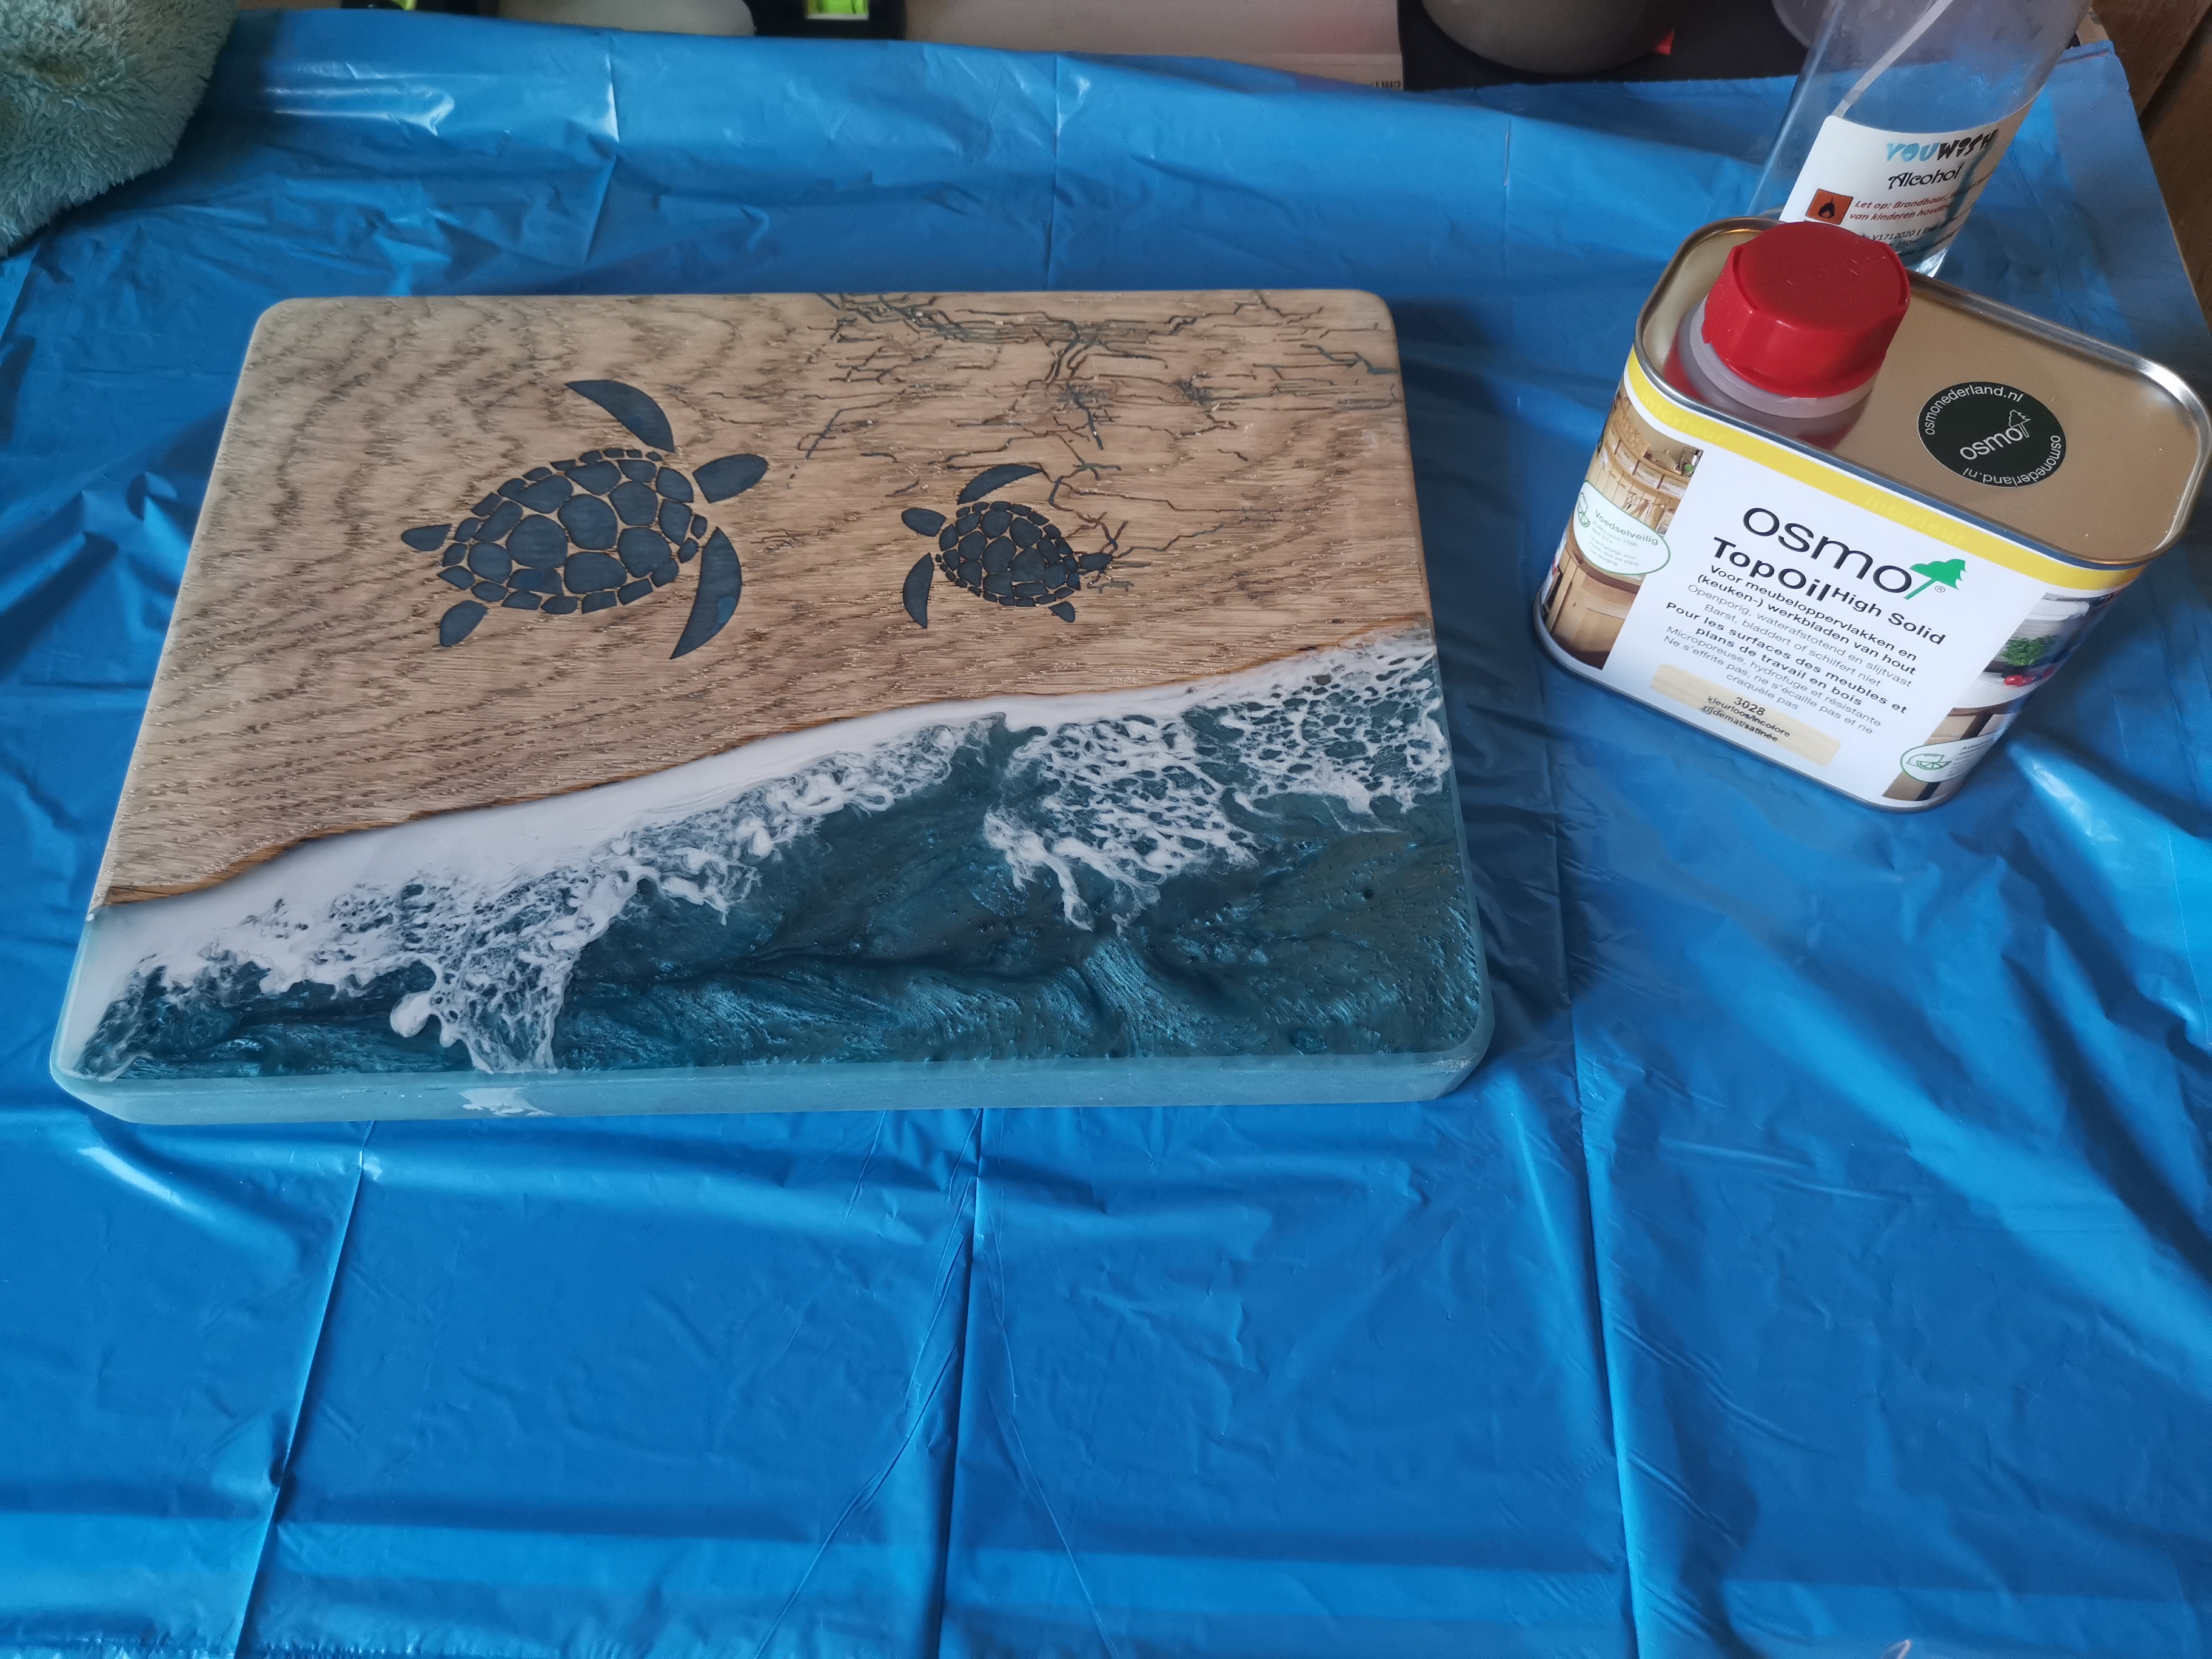
After that I removed all dust and finished everything with Osmo TopOil for a food-safe, natural finish.

What I used or what you can use as an alternative:
Tools
- Sculpfun S30 Pro Max 20W (België)
- Sculpfun S30 Pro Max 20W (Duitsland)
- Sculpfun S30 Pro 10W (België)
- Sculpfun S30 10W (Duitsland)
- Laser safety enclosure (Sculpfun setup)
- Temperature controller for stable epoxy curing
Materials
- letsresin 2:1 Deep Pour epoxy
- letsresin epoxy set + mica powder
- Let’s Resin mica poeder set
- Extended mica powder set
- DecoRom pigment paste for ocean waves
- DIPON ocean pigment paste
- OSMO TopOil food-safe worktop oil
Affiliate disclaimer: some links are affiliate links. If you buy via such a link, I may receive a small commission at no extra cost to you.