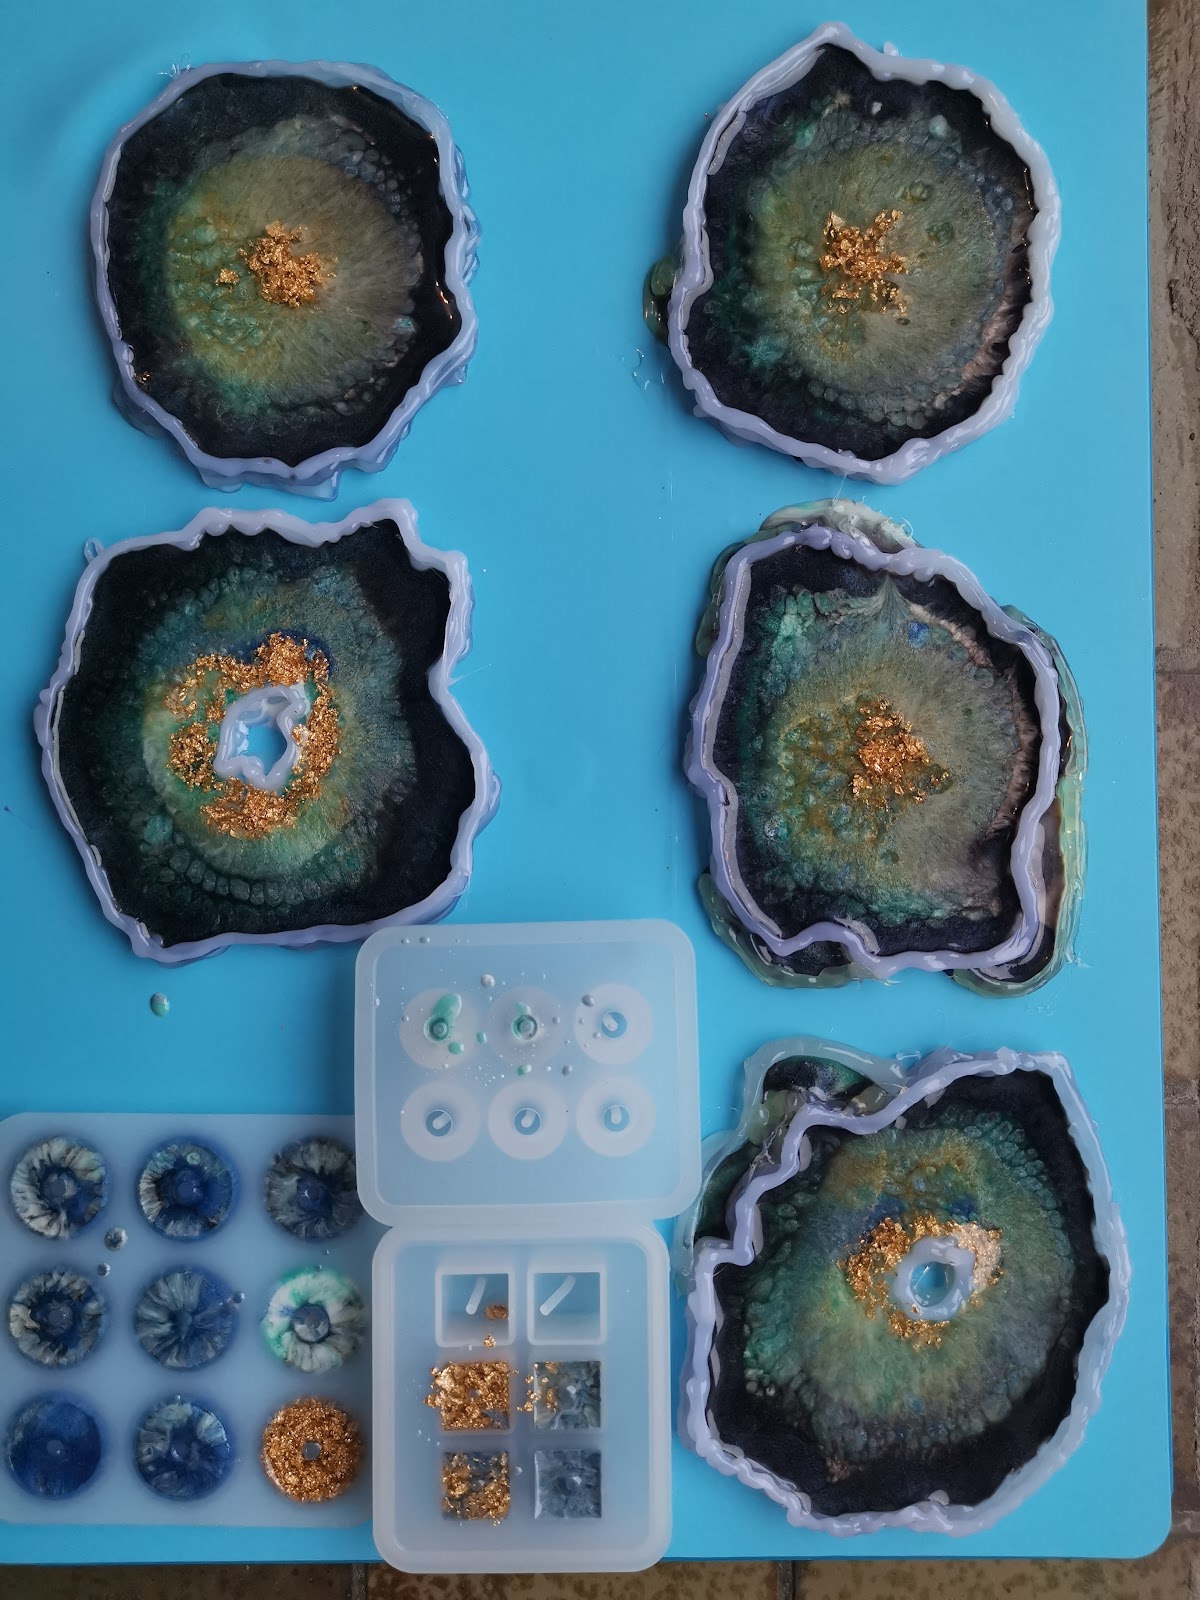
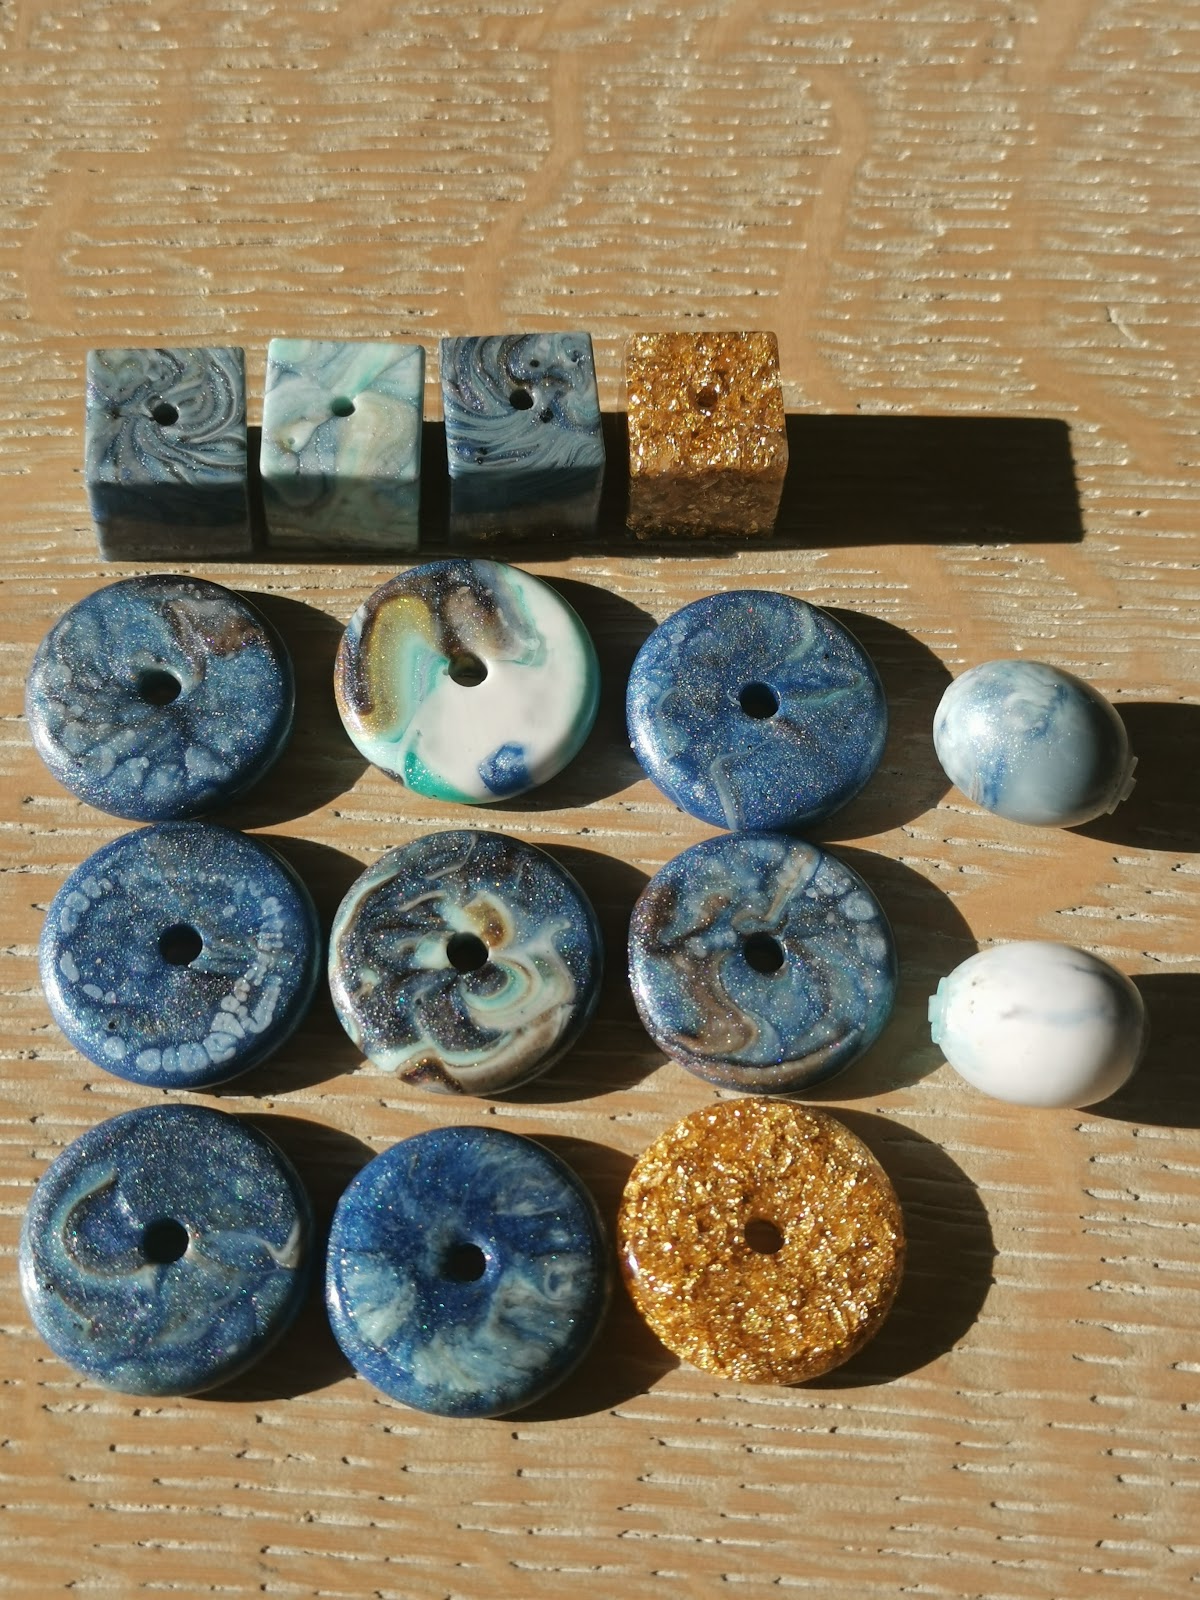
After pouring my epoxy coasters, there was always some leftover resin. Instead of throwing it away, I poured it into small silicone molds to make resin beads. The result? A small collection of six unique necklaces.
Leftover resin? Never throw it away!
Anyone who works with resin knows the feeling: you’ve measured everything carefully, the pour goes perfectly, but at the end there’s still a little resin left in the mixing cup. Such a waste. Fortunately there’s a great solution: making resin beads. For this post I poured the leftovers from my epoxy coaster session into small silicone molds and made a handful of donut discs, cubes and round beads. These were then turned into six different necklaces, each with their own style and finish.
Step 1: Pouring the resin beads
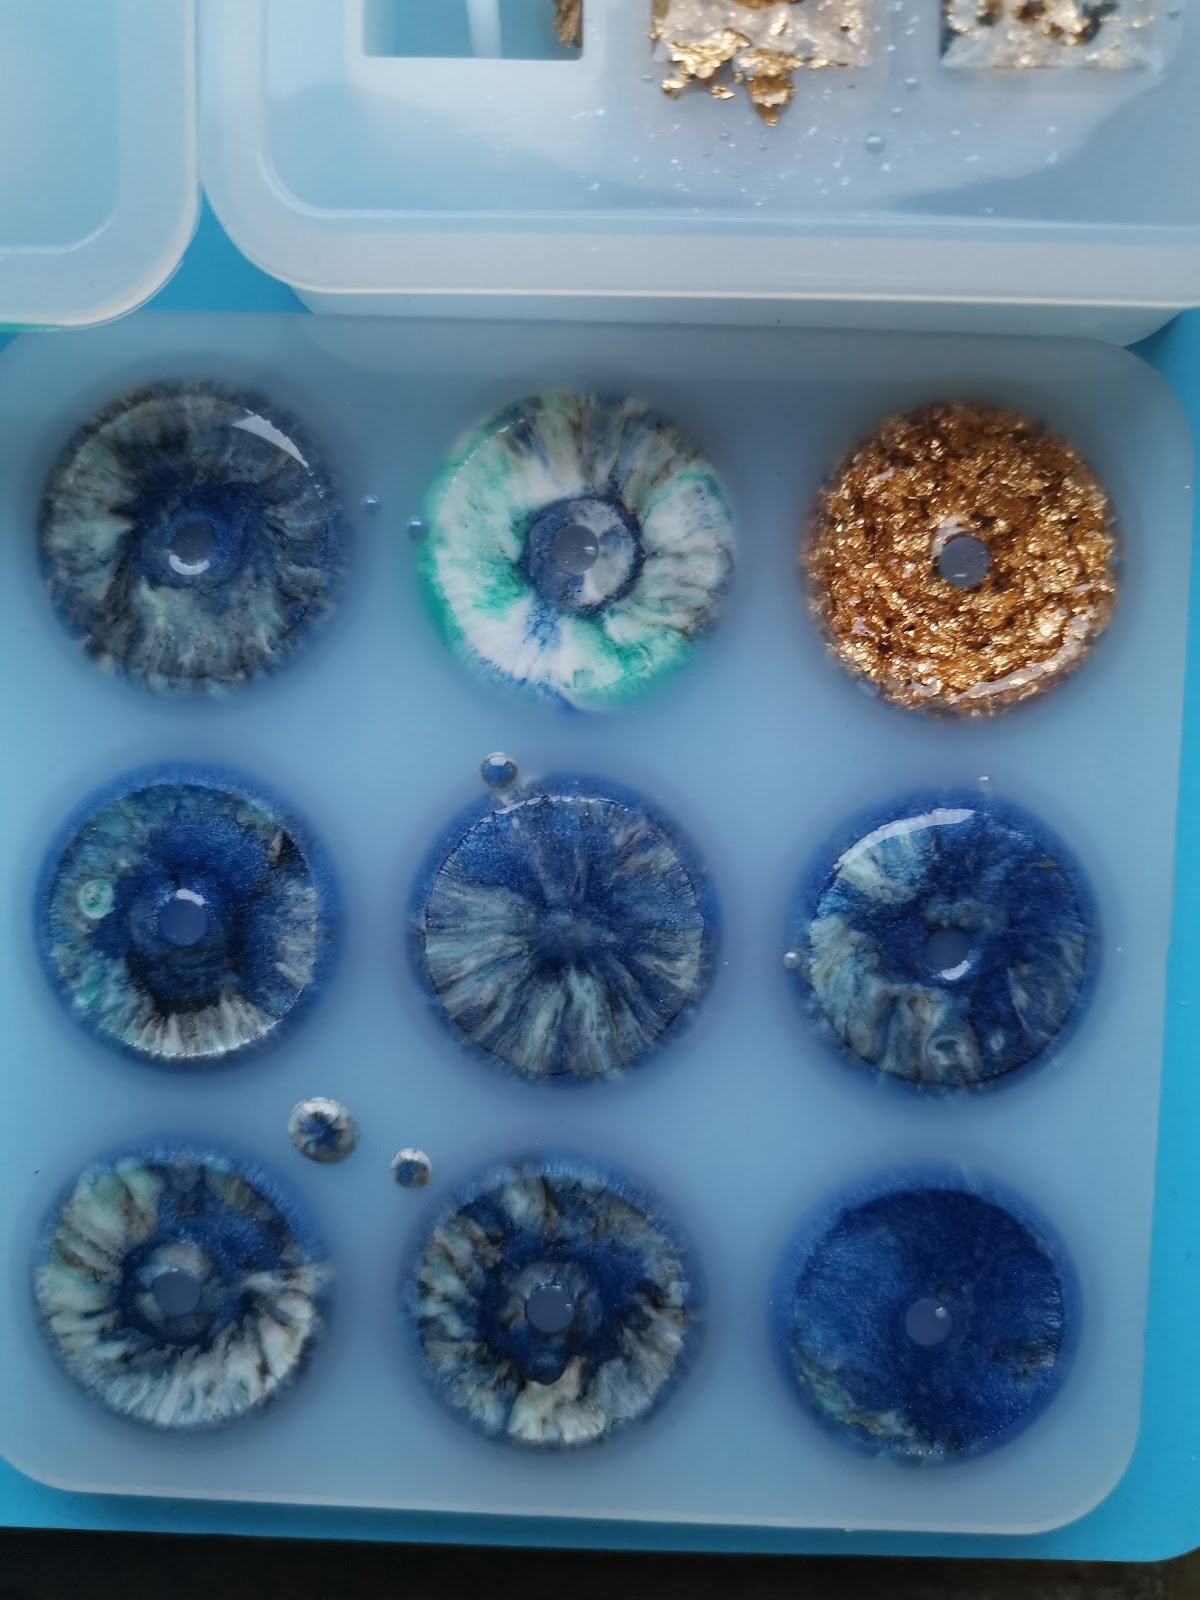
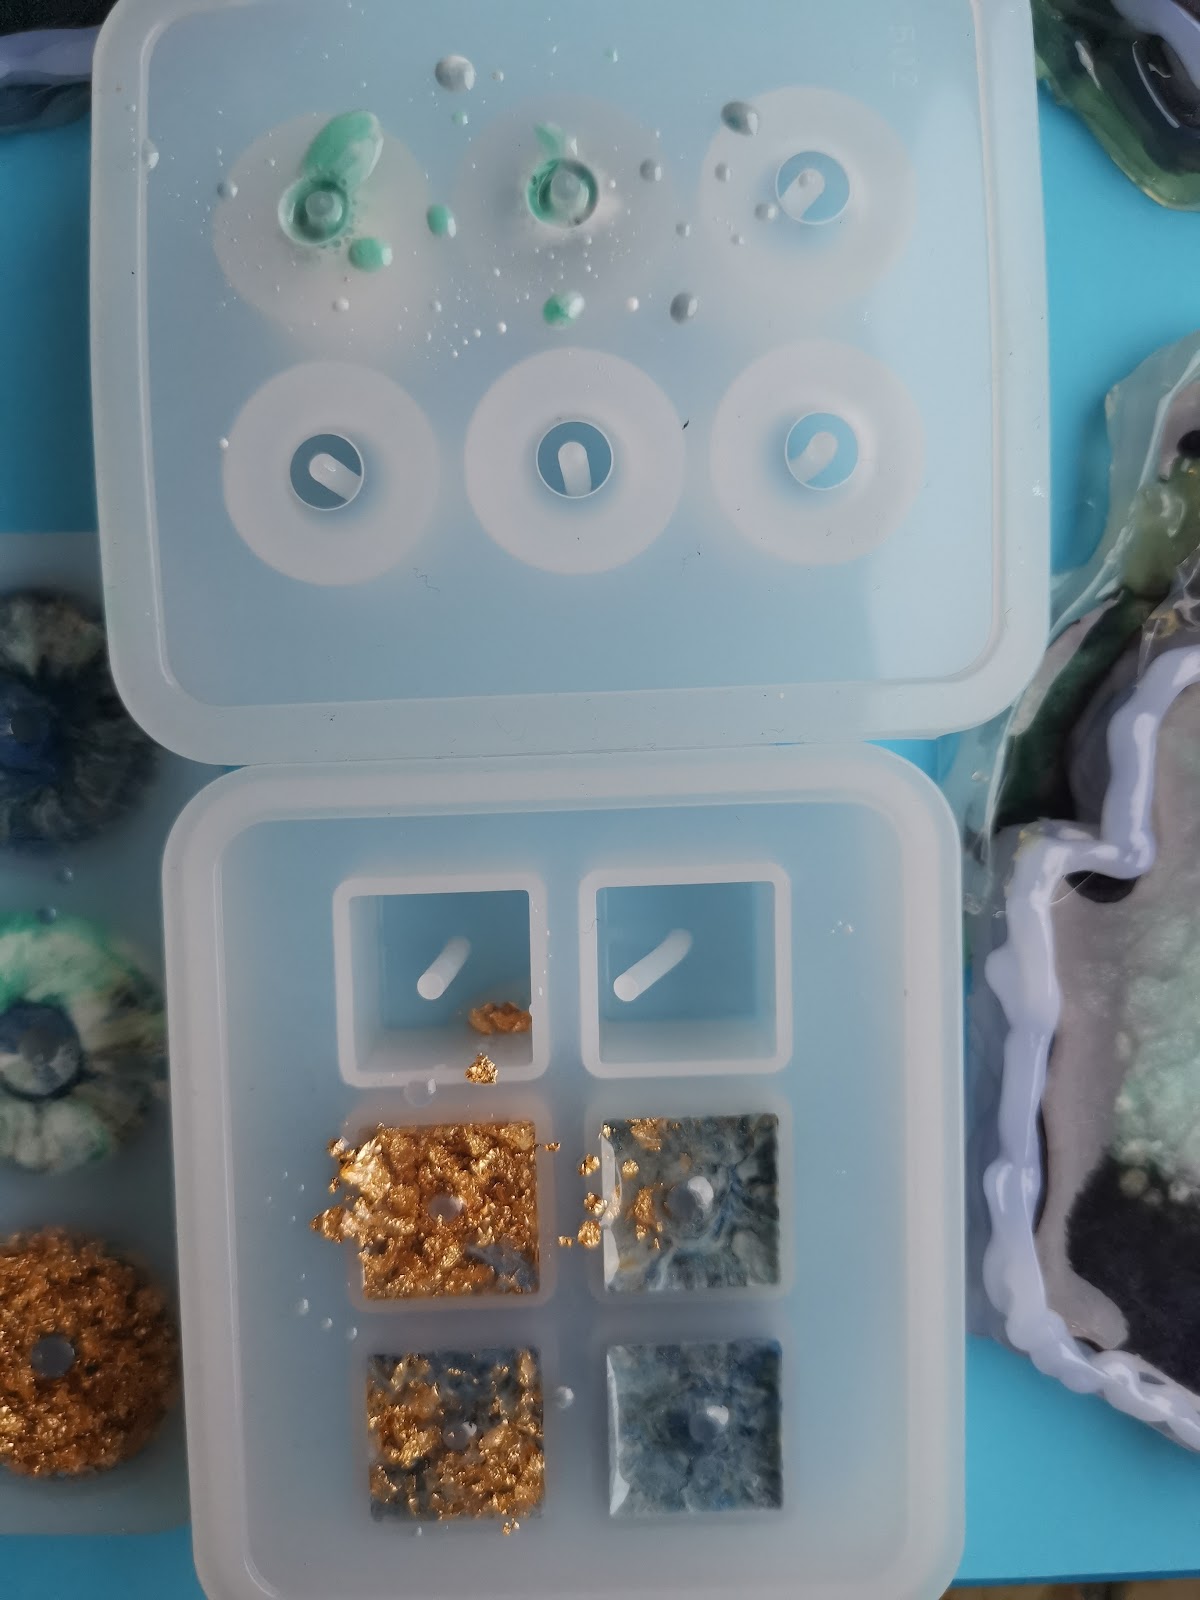
While the coasters were still curing, I immediately poured the leftover resin into the molds — no need to mix anything extra and nothing goes to waste. I used three types of molds: a round donut mold (for disc beads with a hole), a small ball mold and a square mold for cubes. The color pigments in the resin are the same ones I used for the coasters: blue, petrol, white and a touch of gold foil.
💡 Tip: Petri dish patterns in small molds work even better than in large ones. The colors “explode” beautifully in a small format.
Step 2: Demolding and selecting
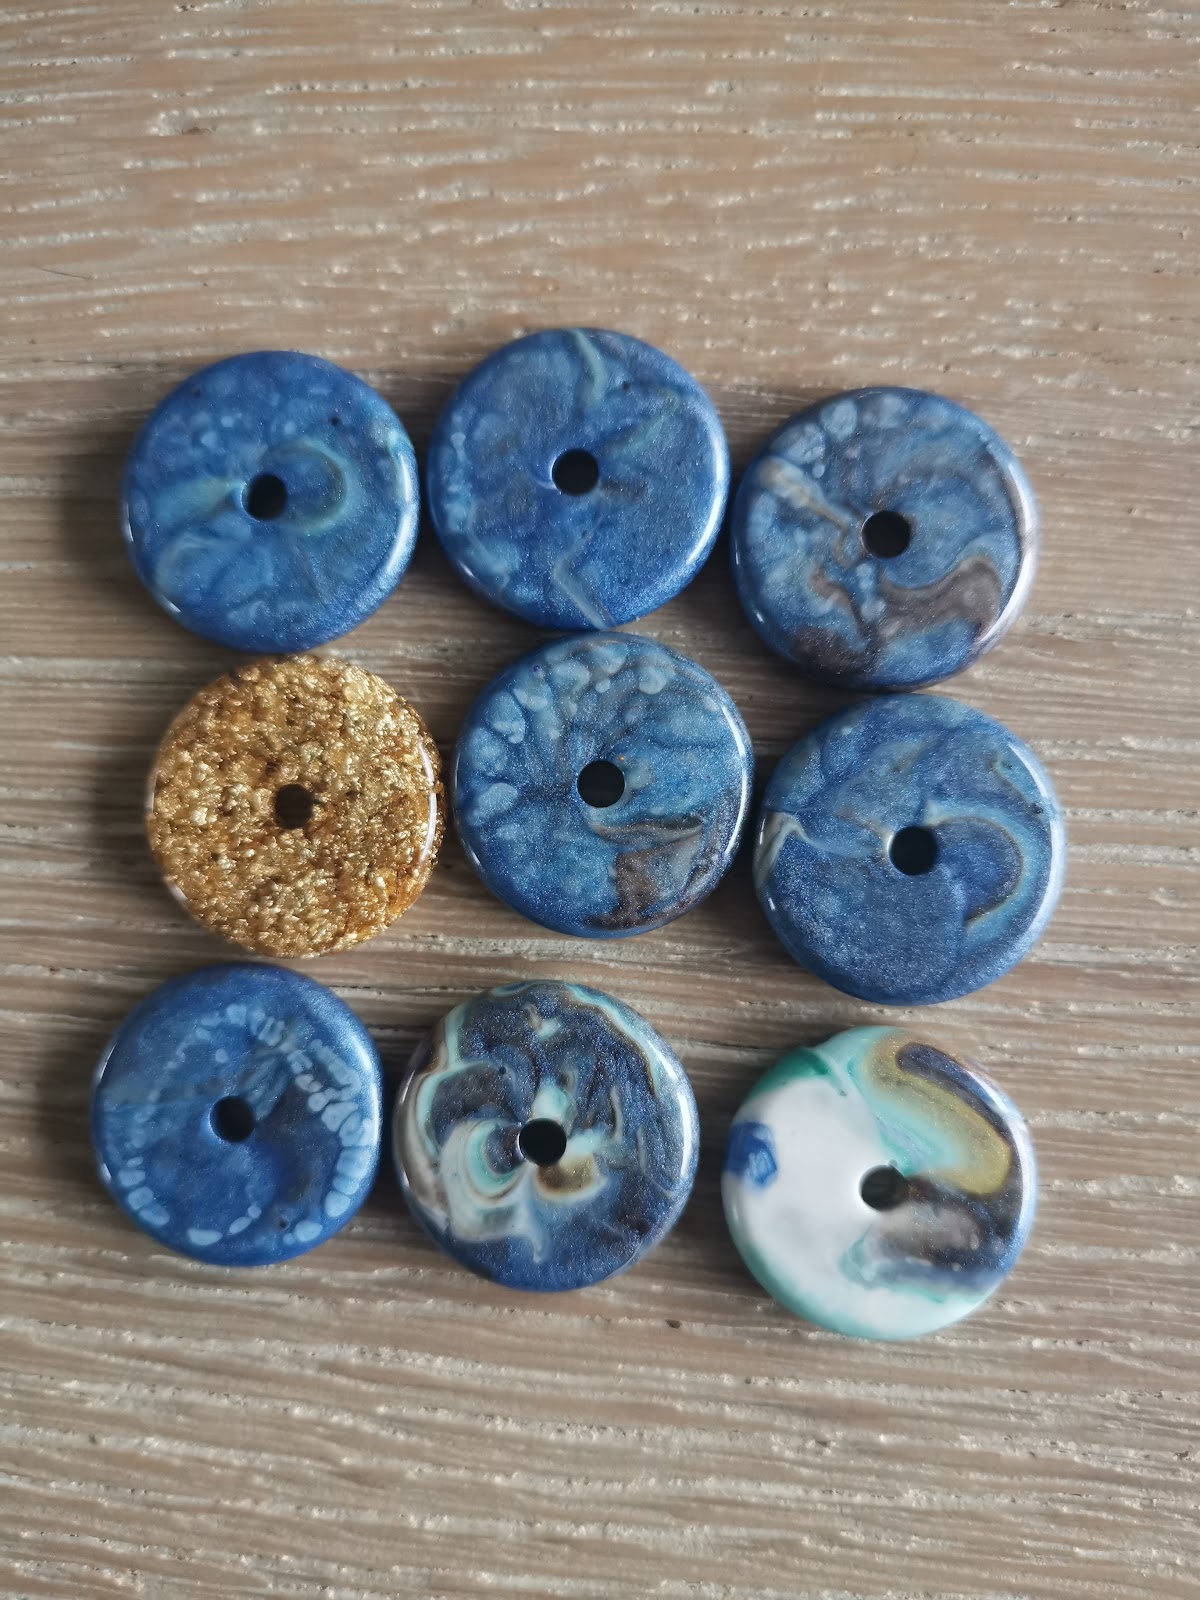
After 24 hours of curing the beads come out of the silicone mold easily. Because each piece of resin mixed slightly differently with the dye, no two beads are identical. Lay them side by side and pick the most beautiful ones for your jewelry.

Step 3: Making necklaces — six ways
One bead, endless possibilities. Below I show the six finishes I tried, from the simplest to the most elaborate.
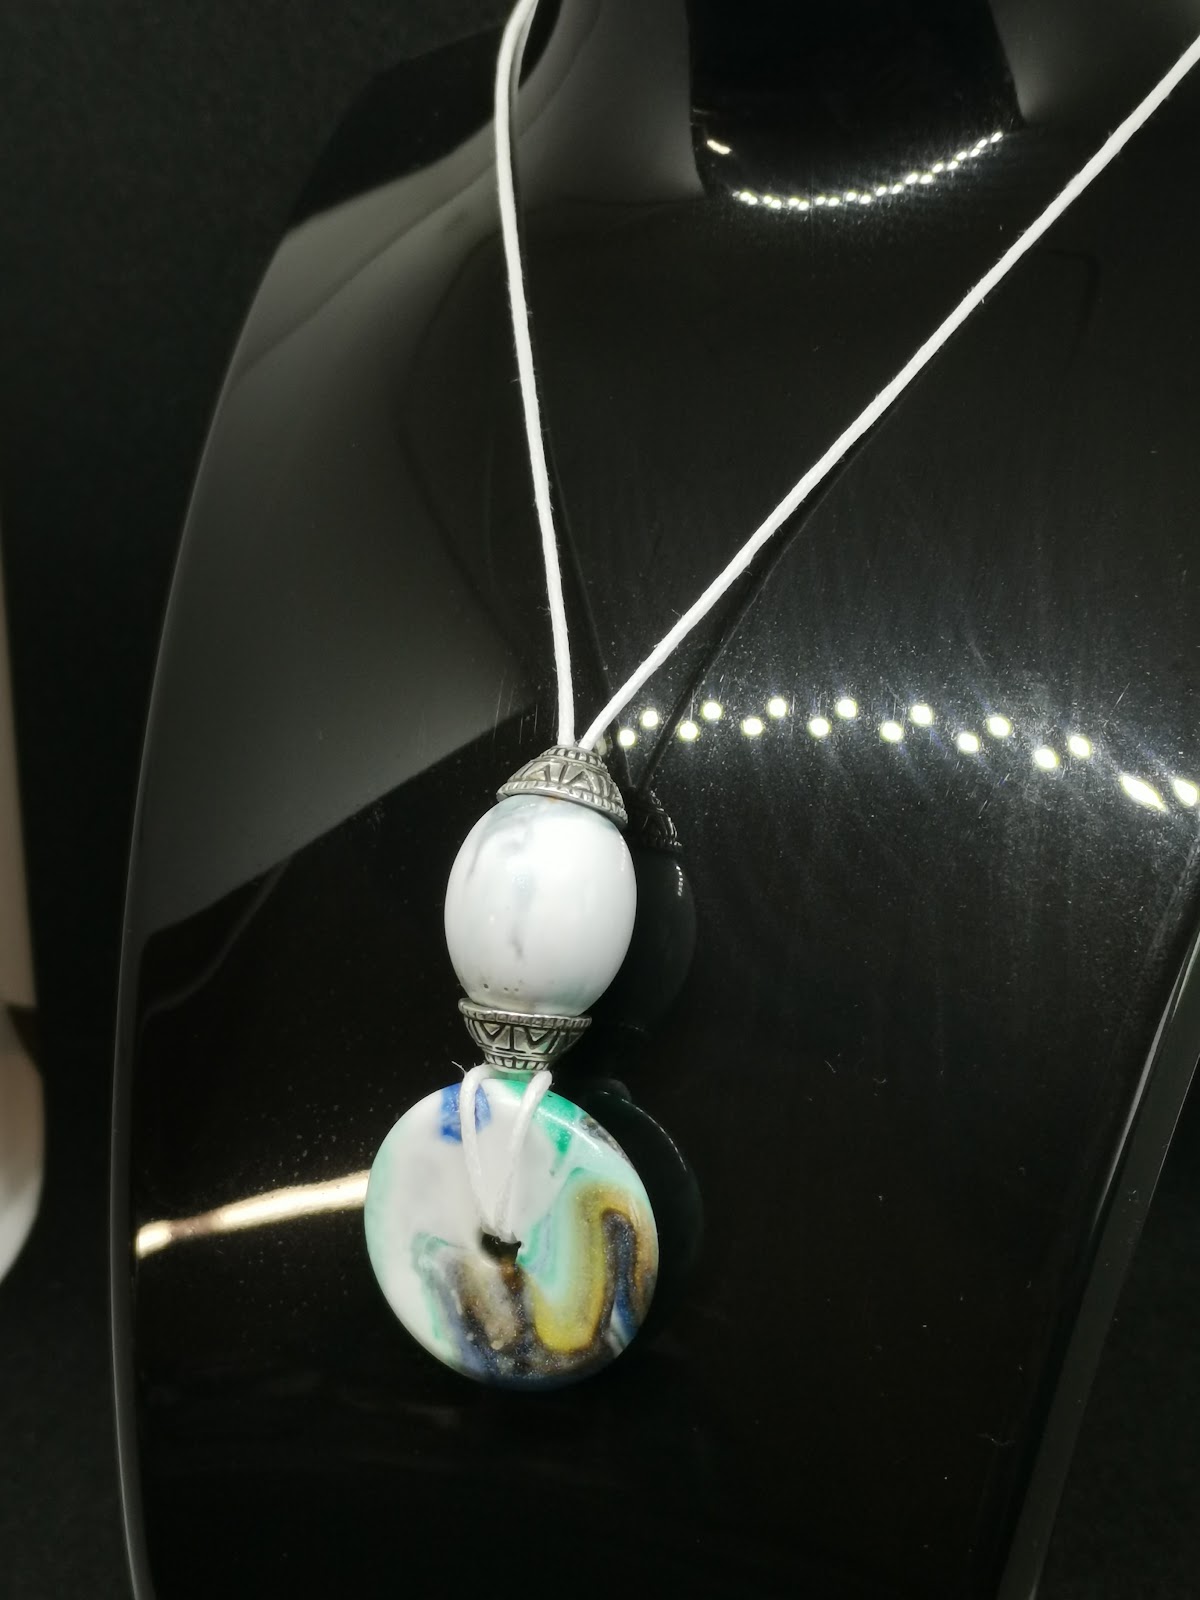
Necklace 1: cord + oval bead + donut disc
A white waxed cotton cord, a white oval resin bead as a spacer and a colorful donut disc as the centerpiece. Simple, but very effective.
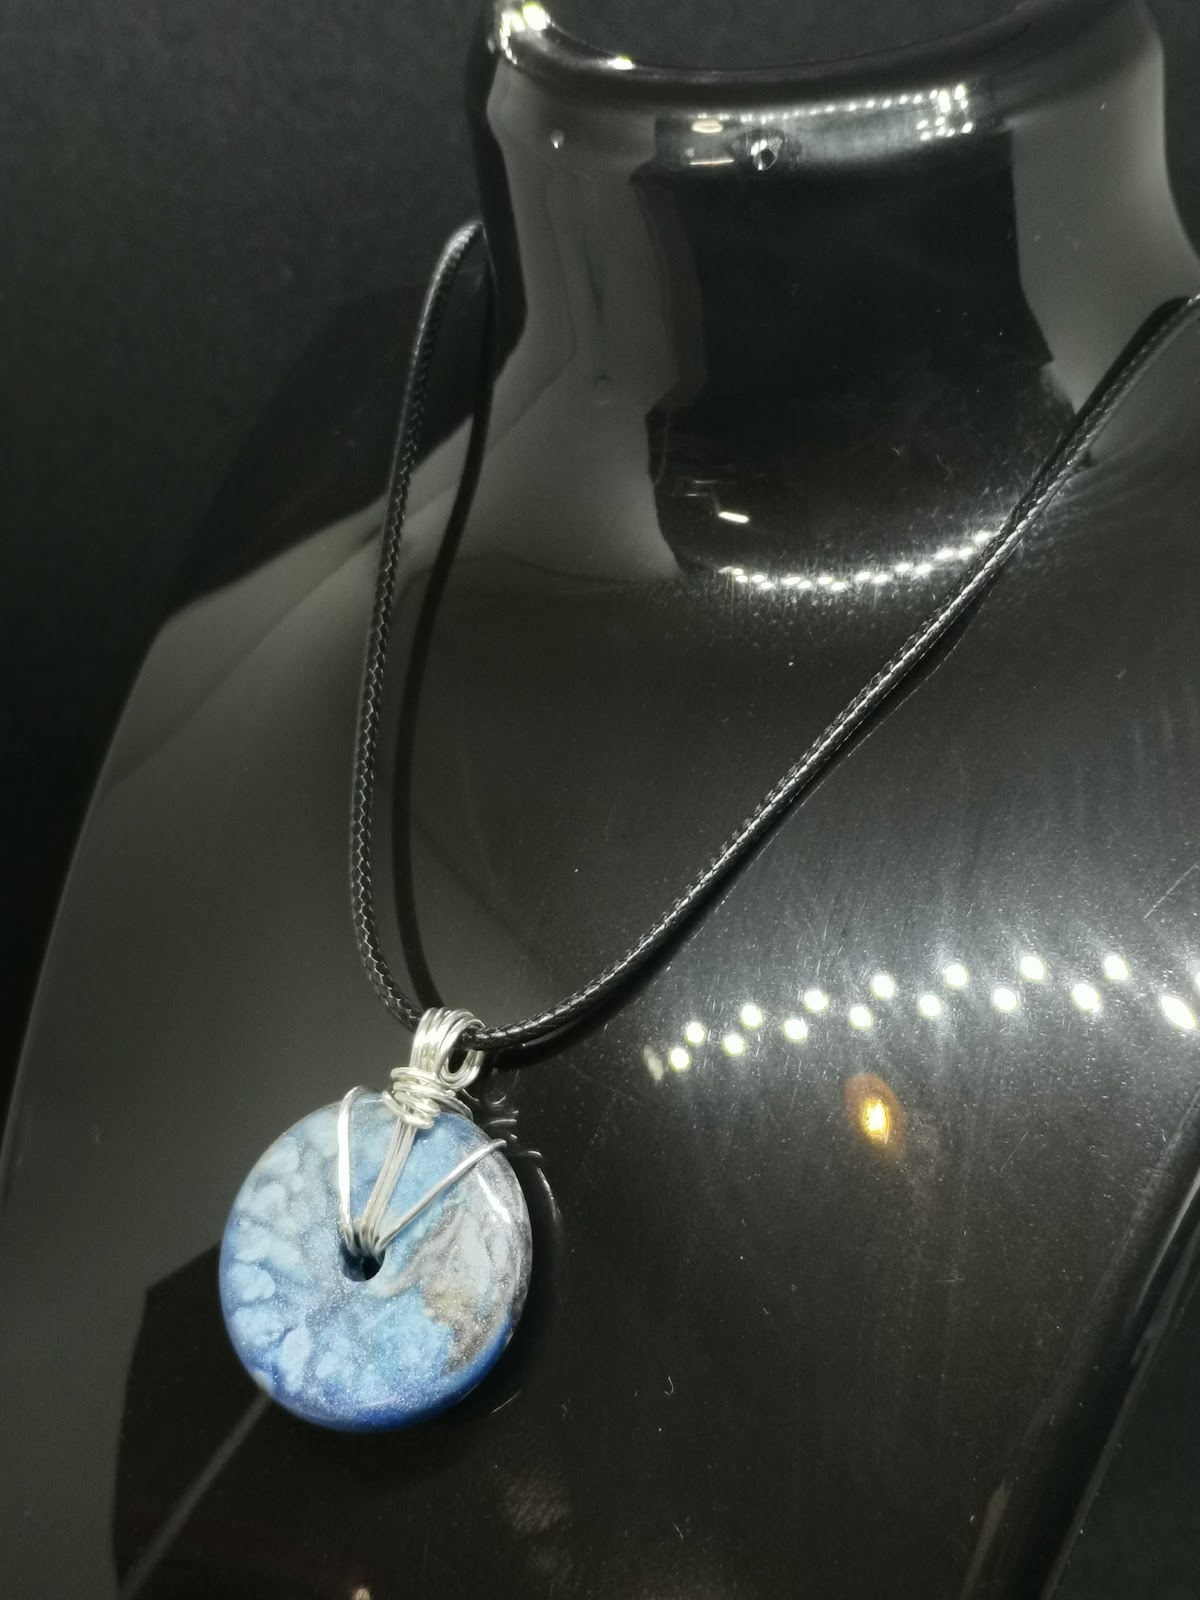
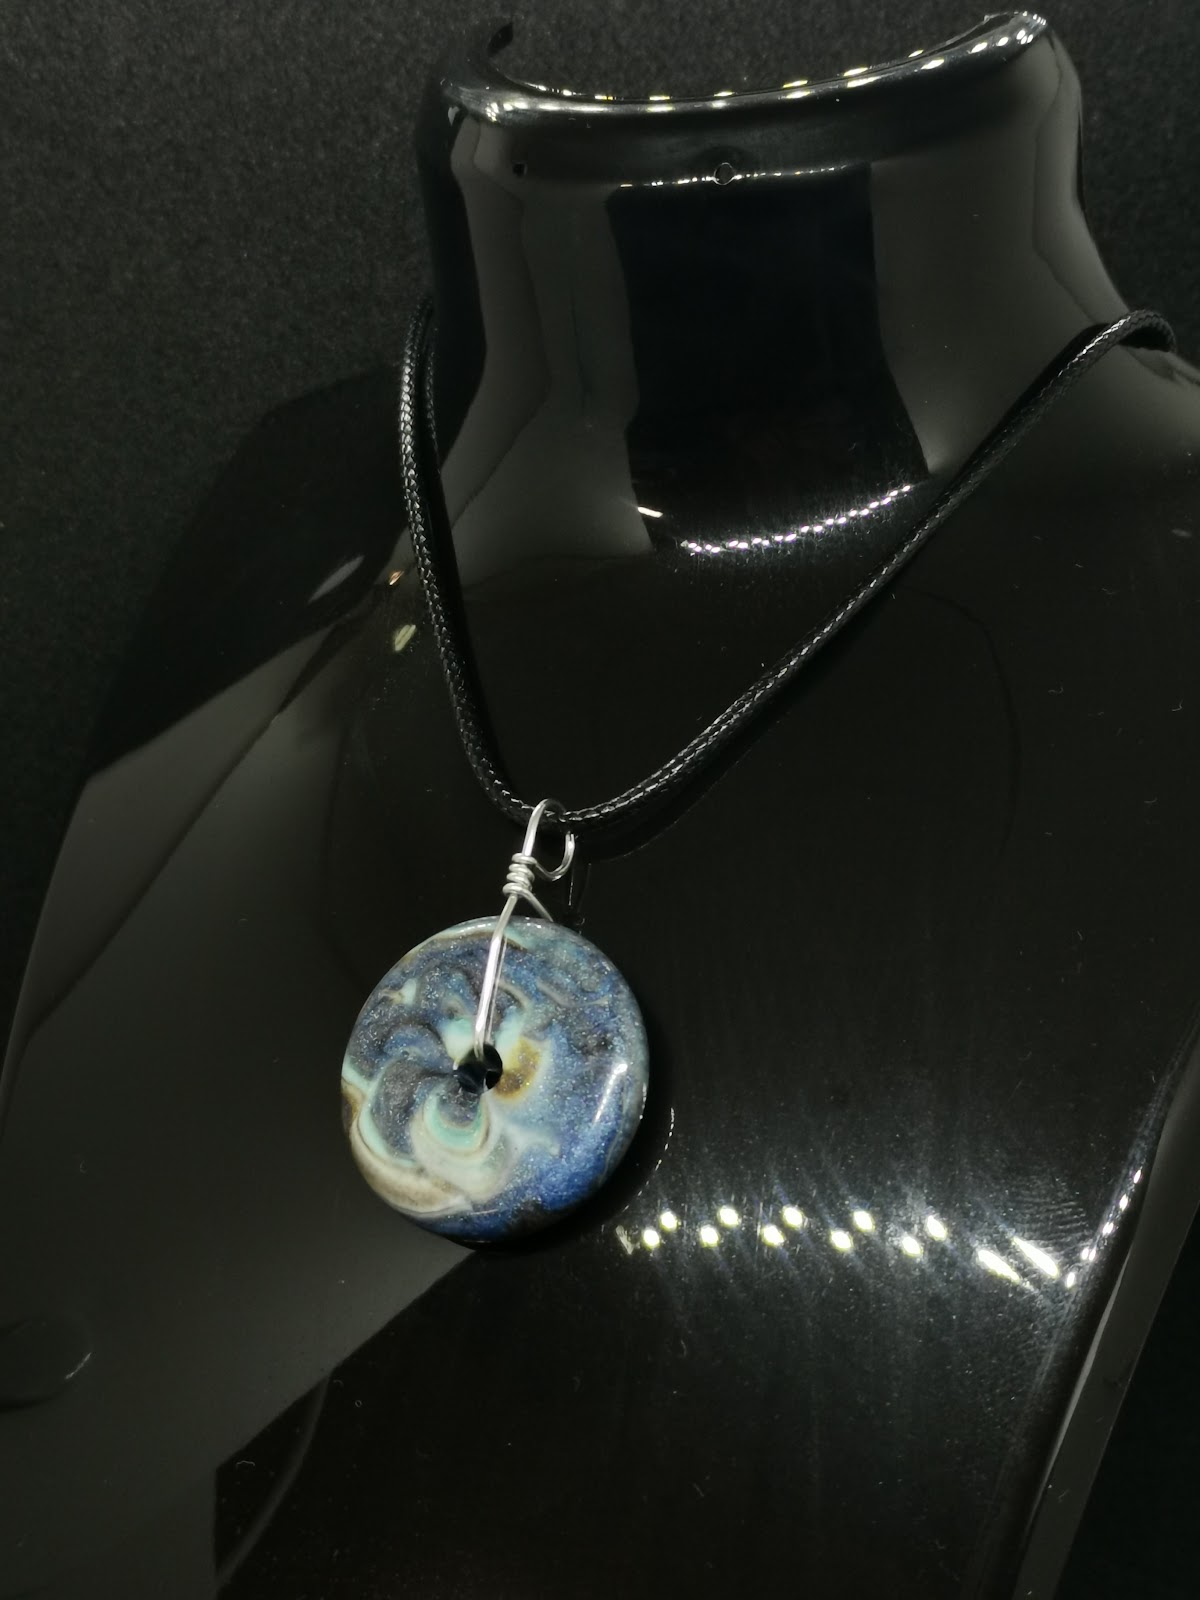
Necklace 2: wire-wrapped donut on black cord
Wire-wrapping is a classic technique where you wrap a bead with jewelry or copper wire and simultaneously create the attachment. Wrap the wire a few times around the donut disc and twist the ends into a loop for the cord. It gives a bohemian, handmade feel.
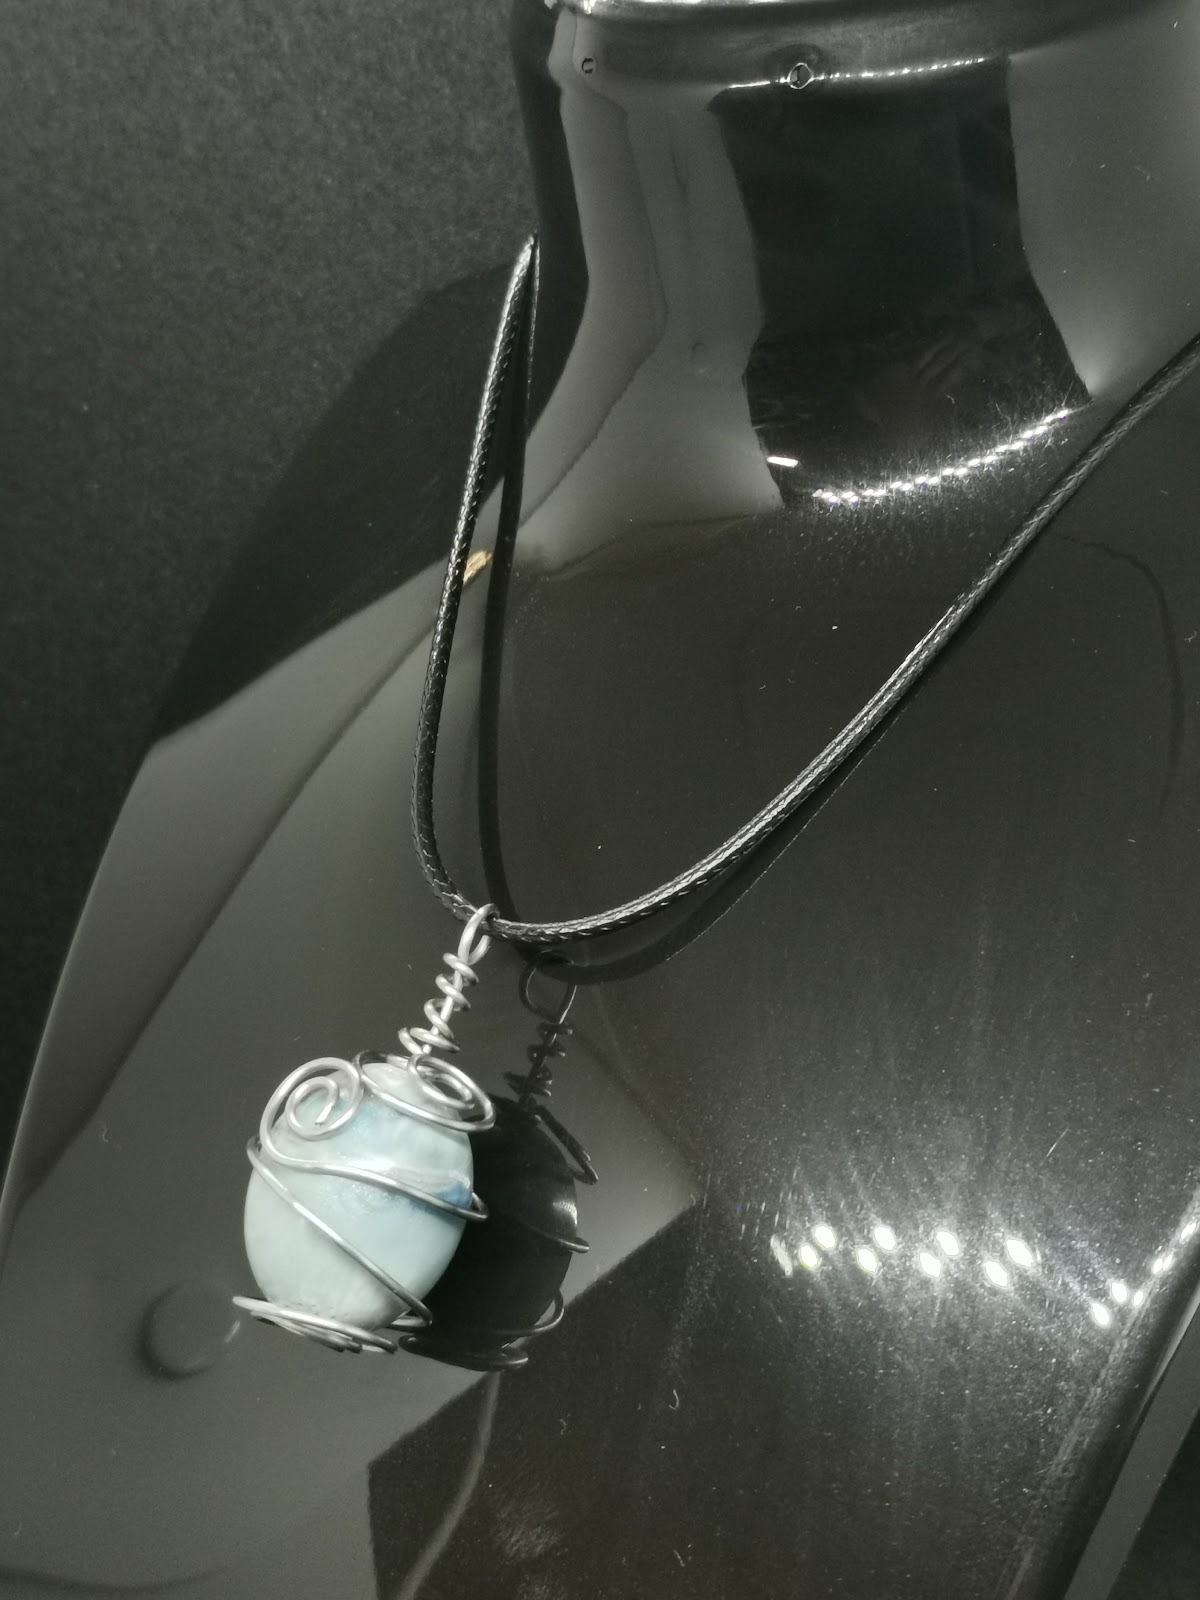
Necklace 3: round bead in wire cage
The round resin bead is perfect for a wire cage: a construction of multiple wires folded around the sphere that come together at a point at the top. The light blue shade of this bead contrasts beautifully with the matte black waxed cord.
Necklace 4: pin bail through the hole
The simplest way: push a piece of wire or a bent paperclip through the hole of the donut, bend the top into a loop and thread the cord through that loop. Done in less than two minutes, yet elegant.
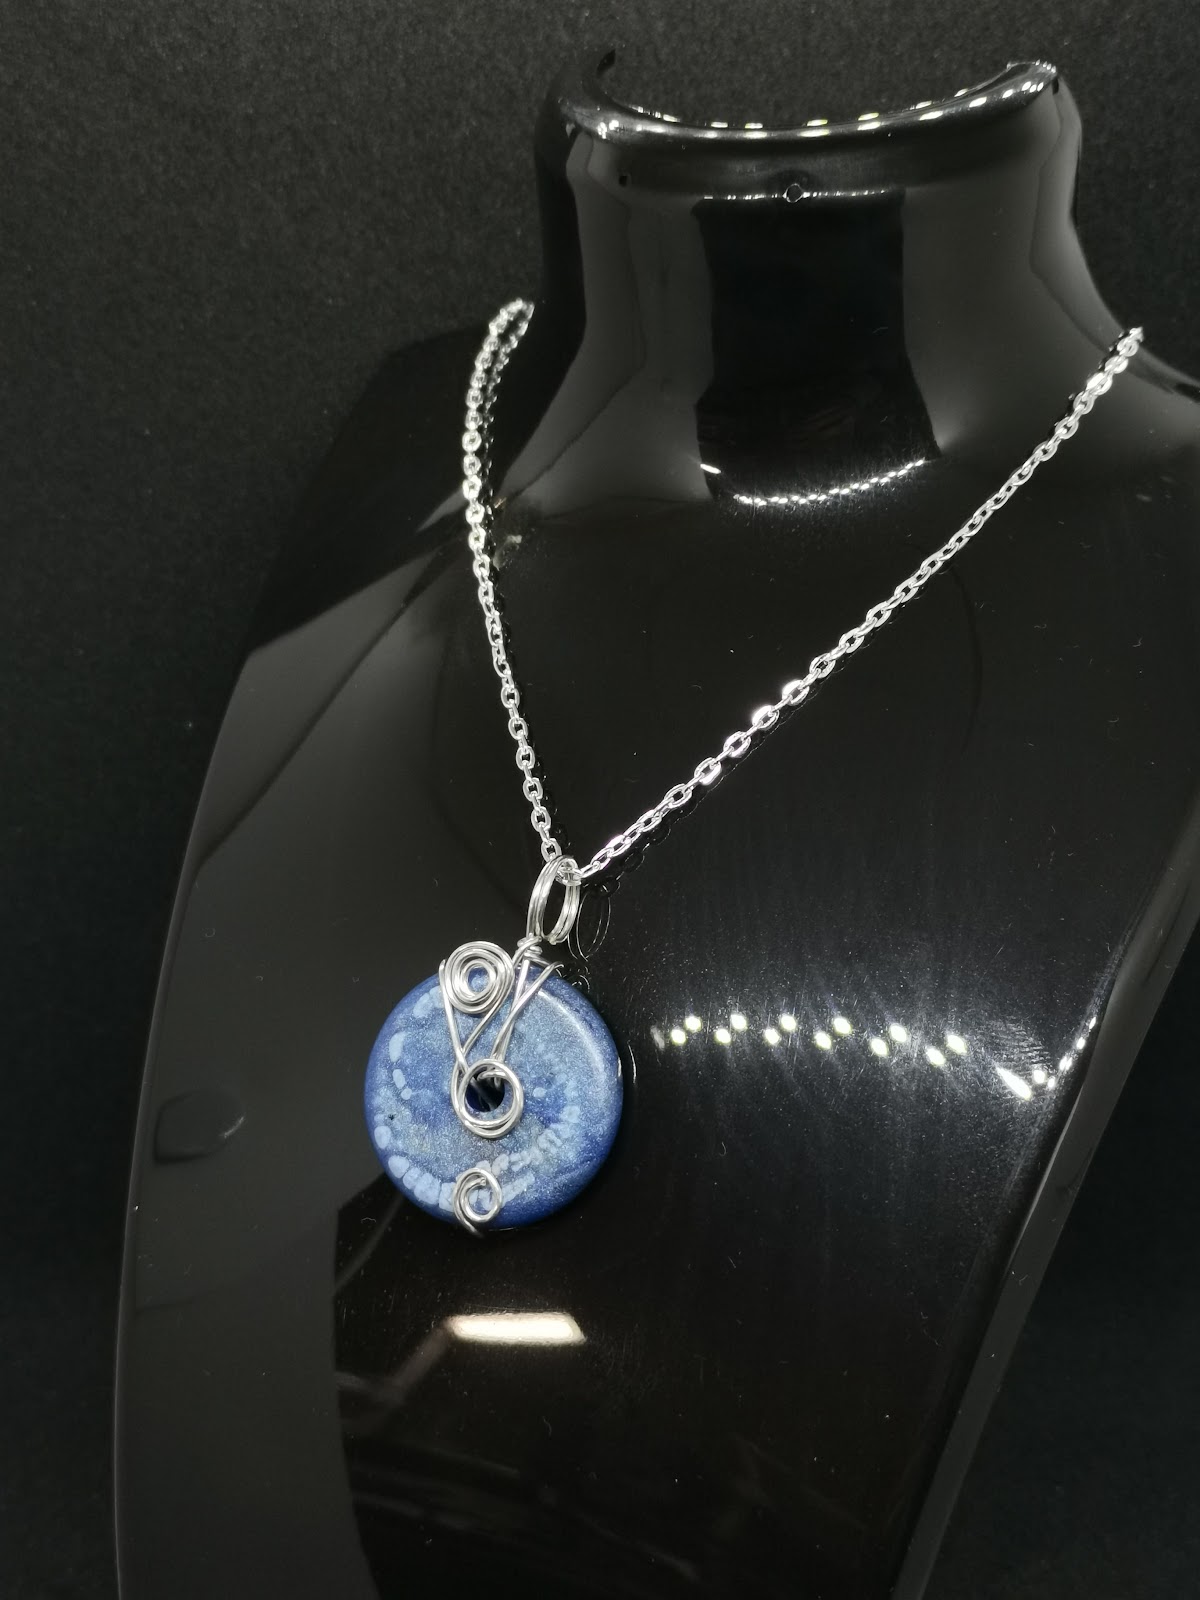
Necklace 5: silver chain with decorative wire spirals
For a more finished look: wrap the wire not only around the bead but also create small spiral decorative elements. The silver chain gives this a more elegant appearance than cord.
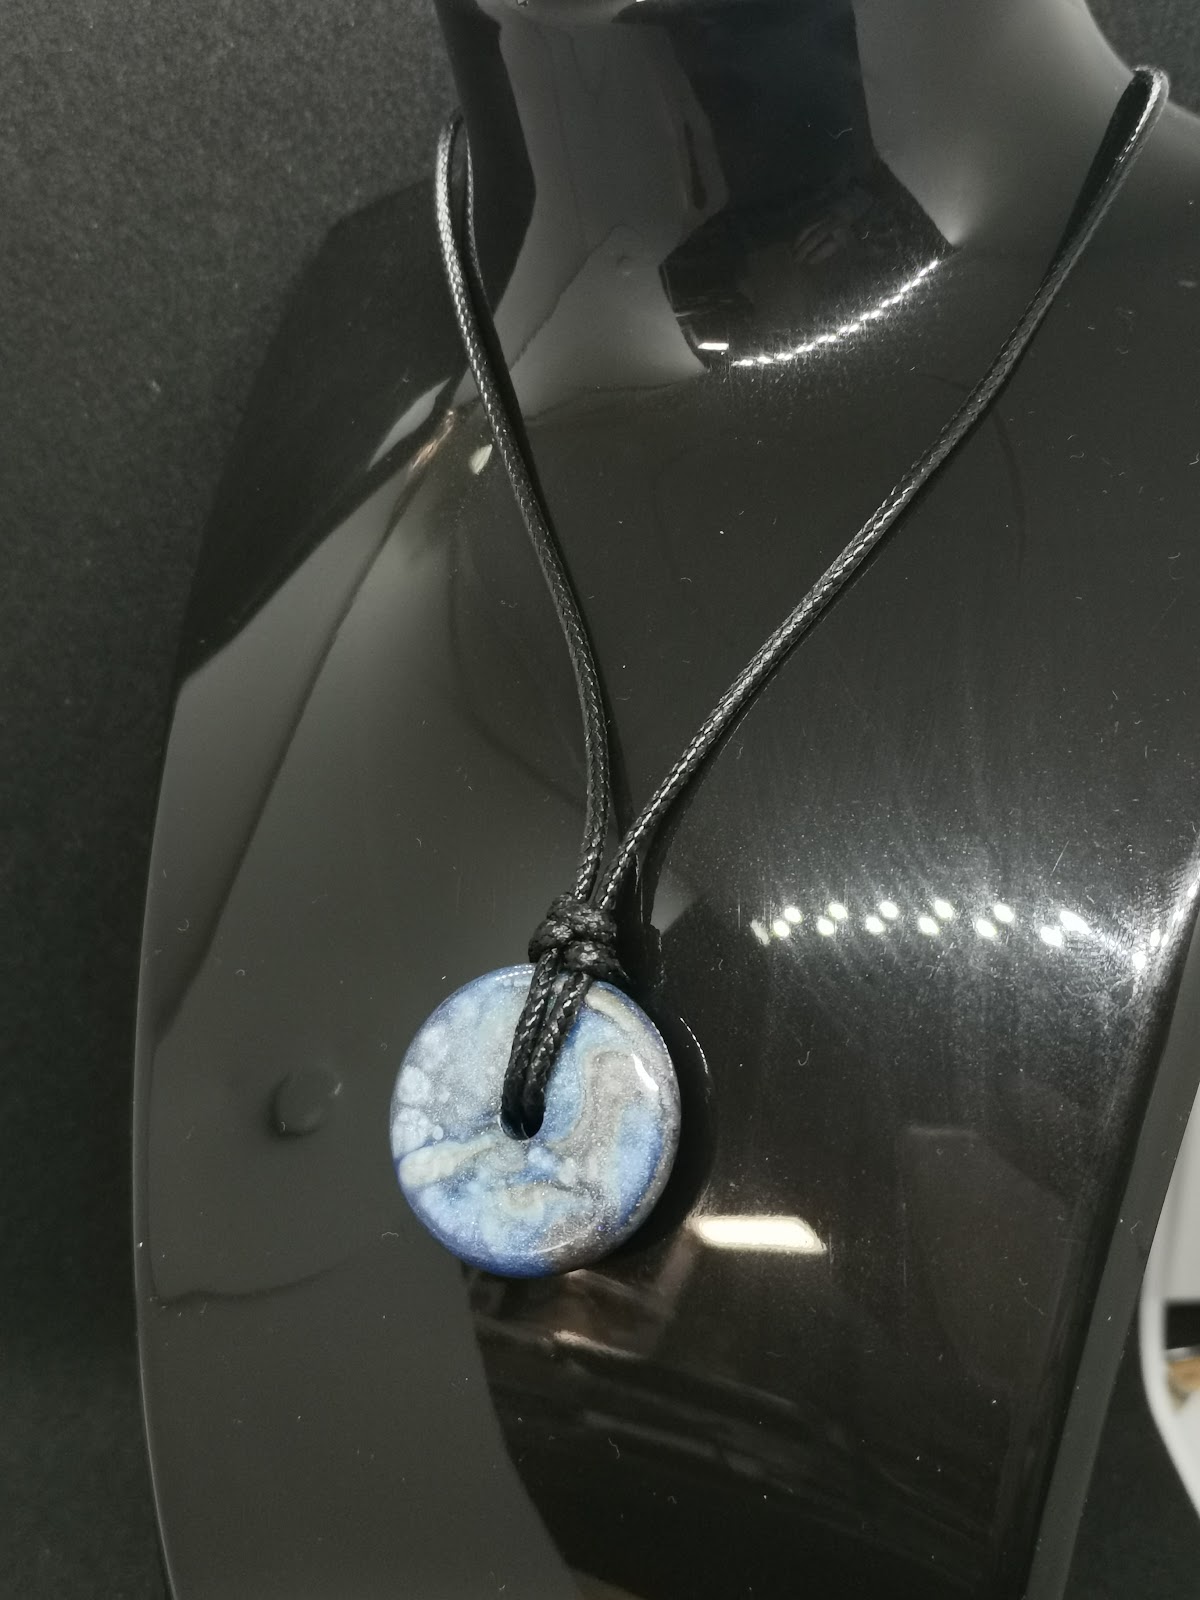
Necklace 6: cord threaded directly through the hole
The most minimalist version: thread the waxed cord directly through the hole of the donut, knot it to the desired length with two simple knots and the necklace is ready. No extra materials needed.
The full collection
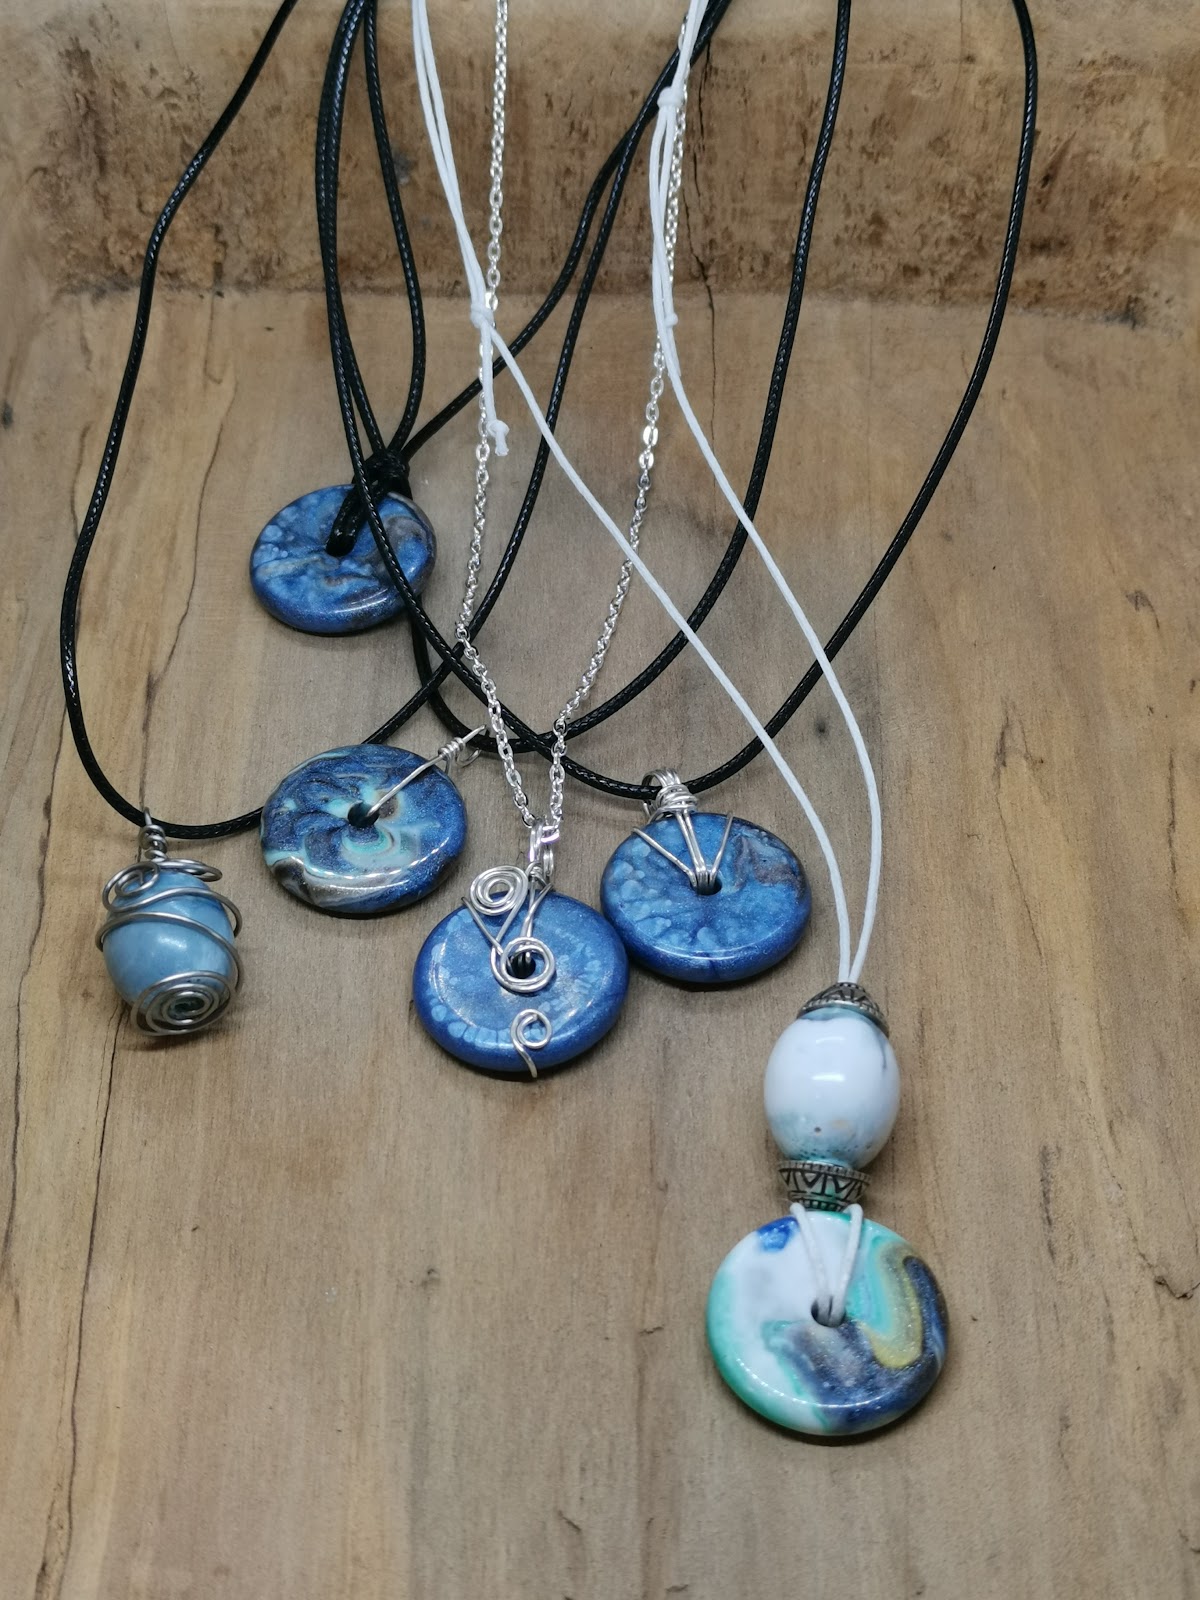
Six necklaces, all from the same batch of leftover resin. Each necklace has its own character, but they fit perfectly together thanks to the same color palette. Just goes to show: there’s always a piece of jewelry hiding in your mixing cup.
Materials I used
| Material | DE | BE |
|---|---|---|
| Epoxy resin (1:1) | letsresin epoxy resin set + pumps and accessories | letsresin epoxy resin set + pumps and accessories |
| Waxed cord | shop link (DE) | shop link (BE) |
| Jewelry wire | shop link (DE) | shop link (BE) |
| Silver chain | shop link (DE) | shop link (BE) |
📖 Also read: Epoxy coasters for beginners — the post where these resin beads were born.